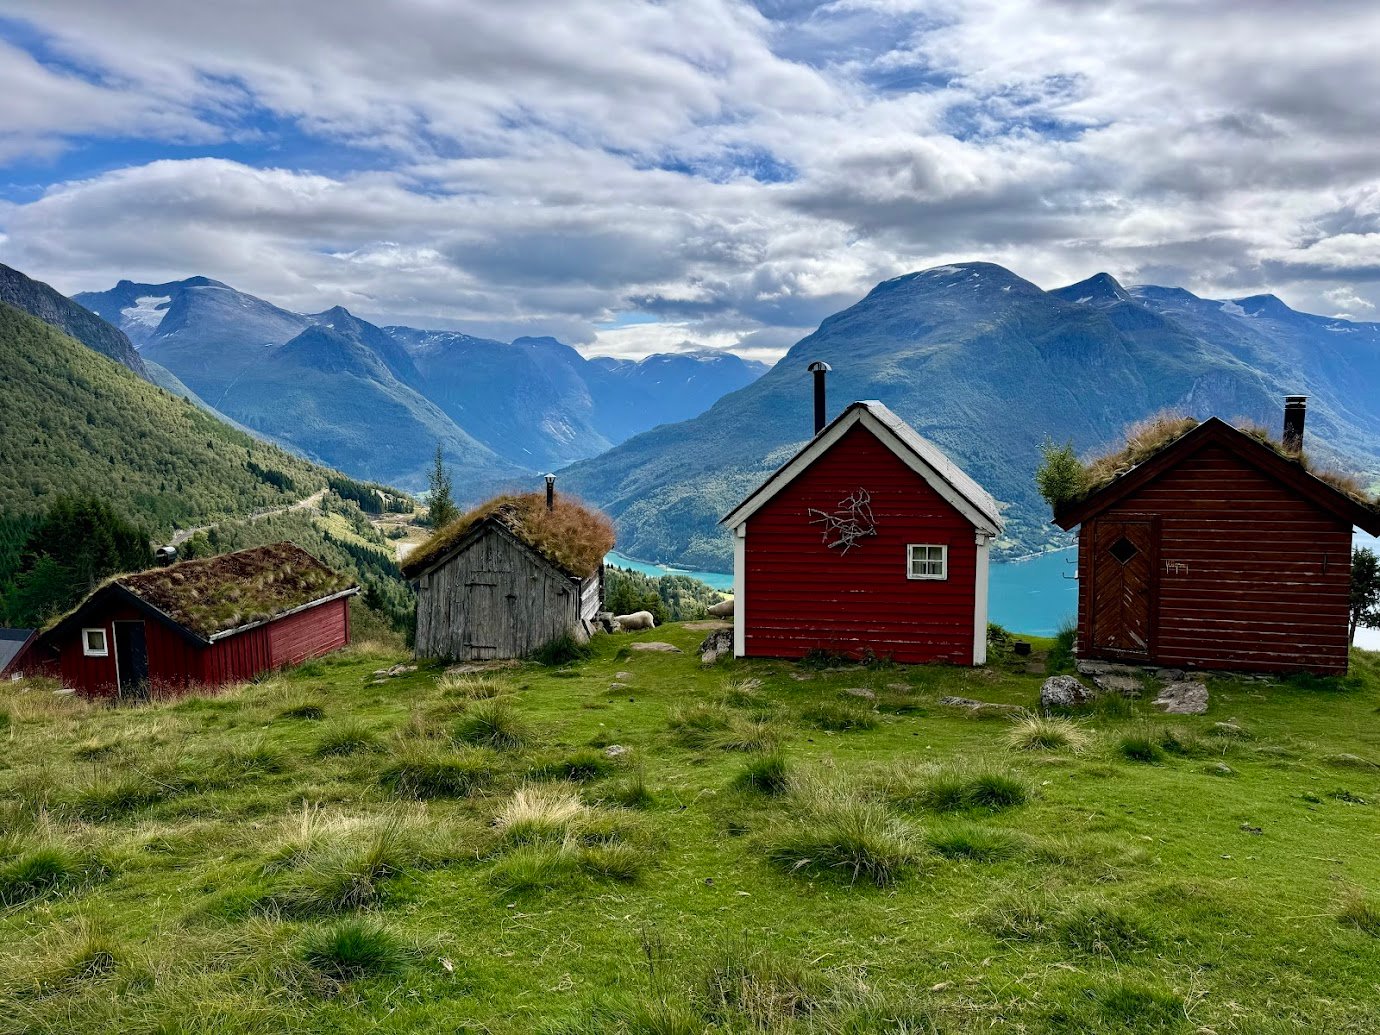
Driving and exploring in Norway feels as if you have jumped inside a postcard. Couple the scenery with an incredible road and tunnel system and you have the makings of one epic road trip. We spent two weeks in early August exploring the fjord region of southern Norway. We’re sharing our itinerary to help you have the adventure of a lifetime!
While lots of hiking is included, what you won’t find are the most Instagram-popular hikes like Preikestolen (Pulpit Rock), Kjeragbolten, or Trolltunga (The Troll’s Tongue). We purposely tried to go off the beaten path where possible, but spoiler alert, we think some of the more well-known areas like Flåm are absolutely worth the hype.
Norway Road Trip Map
Below is a map of our trip including points of interest, activities, and restaurants. It also includes an overview of the road trip route. Toggle the sidebar for details.
Key Information About Traveling in Norway
Car Rental
Renting a car in Norway was a very easy and seamless experience. We found the best selection and pricing via Auto Europe. Our ultimate car provider was Hertz. Nearly all the cars were automatic transmission and our car was nearly brand new; the nicest rental of our time in Europe.
Driving
Driving in Norway was a true delight. The roads and tunnels are incredibly well-maintained and safe. The top speed limit on all the roads we drove on was 80kph (~50mph) and people generally do drive the speed limit thanks to an abundance of speed cameras and very steep fines.
There are tolls along the major roads surrounding Bergen and Oslo, but these are all billed automatically via license plate, so you’ll get a bill from your rental company after your trip with the total.
Ferries are ubiquitous in Norway and you can think of them as just an extension of the roads. If your route includes a ferry you just show up and get in line. No reservations are needed ahead of time and we generally found that ferries ran every 15-30 minutes. Once again, the ferry fee is billed automatically via license plate.
Parking
We mention this because it was confusing to us at first, but most garages or parking lots that are paid also have a camera upon entry and you only pay when you leave. So make sure you know your rental car’s license plate. At the end of your parking session you enter the license plate number into the kiosk and the total fee is automatically calculated based off when you entered. Amazing!
Day 1 | Bergen
This itinerary includes flights in and out of Bergen, Norway’s second-largest city and gateway to the fjord region. We overnighted in Bergen before continuing our journey onward, but if time allows, you could easily spend a full day or two.
Explore Historic Bryggen
Characterized by its slim, wooden houses, Bryggen is a UNESCO World Cultural Heritage Site dating back to the 14th Century. Historically the area was an important trading center and today it boasts museums, shops, and restaurants.
We visited early in the morning before hardly anyone else was there, making this a great time for photography and general exploring, although just a few shops were open. Later in the day Bryggen becomes harder to navigate with the throngs of cruise ship passengers when one is in port.

Fløibanen Funicular & Hike
The Fløibanen funicular takes you from the center of Bergen up nearly 1,000 feet in just under 10 minutes to the top of Mount Fløyen. Just a short walk from the top station is a panoramic viewpoint of the city and harbor below.
The funicular’s website has great information about what you can do once at the top. We sought out a hike and followed what they had listed as “Tour 8” (see screenshot of our AllTrails map below). All of the trails are very well-marked with signs at each junction, so following the trail description worked well.
The path took us through forests, along the banks of several lakes, past World War II battery remains, and to gorgeous viewpoints. We hardly saw anyone else the entire time. Note along the back half of the lakes it did get quite muddy, so we’d recommend wearing your hiking boots on this trail.
Our stats for the hike were:
- 5.85 miles
- 1,299 feet elevation gain
- 2 hr 40 min to complete
Once you’re done exploring the top, get in line for the next funicular down. You’ll need to scan your ticket to get through the turnstiles at the gate in order to board.
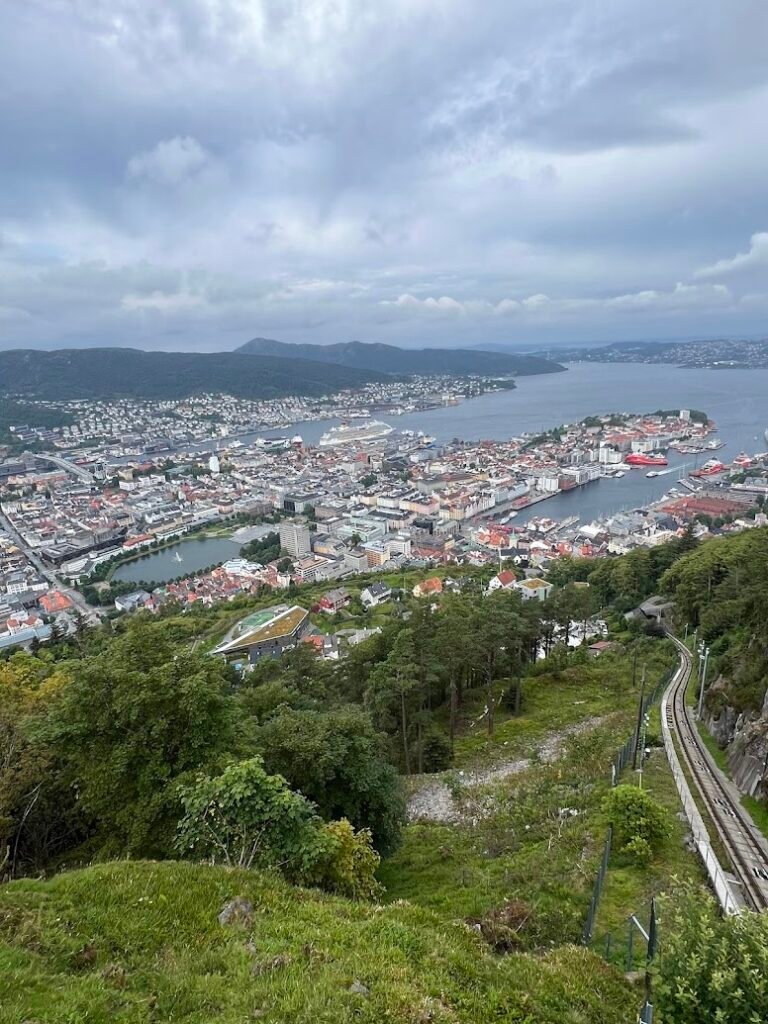
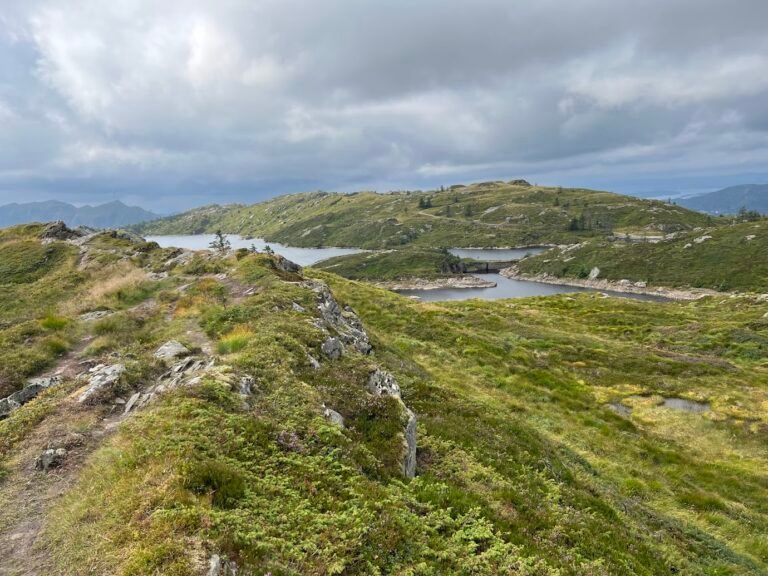
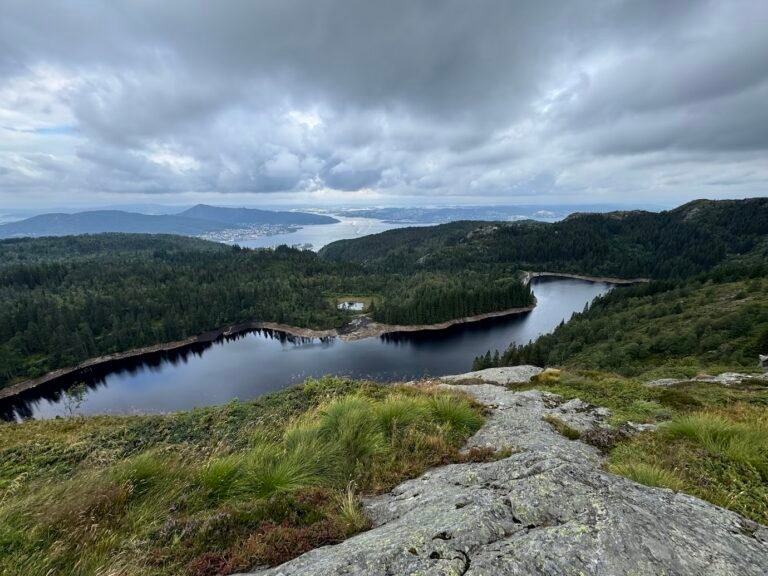

AllTrails map showing our hiking route at the top of Fløyen.
Need to Know
- Hours: Hours change seasonally, so be sure to check the website for current opening times. When we visited in the summer it was open 8:30am-9pm. The funicular runs every half hour before 10am, and every 15 minutes thereafter.
- Tickets: NOK 180/adult roundtrip. During busy times it is recommended to purchase your tickets ahead of time online so you can skip the line at the ticket office.
- Pro tip: Go early! We arrived at the funicular at 8:55am, purchased our tickets, and walked right on to the 9am ride up with about a dozen other people. When we came down at noon it was an absolute madhouse! The queue for tickets wound through the entire roped line, out into the street, and down the sidewalk. 3 hours makes all the difference!
Food & Drinks
Lunch: We had salmon burgers, fries, and local beer from a restaurant stand in the outdoor Bergen Fish Market, located along the wharf just opposite Bryggen. Strolling through the market is fun and you can browse the menus of the many restaurants and stands, finding a place that fits your interests and budget.
Drinks: We sought out local craft beer at the Norwegian pub Henrik øl- og vinstove and were not disappointed. Filled with locals and delicious beer, this was a great way to spend the late afternoon.
Dinner: We ate at Savanna Restaurant, sharing an Ethiopian platter for two. The prices were very reasonable, the owner welcoming and friendly, and most importantly, the dish was excellent. We did not make reservations but were seated right away.
Where We Stayed | Bergen
We stayed at the Zander K Hotel. This was the perfect location in the heart of Bergen and we were able to walk to all attractions, food, and drink on this list. Our room was very comfortable and the free breakfast included in our stay was teeming with varied choices.
We parked at the ByGarasjen parking garage just a 5-minute walk from the hotel and left our car there the entire time we were in the city. We paid NOK 250 to park for 24 hours.
Onward Travel to Myrkdalen
After an early part of the day spent exploring Bergen, this itinerary has you driving to Myrkdalen in the late afternoon. The drive should take about 2 hours and you’ll get your first taste of spectacular scenery along the way.
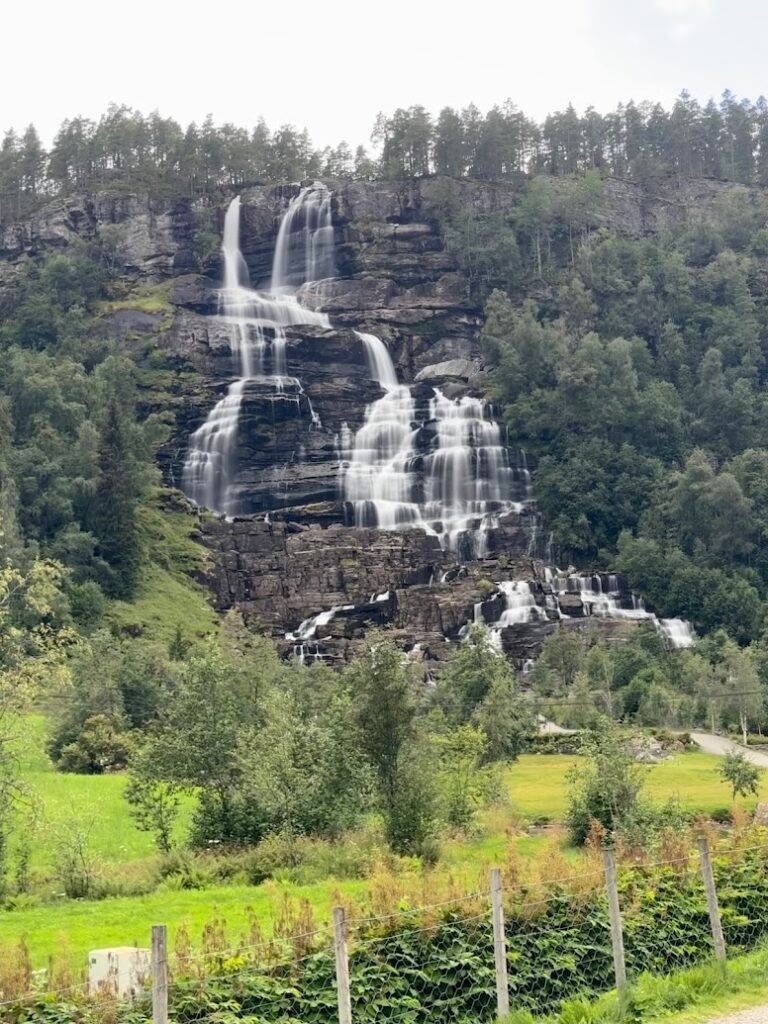
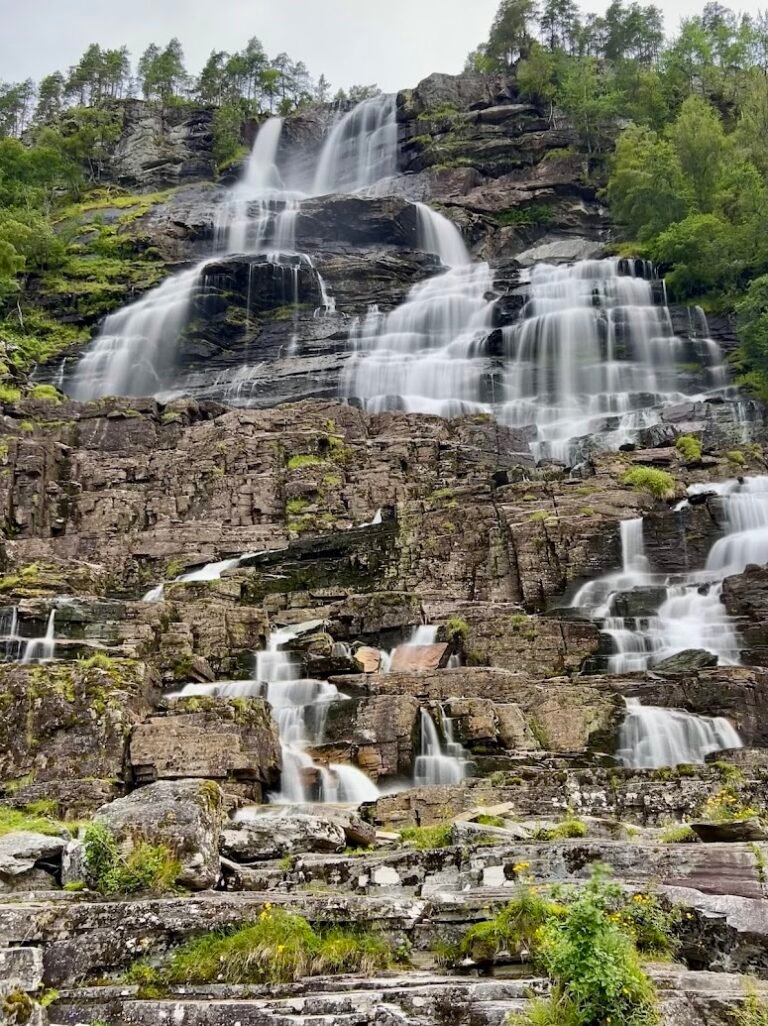
We recommend stopping to stretch your legs at Tvindefossen. This waterfall is located right off the main road (E16). You can park your car for free (30-minute maximum) and walk up and view the waterfall (also free). There is a small souvenir stand on site and paid bathrooms (NOK 10/EUR 1).
Where We Stayed | Myrkdalen
In Norway, to help keep our costs down, wherever possible we wanted to stay at places with a full kitchen in order to cook our own meals. For this reason, we elected to stay at the Myrkdalen Hotel Apartments. The hotel seems to act primarily as a ski resort, so it felt deserted in the summer but that was okay with us. Our one-bedroom apartment was spacious and the kitchen was a huge win. It was a 50-minute drive to Flåm but we didn’t mind it given the views along the way.
Day 2 | Jordalen to Bakkanosi Hike
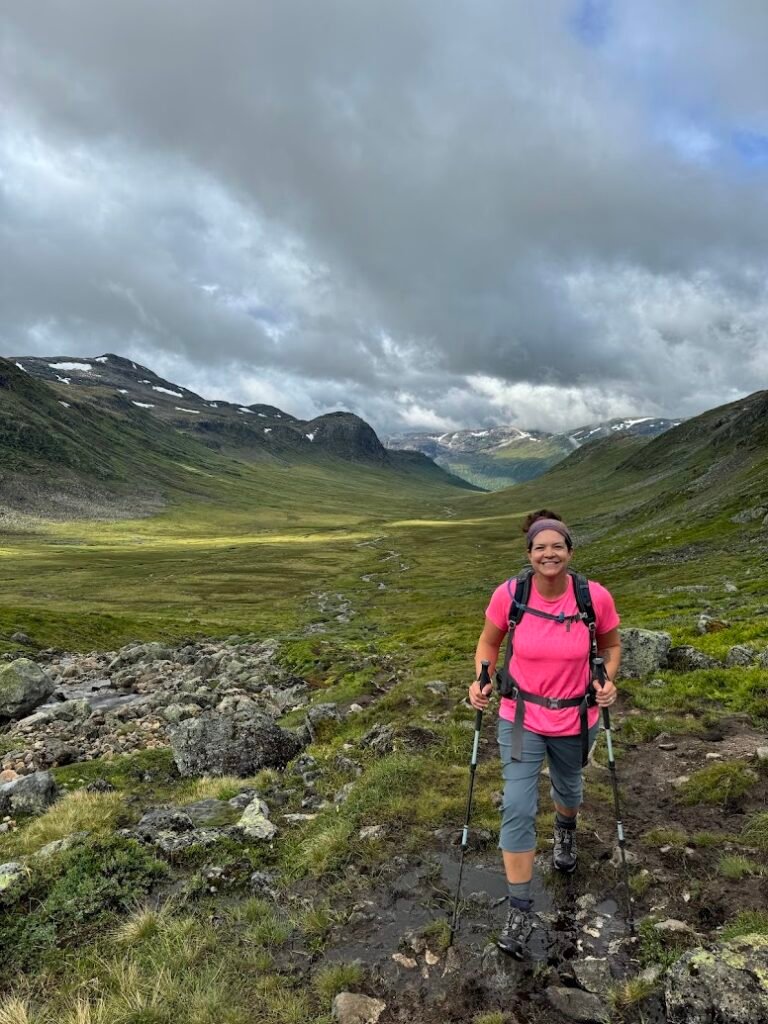
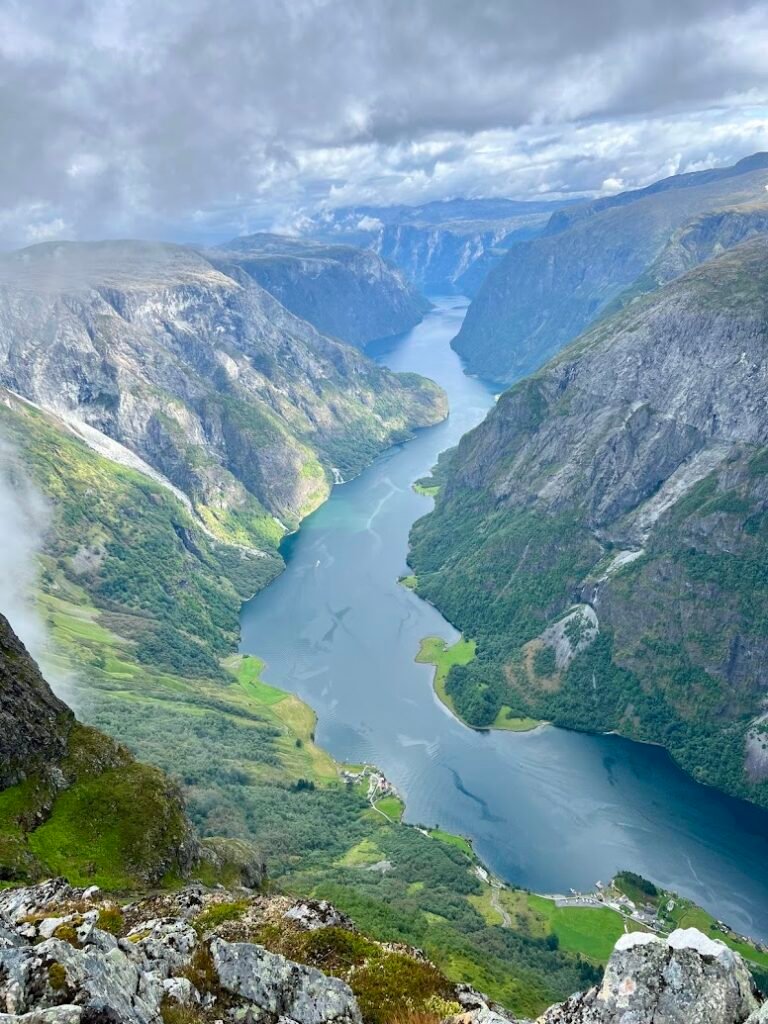
This demanding hike leads to a jaw-dropping view over the Nærøyfjord. This was our first hike in the fjord region of Norway and the view remains one of our favorites of the entire trip. But you need to work for it!
The trail begins along a very steep gravel road then turns into a plateau, passing by Slettedalen which houses small cabins farmers use in the summer when they are herding animals. We passed by tons of sheep grazing in this area.
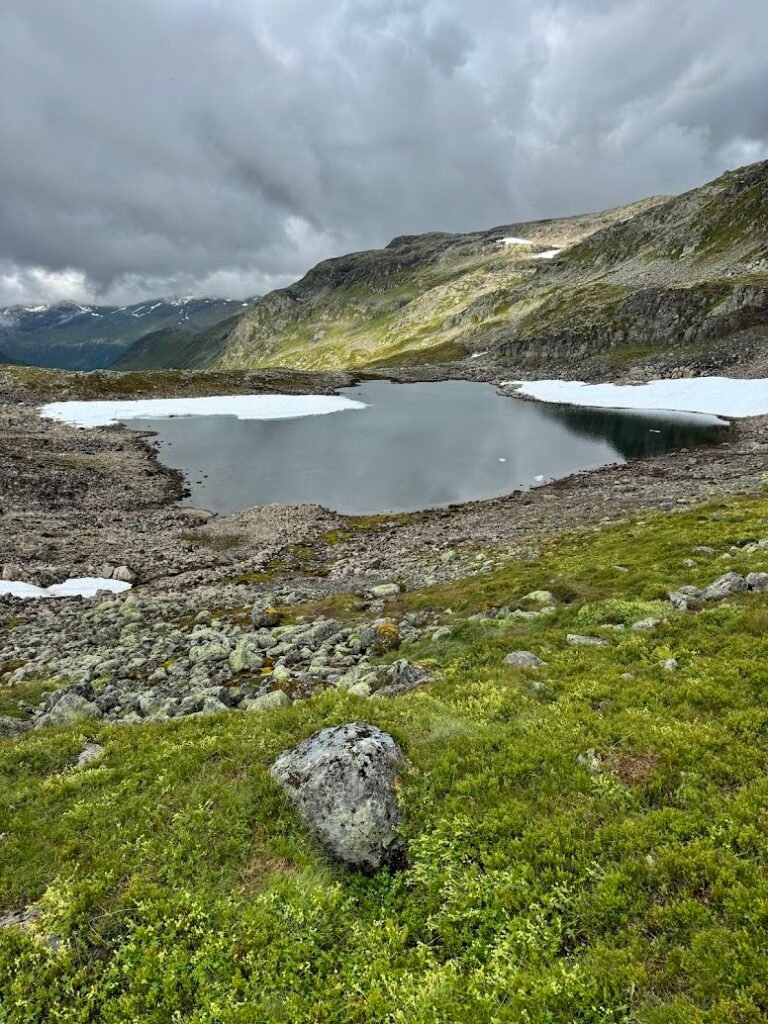
After this point the trail is not marked and can be difficult to follow, so be sure to have an offline AllTrails map downloaded, or a paper map and compass. The trail can also be quite muddy as it runs just alongside a stream. As you climb higher, the area becomes very rocky and you essentially boulder hop for quite some time. Up here, when we visited, it was quite windy making the air cold, especially as we passed by small snow remnants and alpine lakes.
After what seems like forever, you’ll know when you arrive at the end because you’ll see “the view”. Prepare to be blown away!! Once you can tear yourself away, head back down the same route.
We really enjoyed this hike because although it was challenging, we found so much solitude, seeing only one other hiker on the way up. We also had the viewpoint all to ourselves.
This 11.2 mile hike took us a total of 6.5 hours to complete.

Need to Know
- Fees: No fee for trail use.
- Parking: Parking at the trailhead for the day is NOK 100. Near the start of the trail there are two places to park. When we were there, the one in the paved parking lot only took Vipps (the Norwegian equivalent of PayPal) or a bank transfer. Directly across the street, there are parking spaces in the grass payable by cash in an honesty box or via PayPal. Just follow the signs for what works best for you. We parked in the grass and paid by PayPal because we had no cash on hand.
- The trailhead was about a 35-minute drive from where we stayed in Myrkdalen. To get to Jordalen, you will go through a tunnel that literally goes up through the mountain for nearly two miles!
Day 3 | Nærøyfjord Cruise & Undredal Visit
Nærøyfjord Cruise From Flåm
Norway in a Nutshell is touted as Norway’s most popular tour, traditionally taking visitors on a one-way fjord cruise followed by a roundtrip ride on the Flåm Railway. But did you know there is the option to take the railway up, then zipline and bike down?! We like to call it Norway in a Nutshell adventure-style and that’s exactly what we did, breaking up the tour over two days.
We were a bit skeptical about doing this tour, knowing how popular it is, but it’s popular for a reason and we think this is a must do activity while in Norway.
Our day began in Flåm where we departed on the 9:30am fjord cruise. We lined up at 9am and were able to begin boarding at 9:15am. You may want to line up early in order to secure your preferred spot along the railing for the best views.
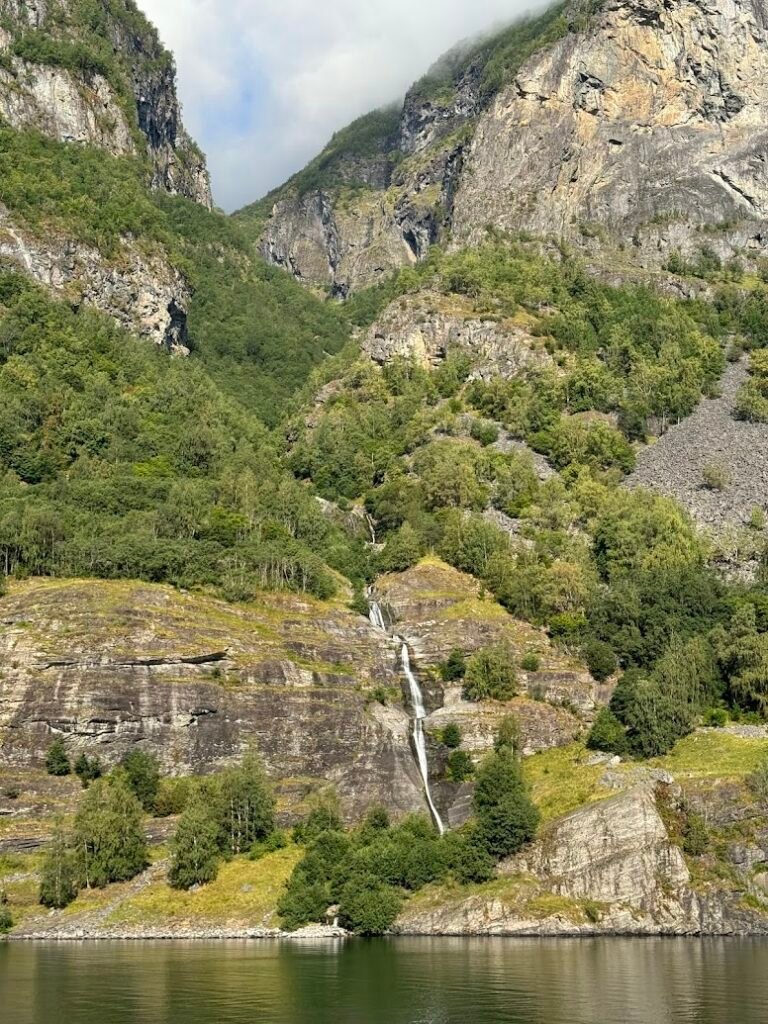
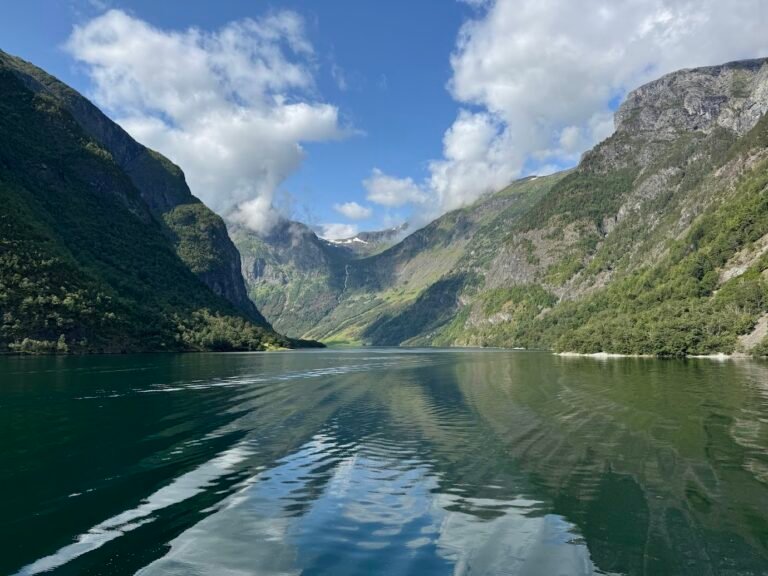
The boat itself was an electric catamaran, so we silently glided through the fjord which was breathtaking. Nærøyfjord was the most narrow of the fjords we visited on our trip, also making it the most impressive, with towering walls on either side.
The 2-hour cruise ended in Gudvangen. Here we had free time to grab a coffee and pastry, look in the shops, and eat a picnic lunch. There is also a Viking Village you can stop in, but we did not visit.
In order to get back to Flåm, you need to arrange for a ticket on the shuttle bus. It’s about a 20-minute ride back and we booked our ticket for 12:45pm.


Need to Know
- Parking: There are several large, paid parking lots in Flåm. We paid NOK 200 at the automated kiosk to park for the day. There are free bathroom pods located throughout the parking lots. It was about a 50-minute ride from our place in Myrkdalen to Flåm.
- Tickets: We paid NOK 775/adult for the fjord cruise and shuttle bus. Book early! In the height of the summer season these tours are popular and sell out early. We booked our tickets 4 months in advance and some of the time slots were already unavailable.
- Pro tip!: Use the Norway in a Nutshell website to check timetables and availability of the different legs of your tour. But don’t book the Norway in a Nutshell package there as it’s more expensive! Book the individual elements on the Norway’s Best website to save money.
Undredal | Cheese & Hike to Stølen
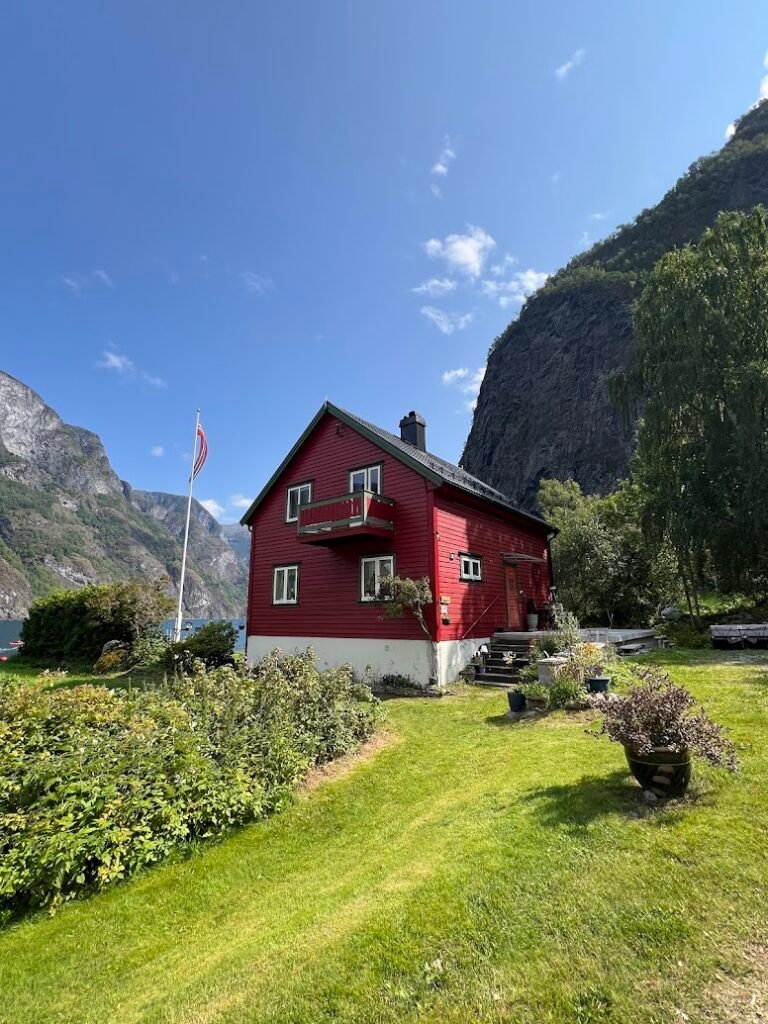
Undredal is a small, picturesque village between Flåm and Gudvangen. We could actually see it on our fjord cruise, and made our way there by car in the afternoon. The draw for us was their famous brown cheese! This traditional brown cheese is made from the whey of cow and goat milk, giving it not only its color but unique flavor. Some say it’s like butterscotch or dulce de leche. We bought a small block at the grocery store in town and YUM!
After our cheese purchase, we set off on a hike up to Stølen, or summer farms. The hike was so steep!! It climbs nearly 2,500 feet in just under two miles. The trail is very pretty, however, mostly in the forest with shade. There are a few viewpoints and openings where you can see the fjord below, making a nice juxtaposition from the view we had in the fjord earlier in the day. At the top, the views are beautiful and you can even continue on if desired.
This 3.75 mile hike took us 3 hours to complete. It was a real leg burner!

Need to Know
- Fees: No fee for trail use.
- Parking: There is a small, free parking lot just before the main part of town. We parked here and walked a short distance along the road to both the grocery store for cheese and the trailhead.
Day 4 | Flåm Railway, Zipline & Bike
The Flåm Railway
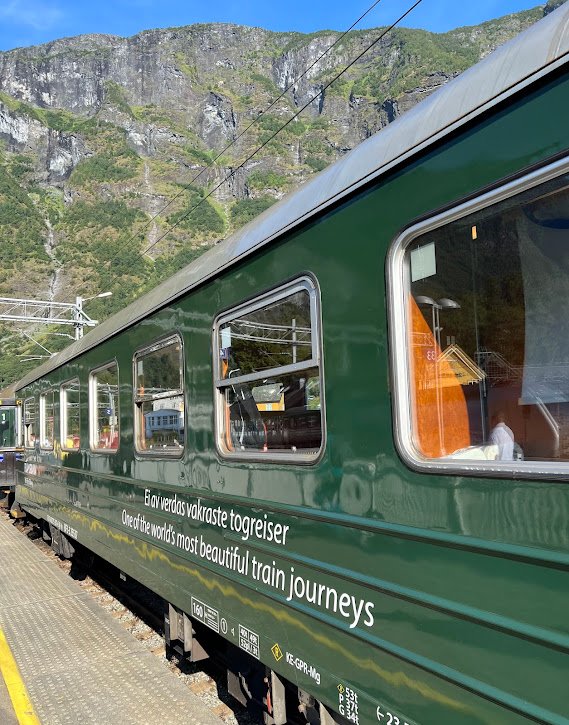
The second part of our Norway in a Nutshell adventure-style once again began in Flåm where we departed on the 9:30am train. We boarded just after 9am and you may want to board early too in order to get seats on the right side of the train for the best views on the way up towards Myrdal.
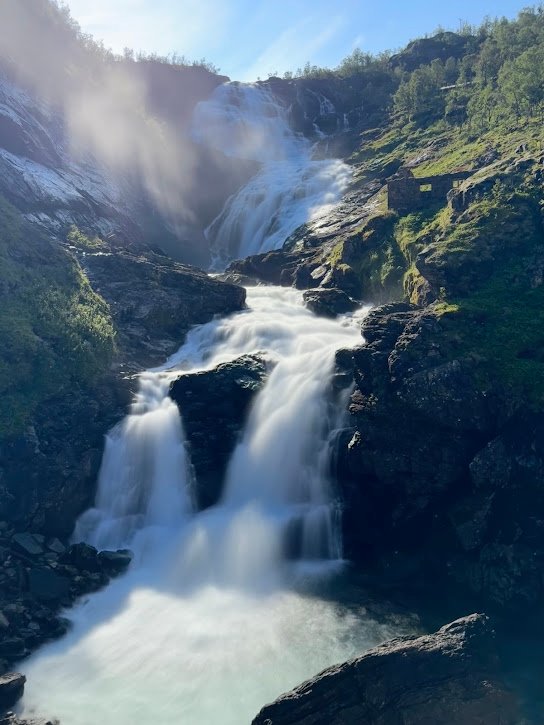
During the scenic ride, the train climbs nearly 3,000 feet in about an hour, some of which is through tunnels. There was a brief stop at the Kjosfossen where we could disembark for a photo of the roaring waterfall. For the zipline, we alighted at Vatnahalsen, one stop before the final stop of the train ride. Based on what we saw from the zipline, I don’t think we missed much. The train conductor makes a clear announcement that this is the zipline stop, so you won’t miss it.
Flåm Zipline
In our experience, at the train stop you won’t want to dilly-dally and instead make your way as quickly as possible to the zipline platform, just a few minutes away. The line can build quickly and you don’t want to waste too much time standing around.
We were the third group in line and after signing a waiver, we were outfitted in a harness and helmet, then shown over to the platform. Two people can go at one time and it was so fun to be beside each other on the way down. Note you can bring a small backpack with you, or if you have a larger one there is a separate zipline trolley they send it down on.
The zipline is a whopping 4,500 feet long!! Scandanavia’s longest and it took us nearly 2 minutes from start to finish. We had great weather and the scenery was so beautiful with the river rushing below us and waterfalls all around. Check out our video below for a firsthand point of view!
Cycling to Flåm
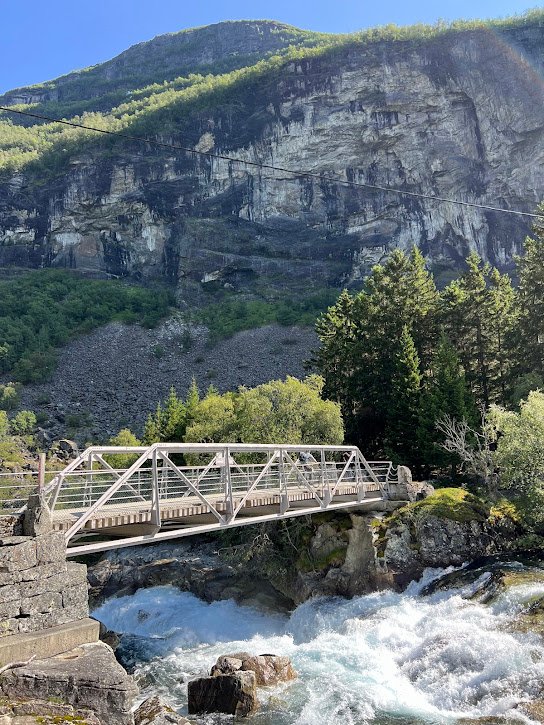
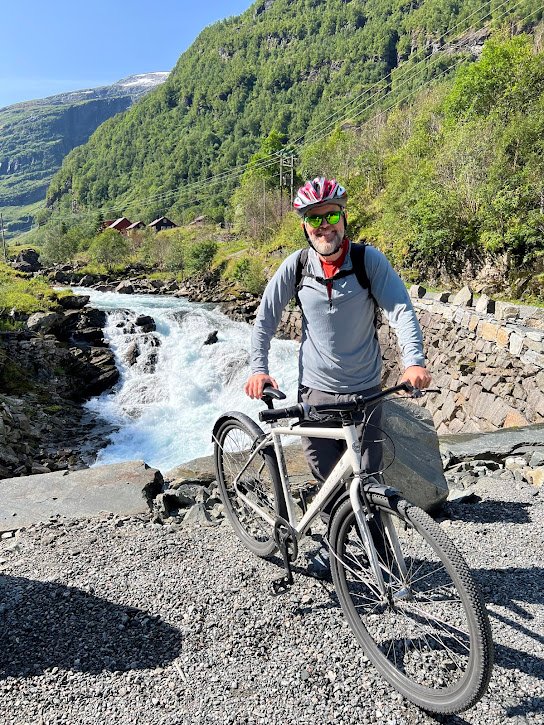
The last part of the journey is a scenic 11-mile bicycle ride from Kårdal back to Flåm.
Once on the ground we were given our choice of hybrid bicycles and sent on our way down the path which was hard packed dirt initially and a paved road on the final stretch. The ride was nearly all downhill which meant we could really take our time and admire the views along the way. We passed many of the same places we saw from the train, but enjoyed this slower pace SO much more than the rail journey. We really took our time and stopped to each lunch along the way, so it took about 1.5 hours to get back to Flåm. Technically we did not need to return our bikes until 7pm in the evening.
In celebration of our adventure, we stopped in at Ægir BrewPub for a pint. We continued to enjoy the weather on their outdoor patio on the fjord, but the indoor Viking-inspired decor is super fun if you’d rather sip your drink in there!


Need to Know
- Parking: There are several large, paid parking lots in Flåm. We paid NOK 200 at the automated kiosk to park for the day. There are free bathroom pods located throughout the parking lots. It was about a 50-minute ride from our place in Myrkdalen to Flåm.
- Tickets: We paid NOK 1,685/adult for the one-way scenic train ride, zipline, and bicycle rental. Book early! In the height of the summer season these tours are popular and sell out early. We booked our tickets 4 months in advance and some of the time slots were already unavailable.
- Pro tip!: Use the Norway in a Nutshell website to check timetables and availability of the different legs of your tour. But don’t book the Norway in a Nutshell package there as it’s more expensive! Book the individual elements on the Norway’s Best website to save money.
Onward Travel to Beitostølen
After an early part of the day spent adventuring in Flåm, this itinerary has you driving to Beitostølen where you’ll spend the night. The drive should take around 2.5 hours and once again, you’ll hardly mind thanks to the gorgeous views.
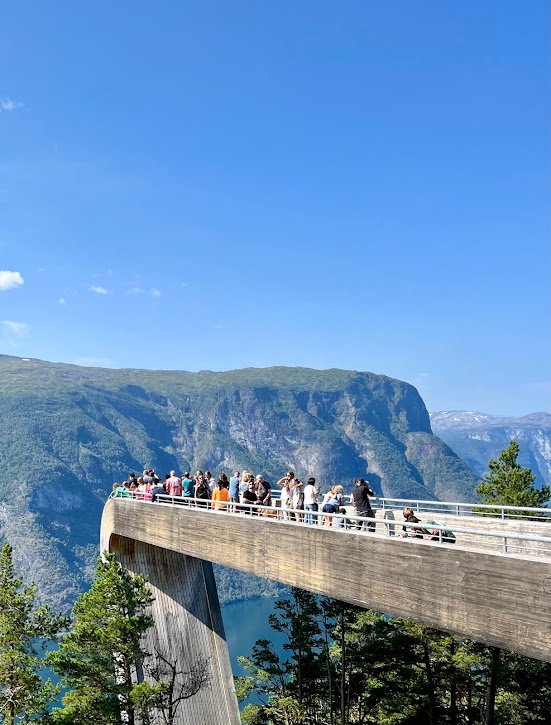
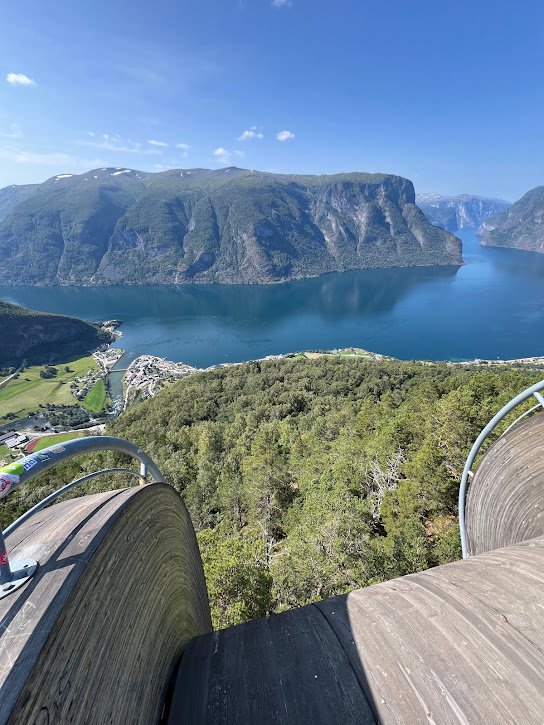
We recommend a detour to the Stegastein Viewpoint which is very close to Flåm. This is a viewing platform that juts out seemingly into thin air, 2,000 feet above Aurlandsfjord. This is yet another vantage point high above the magnificent fjord area.
Be aware that the road to get to the viewpoint is quite steep and narrow, often requiring use of the pullouts to allow one-way traffic by. The viewpoint is free to visit and parking can be a challenge as it’s nearly always crowded, but if you circle around you should be able to snag a spot.
Another point of interest along the drive is traveling through the 15-mile (!!) Lærdal Tunnel which is the longest road tunnel in the world.
Drinks & Dinner
Drinks: We had a pint of local beer from Bryggerihuset in town and enjoyed it on their patio. While they had a burger joint on premises, they only had potato chips and not fries, so we went to another restaurant instead after I had a mini-tantrum due to being over-tired and over-hungry.
Dinner: We had delicious burgers and fries at Caféen Beitostølen that were so delicious! The outside patio was a lovely place to enjoy dinner.
Where We Stayed | Beitostølen
We stayed at Grønolen Fjellgard. Just a short drive from town, the views from the shared patio were beautiful. They also offer a 3-course meal (for purchase) nightly, and free breakfast in the morning.
We honestly didn’t love our stay here. Although the room had an ensuite bathroom, the entire space was very small and oddly laid out. The walls were also incredibly thin and we could hear the people next to us, who were just talking, as we tried to sleep.
We can understand the draw of such a place if you wanted to plop down for a relaxing night and not leave for dinner or breakfast. With our fast-paced itinerary, however, we didn’t have time to enjoy the amenities. One last note, if you need to leave very early in the morning like we did, make sure to pay your bill the evening prior.
Day 5 | Bessegen Ridge Hike

A hike along the Besseggen ridge in Jotunheimen National Park is not to be missed by outdoor enthusiasts in Norway. It does require a bit of planning in advance, but it’s totally doable.
We began our day by parking in the long-term lot at Gjendesheim and taking the short shuttle bus ride to the ferry dock. We had tickets for the 7:45am ferry bound for Memurubu where we would start our hike. A 20-minute boat ride across Gjende Lake and viola, we were ready to begin our climb!
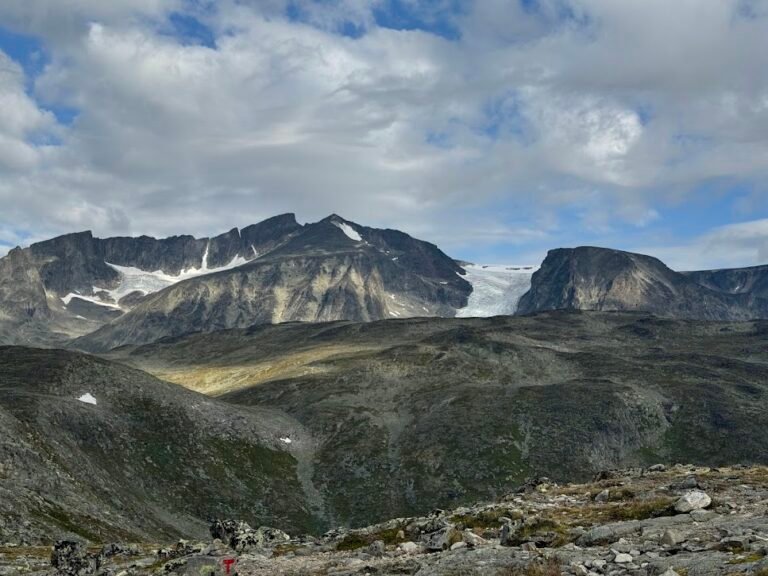
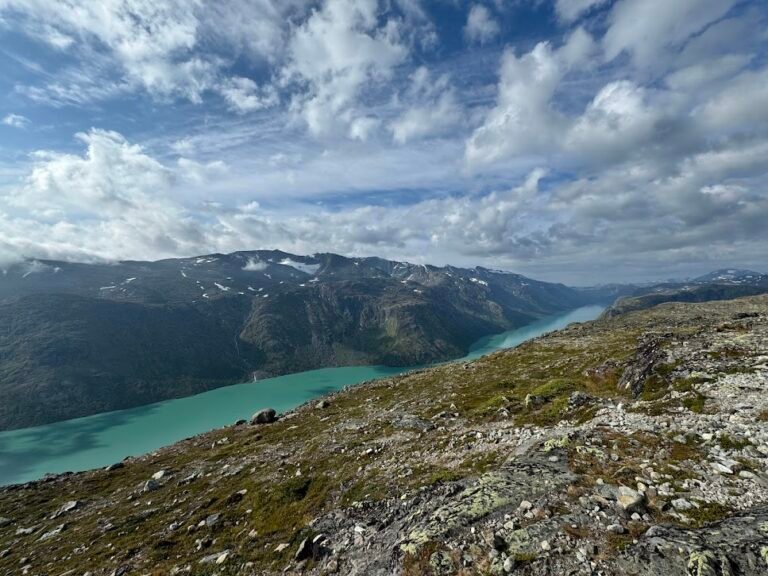
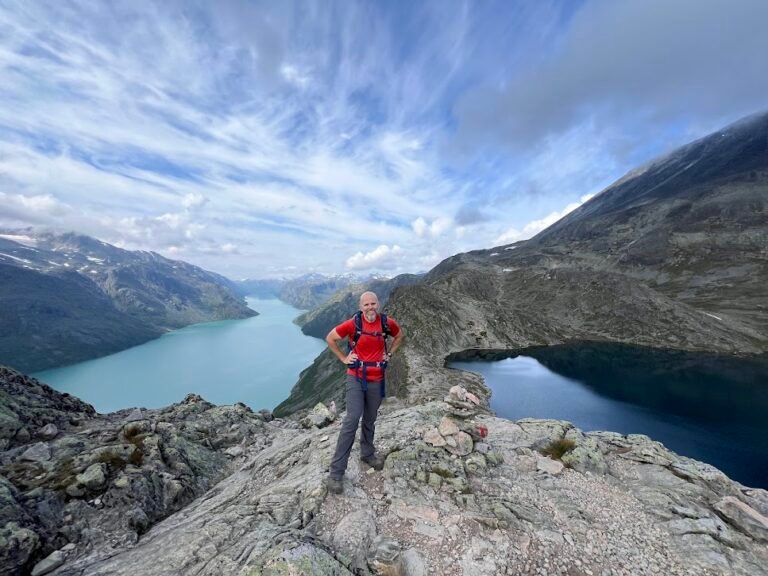
The hike began with a steep climb away from the lake up to the top of the ridgeline. Once there, we had views of the lake below and glaciers above us and off into the distance. At one point, we could see the turquoise of Gjende Lake far below, and the dark blue of Bessvatn Lake just below our feet. The views were mesmerizing!
In trail descriptions we read there was a lot of talk about the very short, but very steep section of the actual ridge which is narrow. We felt it was much ado about nothing, however. While the climb was pretty much straight up a pile of rocks, the drop off on either side was not steep and there were plenty of hand holds. That being said, we are glad we completed this hike in the one-way direction heading up, and not down, this section.
At last, we made it to the highest point on the trail, Veslefjell Mountain, marked by large cairns. At this point, we began our descent towards Gjendesheim which was also fairly steep at times, but mostly a gentle grade down. Keep your eyes peeled in this section for reindeer. During our descent, hanging out in a patch of snow, we saw a herd of reindeer! As the shuttle bus was not yet running when we completed our hike, we walked back to the car park.
This hike came in at 10.2 miles for us and took us 6 hours to complete. Don’t let the one-way ridgeline fool you, there was still 3,600 feet of elevation gain!

Need to Know
- Fees: No fee for trail use.
- Parking: There is a large, paid parking lot for this hike. We paid NOK 130 to park for the day and NOK 85/pp for a roundtrip shuttle bus ticket to and from the ferry dock (NOK 45/pp one-way). If you like, you can book parking and/or shuttle bus tickets online prior to arrival. We simply showed up and bought shuttle bus tickets directly from the driver using our credit card. We paid for parking, after our hike, at the automated kiosk located in the parking lot. Note, the shuttle bus does not start running again until after 3pm, so you may just want to buy a one-way ticket if you think you’ll be done the hike quickly.
- Ferry: Make sure to buy your ferry tickets online ahead of time as they do sell out! We paid NOK 240/adult for a one-way ticket from Gjendesheim for Memurubu.
- It took us about 45 minutes to drive from our hotel in Beitostølen to the parking lot for the Bessegen trail.
Onward Travel to Åndalsnes
After the hike, this itinerary has you driving to the next destination, Åndalsnes, where you’ll spend three nights. The drive should take around 3.5 hours, so this is a long day.
Of interest, you’ll drive along Slådalsvegen, a 20-mile road that follows an old live stock track across a mountain plateau. When we drove, we hardly saw any other cars and it almost felt like we were offroading in the mountains, rather than driving the gravel track. Note this road does have a toll which you should make arrangements to pay within 48 hours of driving. There is a sign at the beginning of the toll portion you can take a picture of to have the information for later.
Where We Stayed | Åndalsnes
We stayed at an Airbnb property just across the Romsdalsfjorden from Åndalsnes. We had a great experience in a historic farmhouse with space to spread out and a full kitchen to cook our meals.
Day 6 | Explore Near Åndalsnes
After the hustle and bustle of the past few days, today is all about relaxation and local exploration. Here are a few things to consider in the area.
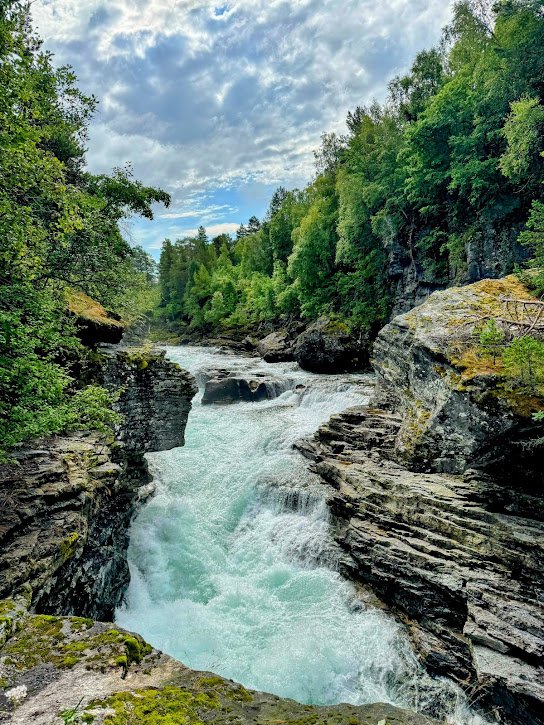
Slettafossen Waterfall
Free to park and visit, you can witness the power of the Slettafossen Waterfall in the Rauma River in Romsdalen. Be sure to walk across the bridge and hike down to the nearby lookouts.

Kylling Bridge Viewpoint
Made of granite, Kylling Bridge is an arch bridge and part of the Rauma Railway line. The bridge has become symbolic of scenic railways in Norway. You can park across the road and walk a 1/4-mile trail to a viewpoint of the bridge. We were lucky enough to witness a train crossing! You might also consider a ride on the scenic railway instead of driving along the E136 road like we did.
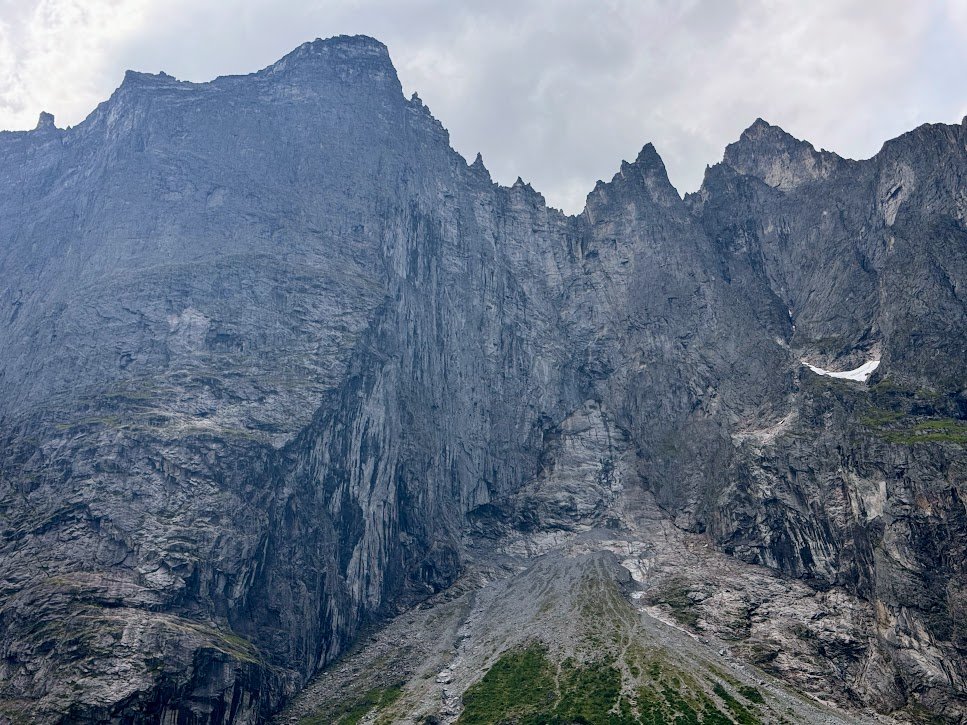
Trollveggen (Troll Wall)
The Troll Wall is an impressive and imposing rock face measuring 3,600 feet from its base to summit. In fact, it's the tallest vertical rock face in Europe and has a storied history of climbing and base jumping, the latter of which has since been banned. At the foot of the rock face there is a rest stop called Trollveggen Besøkssenter which has a picnic area, toilets, a cafeteria, and souvenir shop. It's well worth a stop!
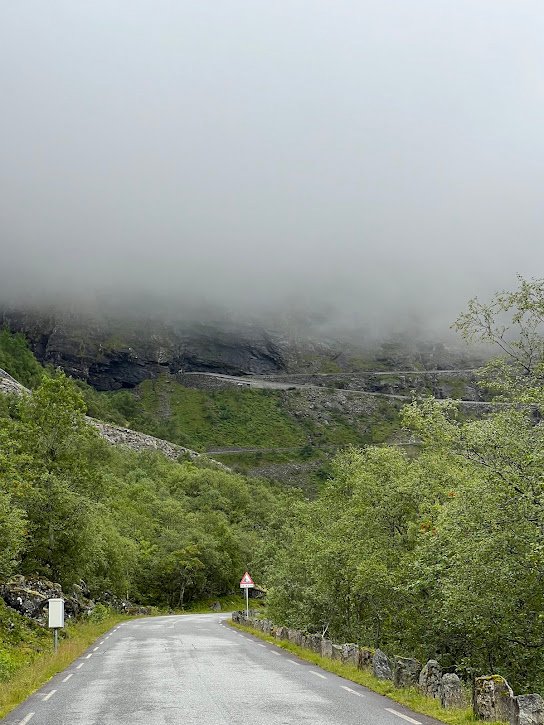
Trollstigen (Troll Road)
Unfortunately Trollstigen was closed for the majority of 2024 due to multiple landslides. When open, the road consists of a series of hairpin turns that are quite famous. When in Åndalsnes you can drive to the car park at Trollstigenfoten in Isterdalen before the point where the road is closed. Although it was quite cloudy the day we visited, it was still neat to look up at the part of the road we could see.
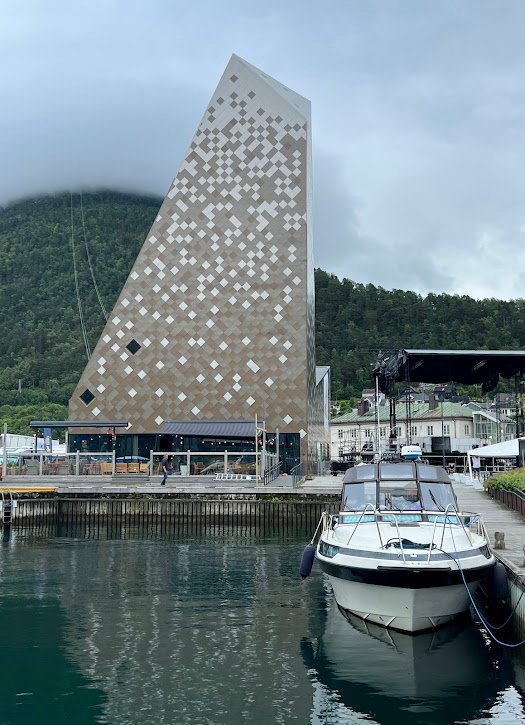
Norsk Tindesenter
Norsk Tindesenter is the Norwegian Mountaineering Centre with a museum, cafe, and climbing wall. Through the center guided trips on the Romsdalsstigen via ferrata can also be booked.
Day 7 | Romsdalseggen Ridge Hike
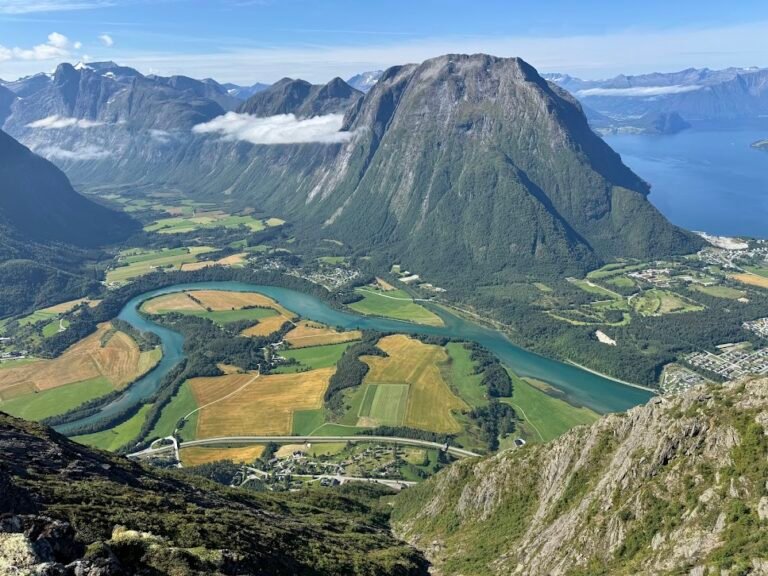
Another day, another ridge hike! The hike along Romsdalseggen ridge has breathtaking views of the surrounding mountains, the Rauma River below, and the fjord near the end. This is also a one-way hike that involves some advance planning, but it’s worth it.
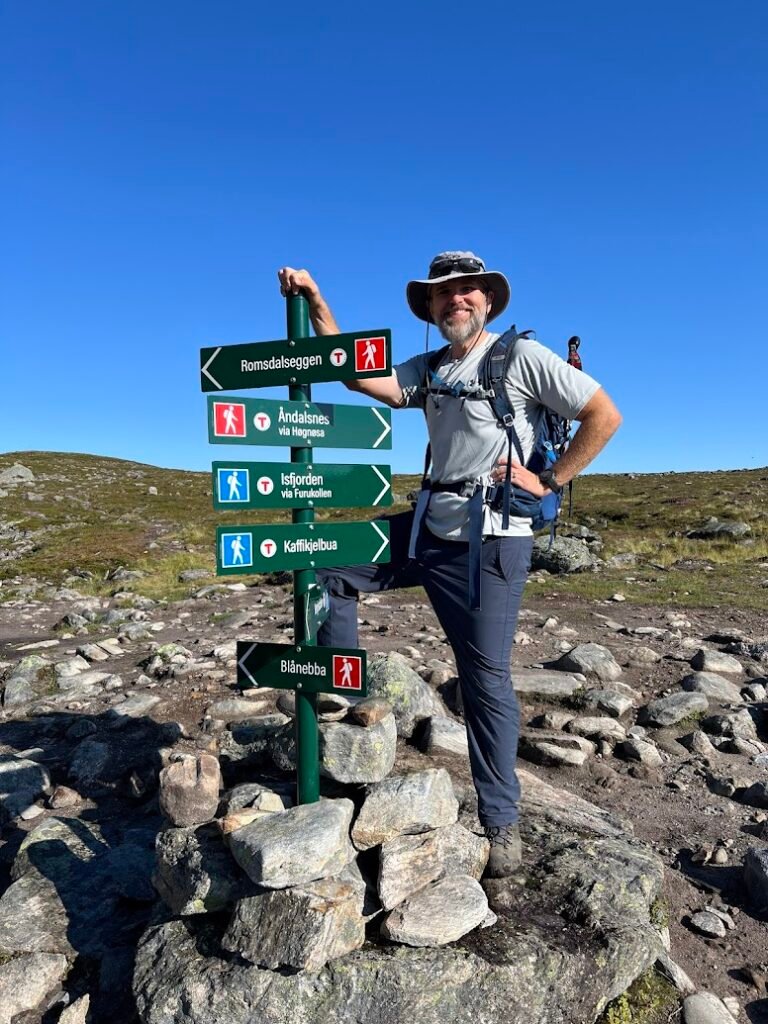
We began our day by parking in Åndalsnes and taking a 20-minute hiker shuttle to Vengedalen for the start of the hike. It was quite foggy in the morning, so we could barely see in front of us as we made our way up the path along the Tverrelva River to Hesthia, whose incline was moderate. As we arrived at a fork in the path, the fog lifted and we could see bright blue skies above. Turning west, we picked our way up the very steep mountainside that would take us to the Romsdalseggen Ridge.

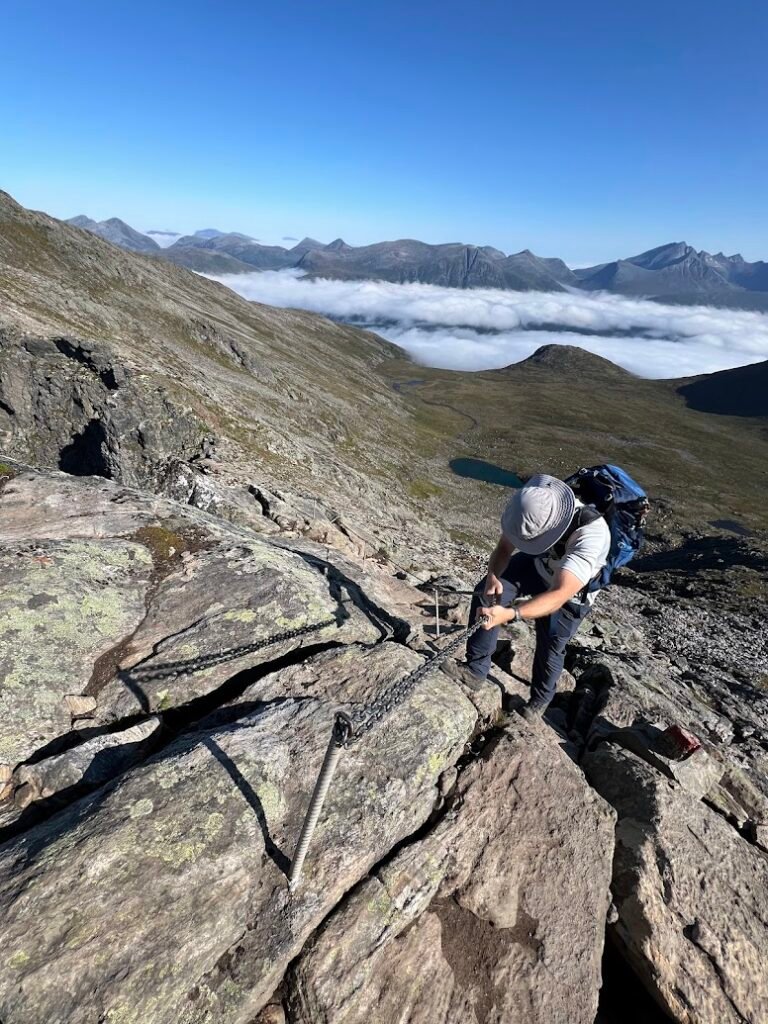
The views of the lush Romsdalen Valley with the river flowing and jagged peaks in the distance were some of our favorite of our whole trip in Norway. We kept going, reaching the most narrow part of the hike and ridge which required some climbing and the use of chains, but nothing too taxing or exposed.

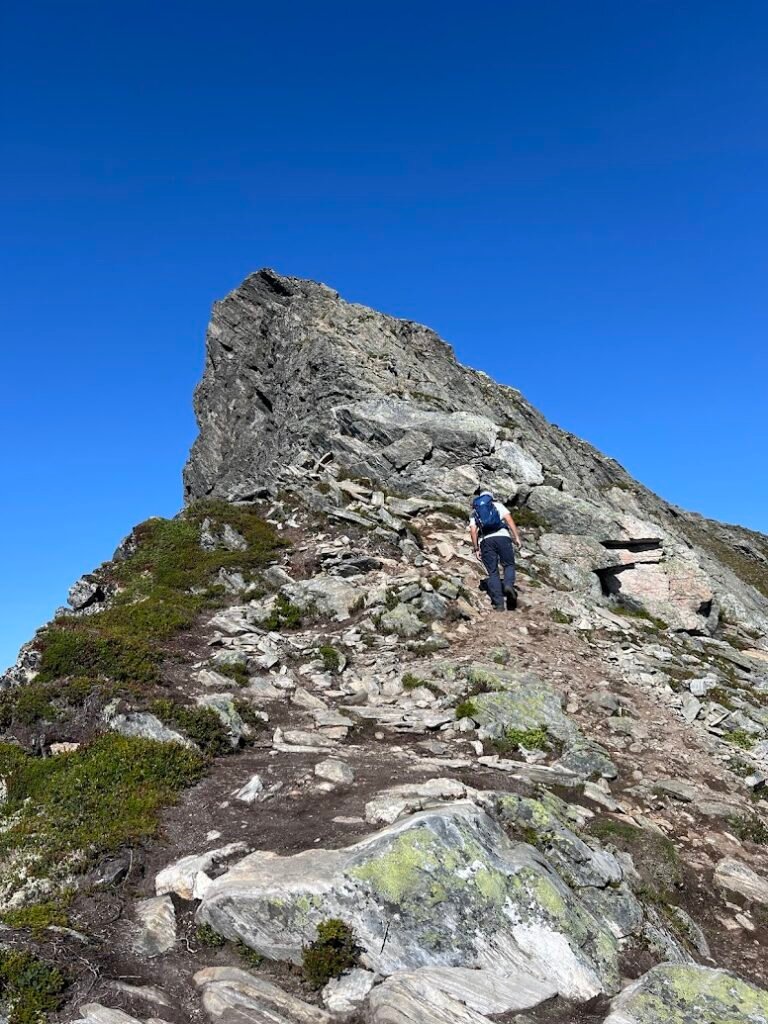
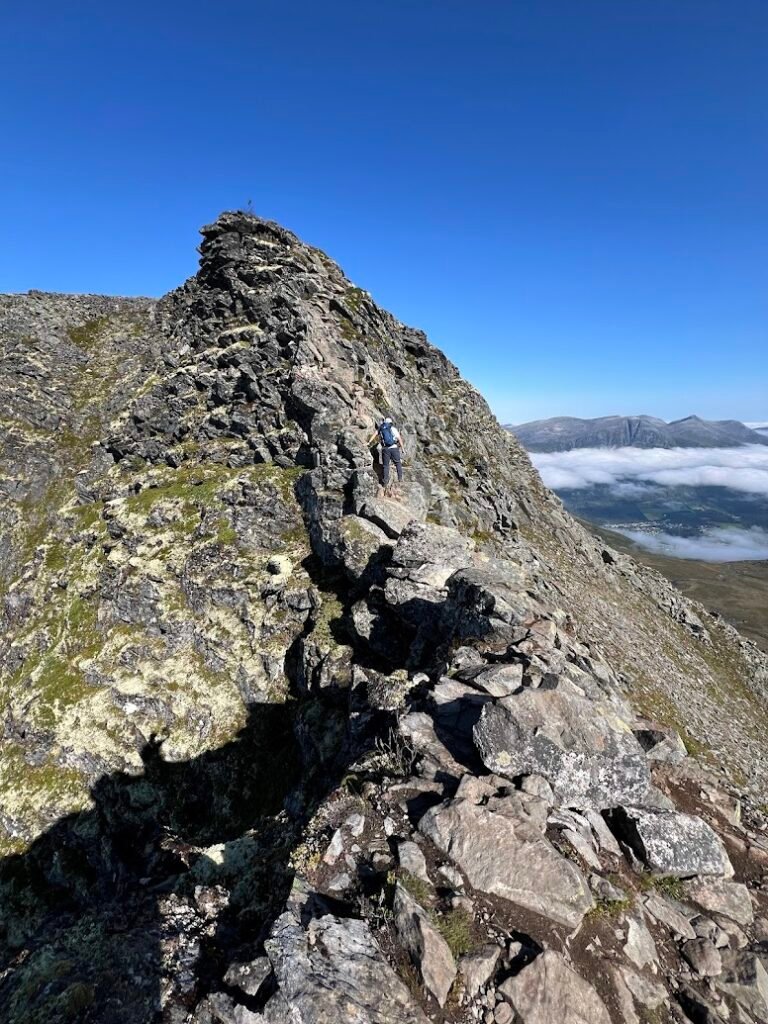
After reaching the highest point of the hike at the summit of Mjølvafjellet, the ridge widened and the descent was gradual along stone and rock. At Nesaksla, there is a restaurant, gondola down to Åndalsnes, and short hiking paths worth checking out for different views.
After some exploring, we headed down towards Åndalsnes and thankfully the path was largely comprised of stone steps making the steep descent relatively easy. Along the way, be sure to stop at the Rampestreken Viewpoint. This steel ramp extends straight out from the mountainside! The end of the trail put us right back in the parking lot where we had parked our car earlier in the day.
Our stats for this hike were 7.3 miles with just over 3,000 feet of elevation gain and it took us about 6 hours total.


Need to Know
- Fees: No fee for trail use.
- Parking: We parked in Åndalsnes at the lot labeled “Rampestreken Parking”. It was a 5-minute walk to the bus station directly outside the Nordsk Tindesenter for the hiker shuttle. We paid NOK 100 to park for the day, at the automated kiosk in the lot, before exiting.
- Shuttle Bus: Make sure to buy your bus tickets online ahead of time as they do sell out! We paid NOK 212.50/adult for a one-way ticket from “Åndalsnes stasjon” to Romsdalseggen”.
Day 8 | Raksætra Hike & Lovatnet Lake
Onward Travel to Loen
From Åndalsnes the drive to Loen should take about 3.5 hours. Note if the Trollstigen route is open, the drive should be a bit shorter (closer to 3 hours). Along the way you’ll get your first taste of a fjord crossing by boat on the Stranda-Liabygda ferry. The drive is quite beautiful, so sit back and enjoy!
Once in Loen, we recommend checking out the shops in town or in nearby Stryn.
Raksætra Hike
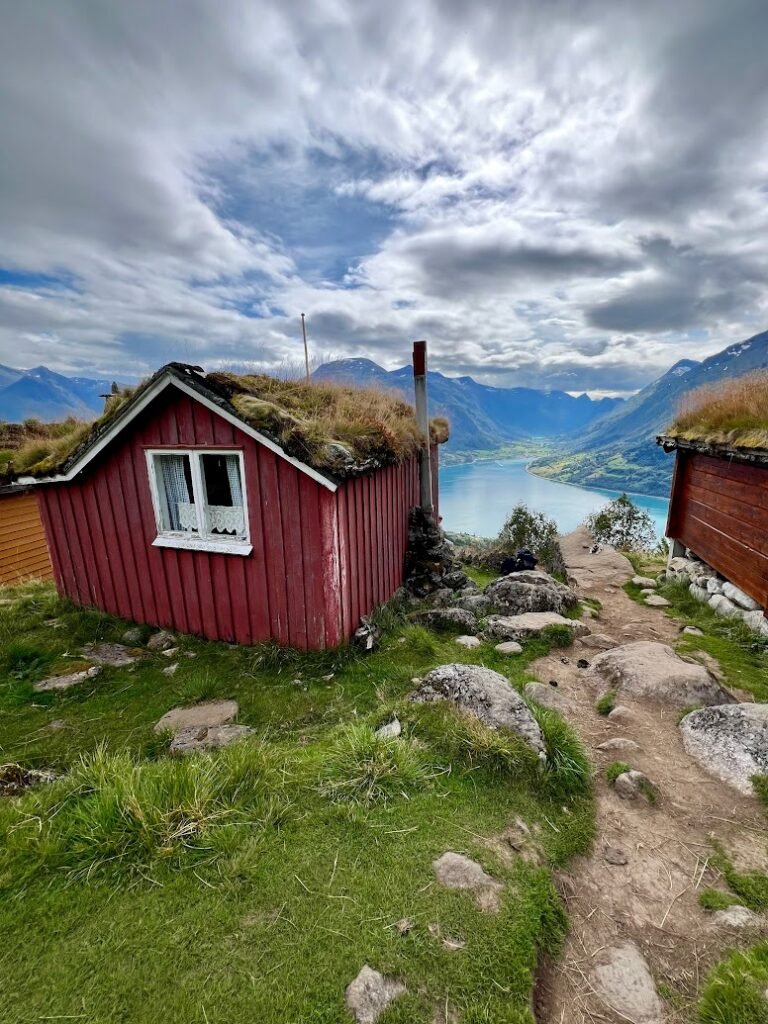
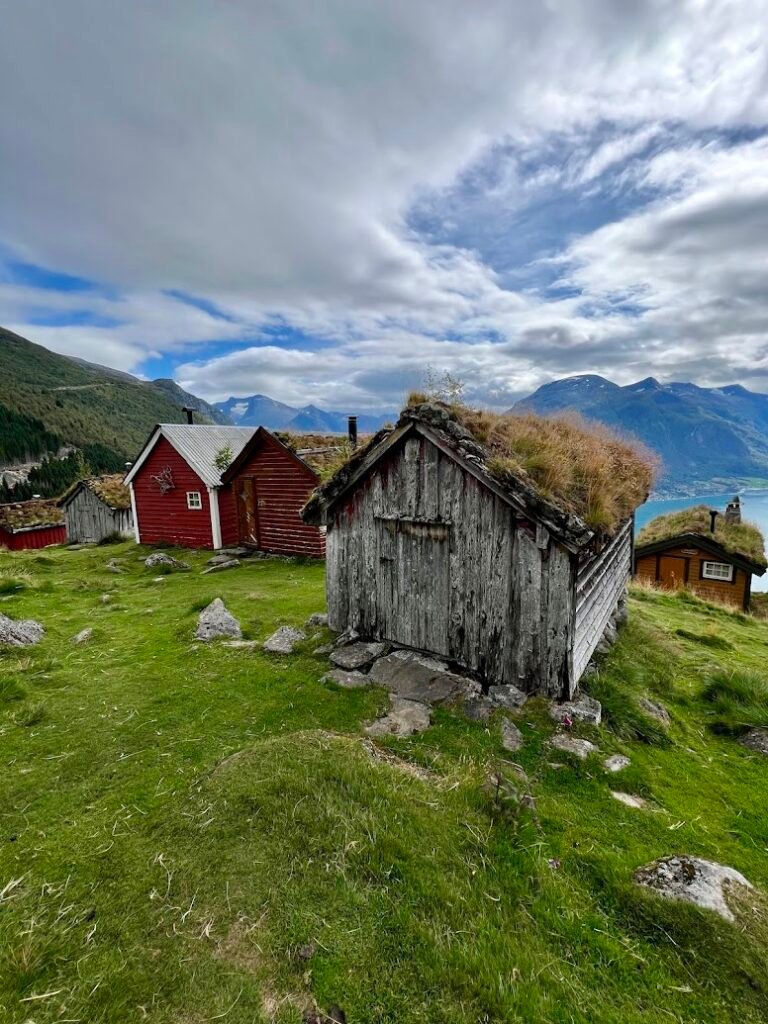
We also recommend the short hike to Raksætra for a great introduction to the area. It’s a short hike but the panoramic views over the fjord pack a powerful punch. The summer cottages at the top are also quite photogenic!
This 2-mile hike had 750 feet of elevation gain and took us about 1.5 hours to complete.
Need to Know
- Fees: No fee for trail use.
- Parking: There is a large, paid parking lot at the trailhead. We paid NOK 85 at the automated kiosk to park during the hike.
Explore Lovatnet Lake
Lovatnet Lake is gorgeous! From Loen, we simply did a scenic drive along the Fv723 road which hugs the shoreline. From the road we could see massive waterfalls tumbling from the cliffs high above and raging streams that feed into the lake. We think the lake it worth at least a drive by, but you might also consider renting bikes if you have the time. It looked like a lovely way to experience the surrounding beauty.

Where We Stayed | Styrn
We stayed at an Airbnb property in Styrn, a town located just a 10-minute drive from Loen. Situated high on a hill, our condo had a lovely view overlooking the fjord.
Day 9 | Loen Via Ferrata
Loen is home to an exciting via ferrata that climbs from the fjord to the summit of Mount Hoven 3,300 feet above sea level.
There are exciting features along the way including:
- The Stigull Ladder which has 120 steps and climbs above thin air.
- The Gjølmunne Bridge, which at 400 feet is the longest via ferrata bridge in Europe. It crosses over a 525-foot gorge.
- And finally, Gjølmunne Wire Bridge that makes you feel like a tightrope daredevil and will test the balance of anyone.
We booked a guided via ferrata excursion with Loen Active. The small group trip included all via ferrata equipment, a guide, and a return via the Loen Skylift. We paid NOK 1,695 per person.
Our trip began at 9am with a very steep climb up to the base of the via ferrata. A lot of people say this is the hardest part of the day! After a brief lesson, our group set off making our way up the via ferrata. Note this route is more like rock climbing with hardly any iron rungs. We really enjoy this type of outing, but wouldn’t recommend it if you’ve never done a via ferrata or rock climbing before, or if you lack in upper body strength or stamina. The ladder and bridges were added elements of fun along the way.


We finished around 2:30pm and independently made our way down and back to the Loen Active shop via the skylift. The skylift ride was great and I’m glad our trip included a ride on that, rather than having to hike down!
About our experience: We are so happy to have done the Loen via ferrata and it was a great day out. We didn’t love our experience with Loen Active, however. Upon arrival, we didn’t feel welcomed by the guides and felt pressured to rent climbing shoes (we did not rent the shoes and were just fine). Other than the initial safety talk, the guides didn’t provide any support, guidance, or assistance throughout the entire trip. It was nice to have them as a safety net, but if you have your own equipment or have done a via ferrata before, we’d recommend saving money and considering going without a guide.
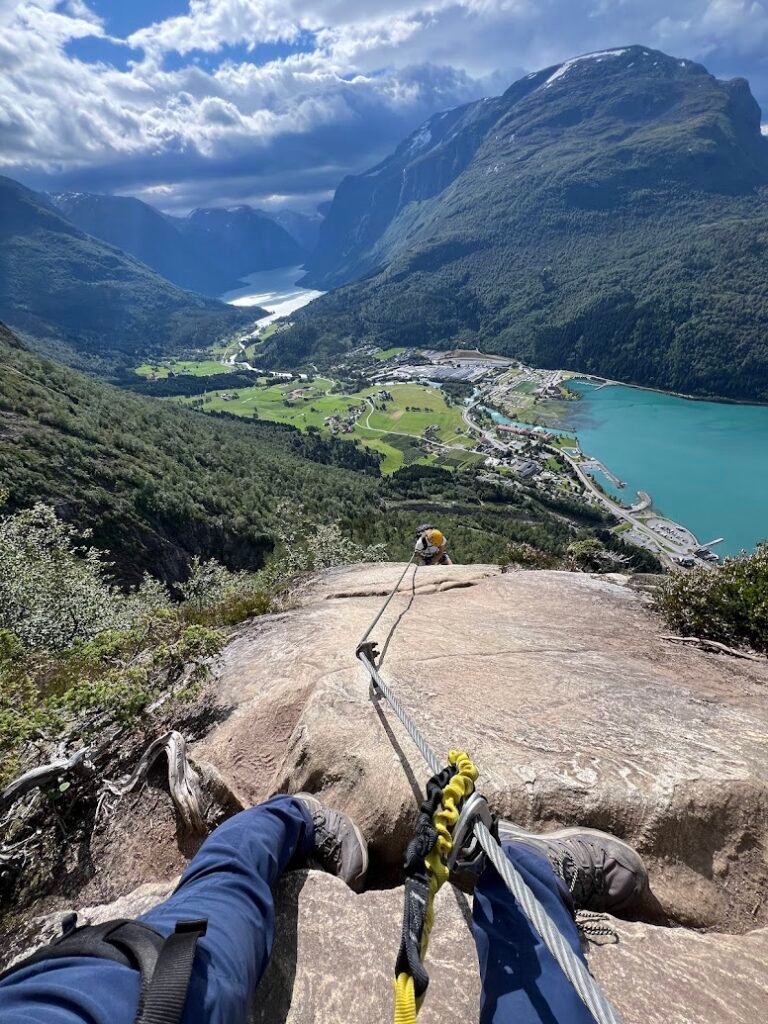
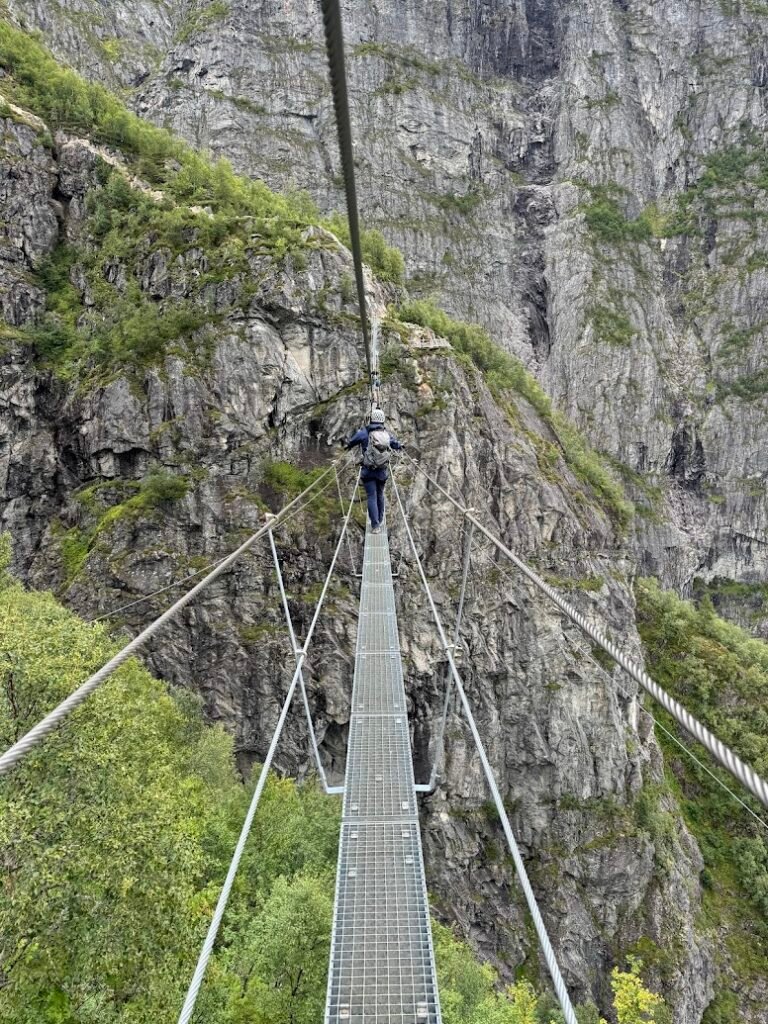
Check out our video for a first person perspective on what it was like to do the Loen via ferrata!
Day 10 | Briksdal Glacier
Visiting Briksdal Glacier is a great way to spend the day near Loen. Part of Jostedal Glacier National Park, Briksdal Glacier is a western arm of the Jostedal Glacier, the biggest glacier on mainland Europe. The drive through the valley to the glacier feels like an attraction in and of itself, given the rugged mountains above and green valley below.
Once at the Visitor Center, you have several options for your visit. You can hike a short, 1.5-mile trail to a view of the glacier at the foot of a glacial lake. You can also get to the same area via a ride on a “troll car” (essentially a glorified, off-road golf cart-style truck).
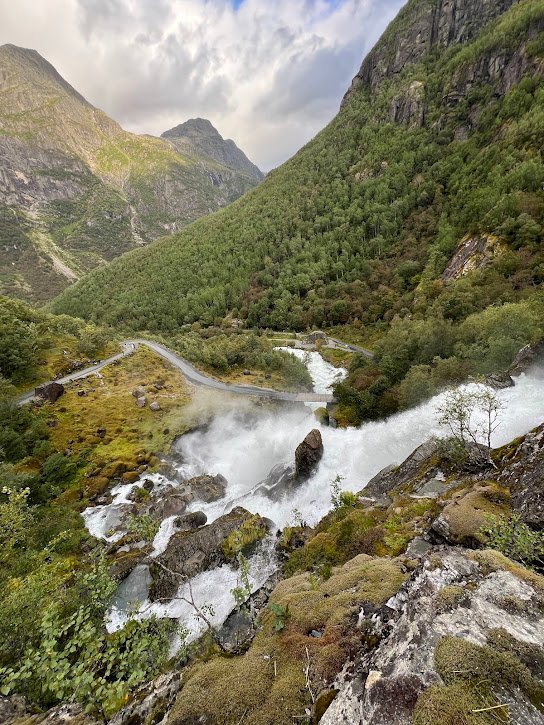

We chose to begin our day with a hike, attempting to summit Kattanakken. The first part of the route follows the same nature trail everyone else will be on. Be prepared to get wet crossing the bridge by Kleivafossen Waterfall!
The trail Kattanakken veers off to the right at a marked signpost and the initial path goes up a large set of boulders from which views of the glacier really open up. It was beautiful! As we climbed, we passed too many waterfalls to count. But the trail was SO steep and very wet from overnight rain. As we pressed on, it actually began raining and the air got much colder the higher we climbed. About 1.5 miles up the trail, we reached a spot where we could see other glacier arms in the distance which was really, really cool. But I called it, not wanting to continue on with the slippery rock. From that point the trail had more climbing up a ridge and even more than going up, I wasn’t comfortable getting down safely.
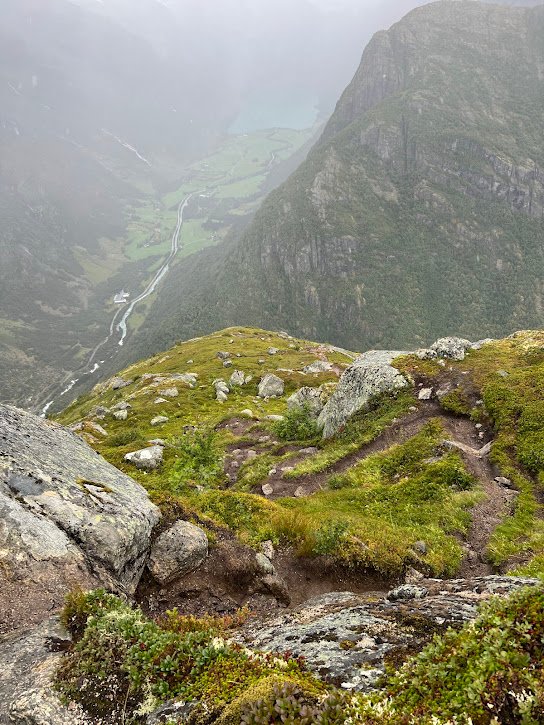

While disappointing, it was the right decision and we were happy to have even done a part of the hike for the views it afforded us high above the valley. On the way down we even saw a rainbow.
We completed the trek to the glacial lake and then back to our car coming in at 6.25 miles total and 3,160 feet of elevation gain in just under 6 hours.
We paid NOK 75 to park for the day and it was about a 45-minute drive to the parking area from where we stayed in Styrn.
Day 11 | Nigardsbreen Glacier
Onward Travel to Sogndalsfjøra
From Styrn or Loen, it should take a little over 2 hours to drive to Sogndalsfjøra. We had really terrible weather, so most of this day for us was spent trying to dodge the rain and relax before we could check in to our Airbnb. If the weather is decent, we think visiting Nigardsbreen Glacier is a good option.
Nigardsbreen Glacier
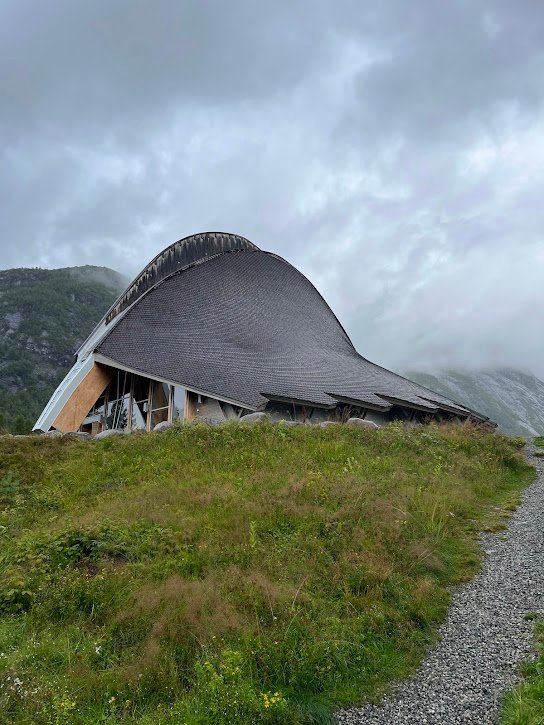
Nigardsbreen Glacier is yet another arm of the Jostedal Glacier, and is also located in Jostedal Glacier National Park. To get to Breheimsenteret (the National Park Visitor Center) near the glacier, you’ll drive through the scenic valley of Jostedalen. It took us about an hour to make this drive from Sogndalsfjøra.
The Visitor Center has a small museum and cafe. From here, you will need to make a short drive to the car park near the glacier. This is along a toll road which costs NOK 90 per car.
Once at the car park you can either hike to the glacier viewpoint or take a boat across which is NOK 75 per adult for a roundtrip ticket, or NOK 50 per adult one-way. Boats run regularly and no reservations are taken.
Where We Stayed | Sogndalsfjøra
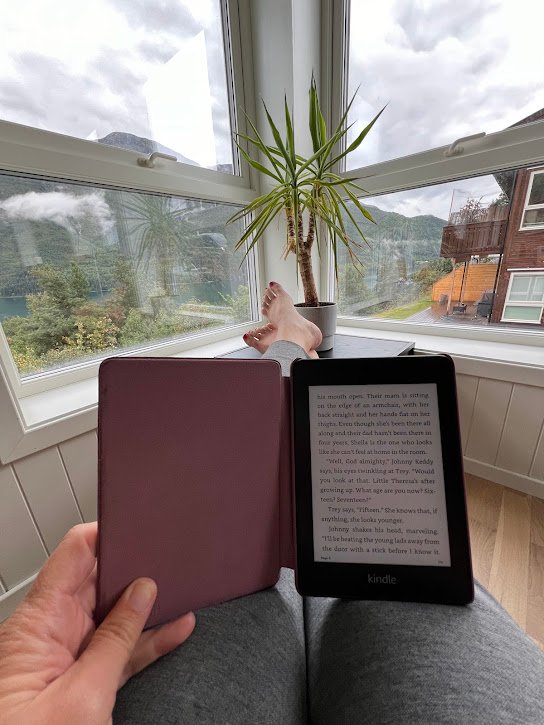
We stayed at an Airbnb property in Kjørnes which is a 10-minute drive from the main part of Sogndalsfjøra. This was our favorite Airbnb of the trip with amazing views of the fjord through its picture windows.
Day 12 | Styggevatnet Kayak & Austdalsbreen Glacier Hike
For one of our last adventures in Norway, we had booked a full day kayaking and glacier hike with Icetroll. Prior to our trip, we had pictured an idyllic day paddling across the lake and sipping hot chocolate on the glacier. Unfortunately for us, we had absolutely terrible weather. It poured the entire trip and we were therefore wet and freezing. Before booking this trip, you should know it really does go on unless there is dangerous weather. If we had a redo, we’d book a shorter excursion that just involves a glacier walk.
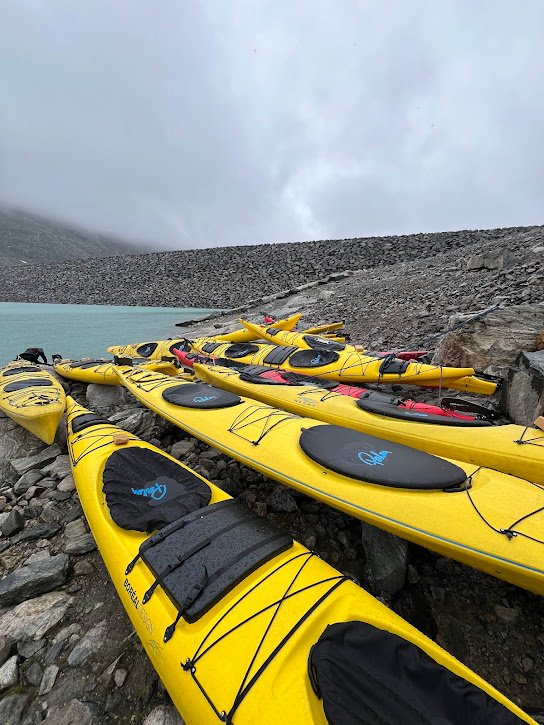
Our day began at Breheimsenteret (the National Park Visitor Center) where we met our guide, signed a waiver, and were told to layer up due to the rain and cold. From the Visitor Center, we all drove individually up to the parking area near Styggevatnet which took about 45 minutes. Styggevatnet is a glacial lake situated nearly 4,000 feet above sea level. It is regularly covered with ice until mid-July, so even in early August it was cold!
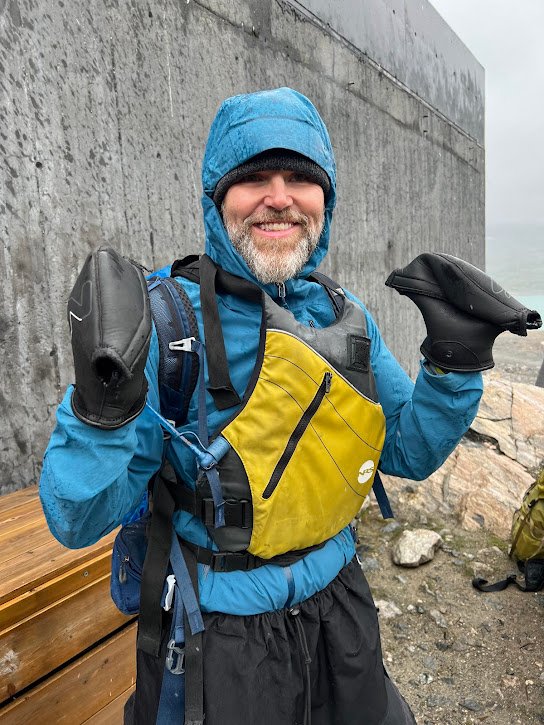
We were outfitted with kayak bibs, life jackets, and neoprene paddle gloves and tried to all get in our tandem kayaks as quickly as possible. This was easier said than done because already we could barely feel our fingers. We didn’t get warmer as we sat down in pools of cold water and paddled for about an hour across the lake, all the time through driving rain.
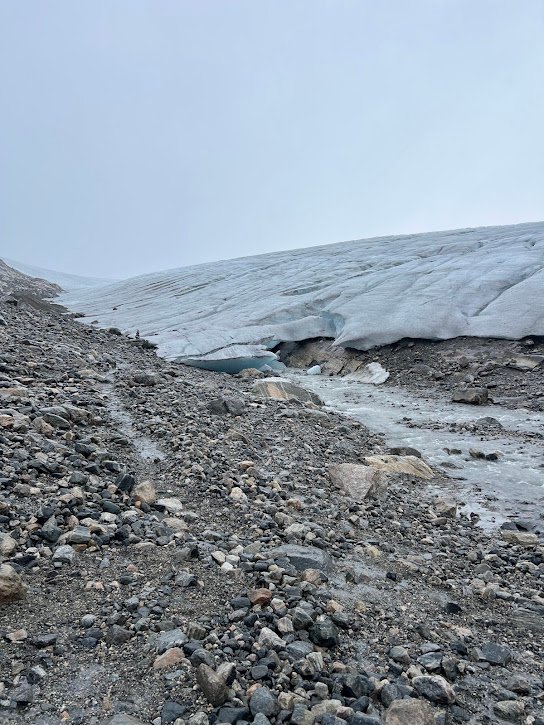
Once on the shore near the glacier, we then needed to put on our crampons in anticipation of hiking on Austdalsbreen Glacier. We’ve been on glacier hikes before, and they are so neat! But on this tour we were so cold our teeth were chattering, so we could barely muster the energy to look in the crevasses our guide was pointing out. Our whole group lasted about 45 minutes before practically begging to get off the ice.
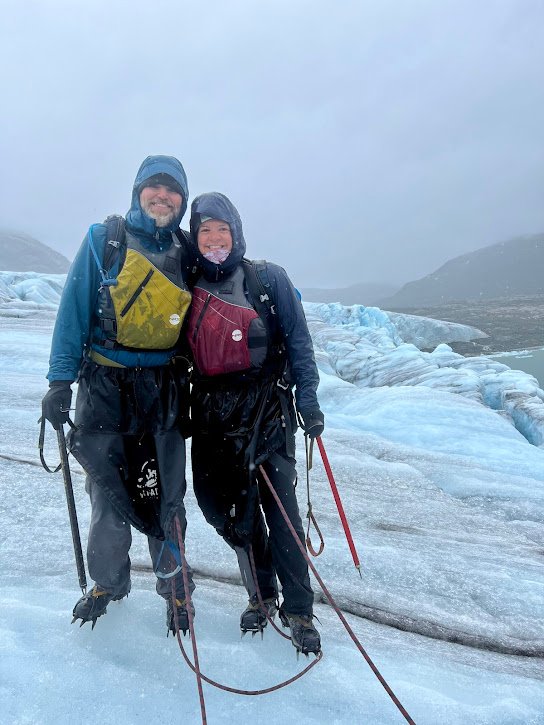
Thank goodness that instead of paddling back across the lake as the tour called for, our guides made the decision to bring over RIBs which would whisk us back in a (very cold and windy) 5-minute ride. While we waited for the boats to arrive, we all stamped our feet and literally danced around to keep warm while we sipped hot chocolate.
Our honest experience is that this excursion was miserable, and we wish the company would have cancelled it given the consistently poor weather. On a beautiful day we can see why it would be amazing. Unless kayaking across a glacial lake is important to you, our recommendation would be to look at one of the excursions on a glacier at a lower altitude, or perhaps the motorboat tour instead. We booked our tour in advance of coming to Norway and paid NOK 1,900 per person.
Day 13 | Molden Hike & Sogndal Fjord Cruise
Molden Hike
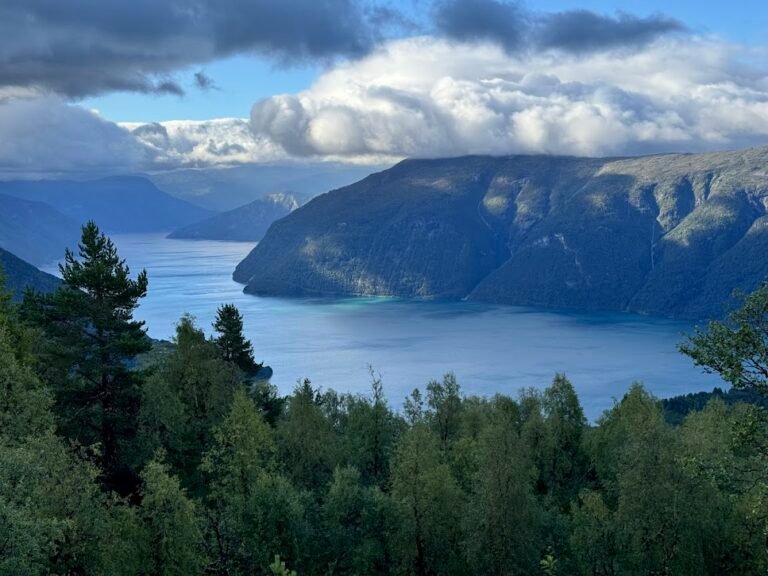
The hike to the top of Molden has one of the best views of Lustrafjord and Sognefjord below. It is a popular day hike, but no other cars were parked in the parking lot when we arrived at 8am on a Sunday morning.
The past few days of rain had blown out and we were treated to beautiful blue skies as we climbed the trail through the forest and then out into the open. Compared to the other trails in Norway, this hike was so well-graded and maintained. It was a nice, steady incline the whole way up with many boardwalk-style planks to help avoid mud.

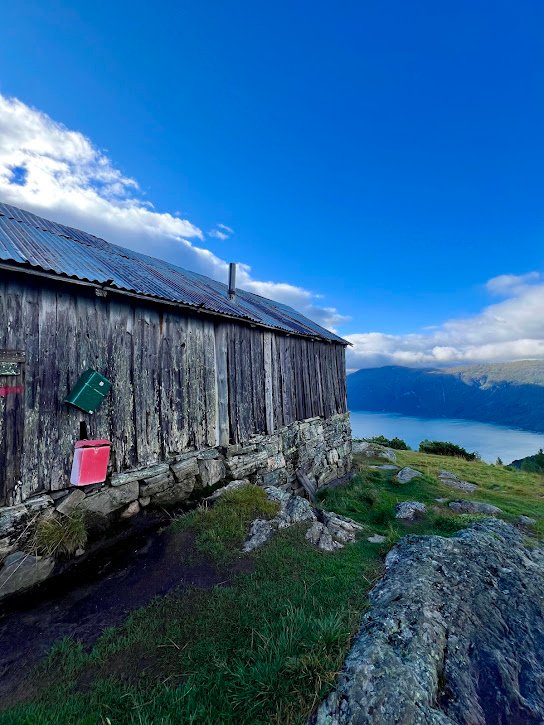
Once we reached the alpine hut, Svarthillerthe, views really opened up and we could see far below. It remained that way for the rest of the hike as we climbed up a rock crag to the cairn that marked the summit of Molden 3,660 feet above sea level.
The hike clocked in for us at 5.3 miles with just under 2,000 of elevation gain, taking us 3 hours. While we saw no one else in the morning, it was a parade of people going up when we came down, so get there a bit early for some solitude!

Need to Know
- Fees: No fee for trail use.
- Parking: There is a large, free parking lot at the trailhead. There are also free public toilets at the trailhead. It took us about 25 minutes to drive to the trailhead from where we were staying in Kjørnes.
Historic Viking Battle Cruise
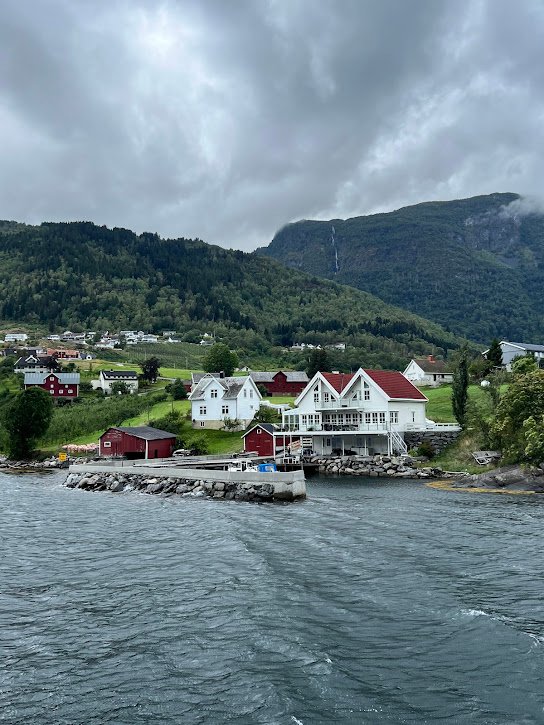
We took an afternoon fjord cruise with Fjord X designed to cover the history of a 12th Century Viking battle, and in recent times a submarine hunt that took place during the Cold War.
The roundtrip cruise from Sogndal to Fimreite took about 1 hour and 45 minutes. We enjoyed being out on the water one last time and seeing this “new to us” fjord. The boat itself was clean and comfortable and there were only a dozen people onboard. Our guide had interesting facts to share, but was at times hard to hear. The company offers other cruises such as a shorter evening cruise, or one that stops at a cider farm.

Need to Know
- Tickets: We purchased our tickets online ahead of time for NOK 475 per adult. In hindsight, the boat was not at all crowded so we could have just shown up and purchased tickets on the spot.
- Parking: There is plentiful parking in the shopping area just up the street from the boat dock. While it is generally payable at the automated kiosk in the lot, when we visited on a Sunday, parking was free all day.
- Pro tip!: Just next to the boat dock was a lovely bar and cafe called Dampskipskaien. We had cappuccinos and shared a slice of carrot cake before our cruise departed at 1pm.
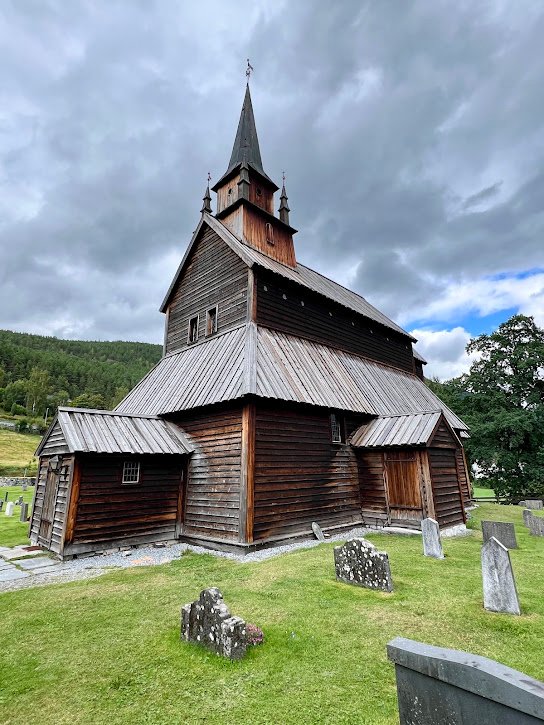
Kaupanger Stave Church
Throughout Norway there are many types of stave churches which have corner-posts (“staves”) and a framework of timber with wall planks known as stave walls. The wood building techniques and wood carving traditions of the Vikings often incorporate animals and dragons and are so unique.
To round out our day, we made a quick visit to the grounds of the Kaupanger Stave Church in Sogndal. This church dates back to the 12th Century and is quite beautiful.
Day 14 | Onward Travel
Today it’s time to leave the magic of Norway behind and make your way back to the Bergen Airport. From Sogndalsfjøra the drive should take about 4 hours and will include another ferry ride, likely on the Hella-Vangsnes route.
Along the way, we recommend stopping at the Hopperstad Stave Church in Vikøyri. This church dates back to the 12th Century and was restored in the 1880s. Hopperstad Stave Church is the only church where the original narrow chancel opening is preserved. It is open at 10am daily and this is one church you can actually enter. We paid NOK 110 per adult and received a very informative 15-minute tour once inside. This is definitely worth a stop!
To cap off your trip, the route should take you along the road Rv13. Just north of Myrkdalen, near where this trip started, there is an amazing hairpin turn road. We thought of it like a mini-Trollstigen and couldn’t believe our eyes as we descended right next to a waterfall.
And that’s a wrap! If you’re anything like us, you’ll start researching your next trip back to explore more of Norway at the Bergen Airport.

