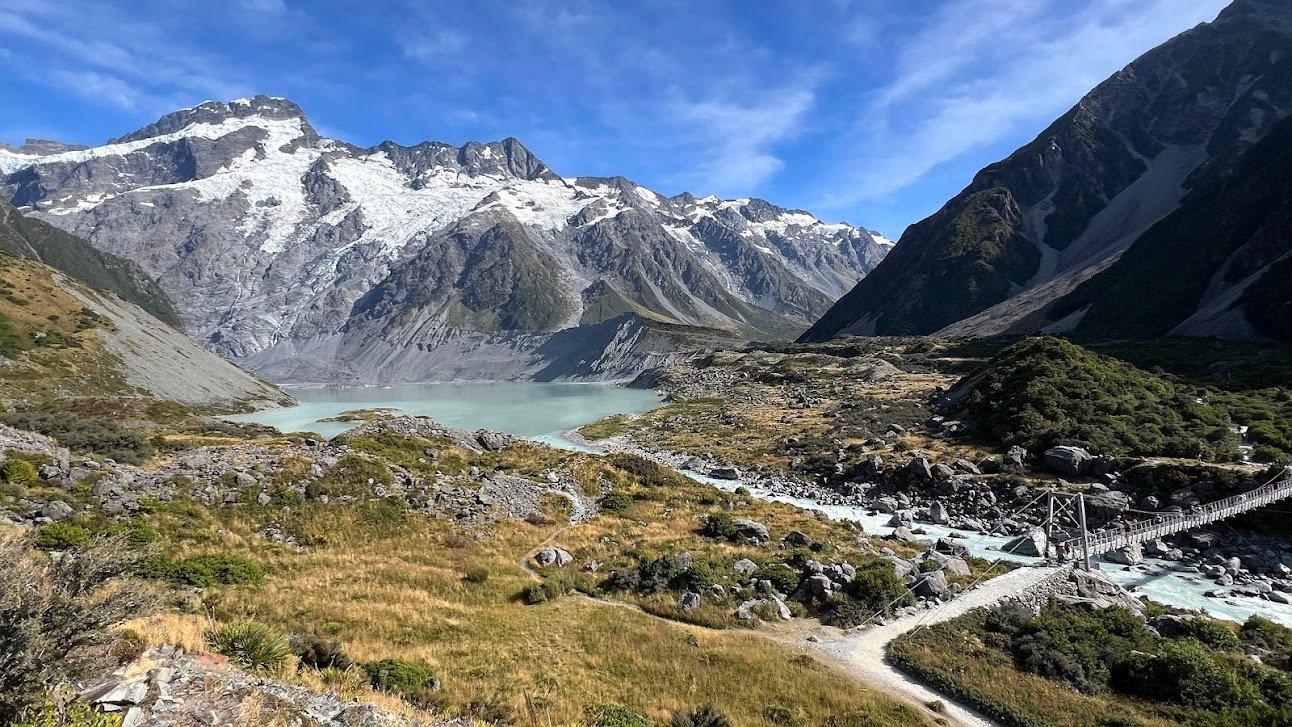
Home to incredible mountain ranges, dazzling lakes and fjords, and more adventures than you can shake a stick at, the South Island of New Zealand is worthy of at least two weeks of your time.
After having first visited New Zealand’s North and South Islands nearly 15 years ago, we ventured back to devote a full trip to the South Island to see if it still lived up to the hype. Spoiler: it did, and then some. This time, we did some serious exploring by foot on trail, but sprinkled in plenty of thrilling adventures like bungy jumping and jet boating.
Let us help get your adrenaline pumping with this itinerary based on our own two-week trip to New Zealand at the height of summer in February!
New Zealand Map
Below is a map of our trip including points of interest, activities, and restaurants. It also provides an overview of the driving you’ll do between towns. Toggle the sidebar for details.
Trip Overview & Tips
This trip begins in Queenstown and ends in Christchurch and assumes you’ll be renting a car to make the most of your two weeks on the South Island. We found rental cars to be plentiful and relatively inexpensive, even with the additional one-way rental fee for dropping off in a different location than we picked up. We used Budget and had a very good experience in an almost-new rental car.
- Queenstown | Days 1-4
- Te Anau | Days 5-7
- Wānaka | Days 8-11
- Mount Cook | Days 12-13
- Christchurch | Day 14
Entry Requirements
Luckily, the application process is very quick and easy. We downloaded the official government NZeTA app to one phone and used it to submit the required application information and photos. Our requests were processed within hours, though it can take up to 72 hours, so make sure to apply well in advance of your flight. The NZeTA is valid for two years from issuance and costs NZD 17.
2. You will need to pay the International Visitor Conservation and Tourism Levy (IVL). This NZD 100 fee is levied on all visitors and paid as part of your NZeTA application process.
3. Complete a New Zealand Traveller Declaration (NZTD). This is free and equivalent to the old-school paper Passenger Arrival Card. Here too, we downloaded the official NZTD app to complete the short form. Note you can only submit the declaration up to 24 hours prior to starting your journey to New Zealand.
For the most current immigration information, visit New Zealand’s official government website.
Arrival
Upon arrival you will need to go through immigration. Your previously submitted NZeTA and NZTD are tied to your passport, so there should be no need to show any documentation to immigration officers.
After picking up our bags, we then went through a biosecurity pre-screening where we spoke with an officer. Here we declared the previously-worn/used gear we were bringing into the country (e.g., our hiking boots, backpacks, etc.). Based on our conversation, we were given a “yellow card” which, along with our belongings, went through the actual biosecurity screen in the form of an advanced X-ray machine designed to ferret out harmful pests. Once in the clear, we were free to exit the arrivals hall.
Car Rental
Our car rental experience at Budget was wonderful. The rental counter was right in the terminal and the cars were located in a lot just outside the airport doors. Easy breezy. Just don’t forget to drive on the left side of the road!
Money
For the first time in all our travels, we never once used cash in New Zealand. We were able to pay with credit card for every single expense. We never visited an ATM or currency exchange in the country. This is such an anomaly in travel, we wanted to note it here.
Day 1 | Queenstown: Arrival & Settle In
By the time we made it through customs and picked up our rental car, it was late afternoon.
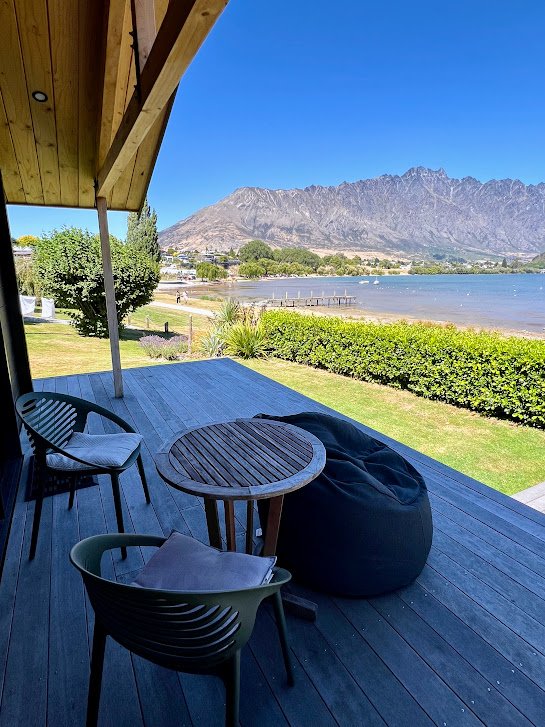
We used the rest of the day to get acclimated at our Airbnb, pick up groceries (we loved the Queenstown PAK’nSAVE), and enjoy a well-deserved beer by the lake. Check out the amazing view from our rental on the shores of Lake Wakatipu!
Where We Stayed
Our Airbnb was right on the shores of Lake Wakatipu in the Frankton Arm. While we couldn’t walk into the main part of town, we preferred this quiet and picturesque location.
Where We Ate
Most of the time on long road trips we cook as many meals at home as possible as a cost saving measure. For that reason, you won’t find a ton of restaurant recommendations here but we do have a few in Queenstown.
We had an amazing celebratory dinner at Botswana Butchery to kick off the last leg of a long trip throughout Asia and New Zealand. Meat is the star of the show here and we thoroughly enjoyed dishes like deviled duck livers, steak, and duck fat potatoes.
Fergburger is a well-known Queenstown institution famous for their giant burgers. We had them the first time we visited and they were undeniably delicious. But now getting one of these burgers often requires either an hour-long wait or ordering ahead and still waiting an hour. They are definitely worth checking out! For us, however, it was easier to walk to Altitude Brewing, located right on the Frankton Arm Walk. Here we had amazing craft beers and equally amazing burgers and fries from their onsite food truck.
Day 2 | Queenstown: Shotover Jet & Moke Lake Hike
Shotover Jet
For the perfect thrilling adventure to kick off your time in New Zealand, we highly recommend a jet boat ride. During this excursion you are strapped into a jet boat while a (very professionally trained) expert driver pilots you along the glacial-blue Shotover River and through the surrounding Shotover Canyons. These custom boats boast two V8 engines along with jet units that use the water to propel and steer the boat.
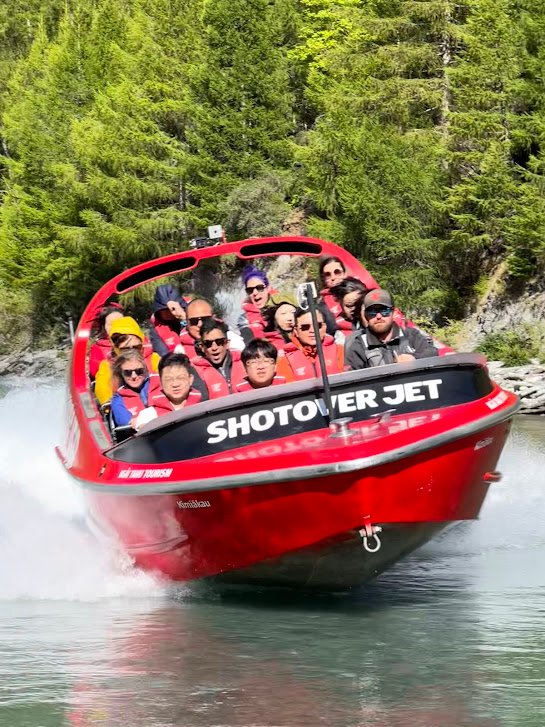
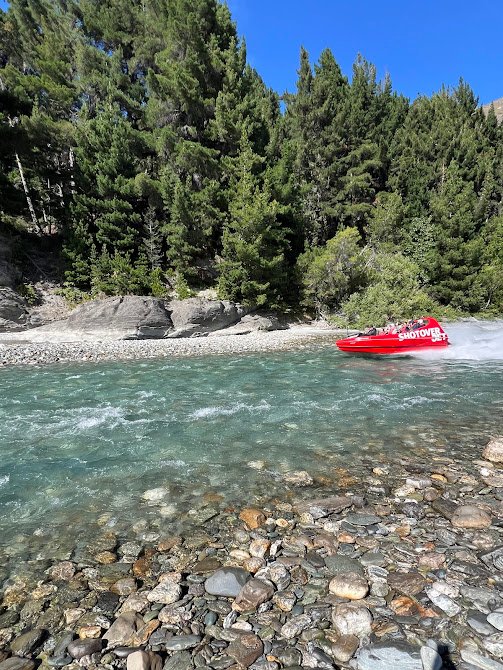
Did we mention speeds top out at 55mph and there are MANY 360-degree spins involved? To the untrained eye, you come impossibly close to the canyon walls and skim over rocks and sand you’re sure you’ll get stuck on. This trip had our hearts pounding for the entire 25-minute ride, but we were also laughing and got off the boat with smiles plastered on our faces at how ridiculously fun it was. Check out our video below for a first-person POV on the ride!
Need to Know
- Tours: Jet boat rides are 25 minutes in duration and booking a time slot in advance is highly recommended. When we visited most times each day were completely sold out. Reserve a spot on the Shotover Jet website.
- Directions: The Shotover Jet beach is located a 10-minute away from downtown Queenstown. There is free parking onsite, but if you need a ride there is a complimentary shuttle you can book during the online ticketing process.
- The ride: When it is time to board the boat, you have the opportunity to store any loose items in free lockers on the beach. The boat ride is wild and we highly recommend leaving behind all keys, wallets, cell phones, etc. We also recommend dressing warmly (it’s chilly on the water no matter the season) and prepare to get a little wet from the spray and splashes during all your turns.
- Memories: We filmed our jet boat ride using a GoPro on a head strap. Shotover Jet also has video cameras mounted to each boat and onsite photographers. If you’d like to purchase their media after the ride, you can do so in the gift shop.
Moke Lake Loop Hike
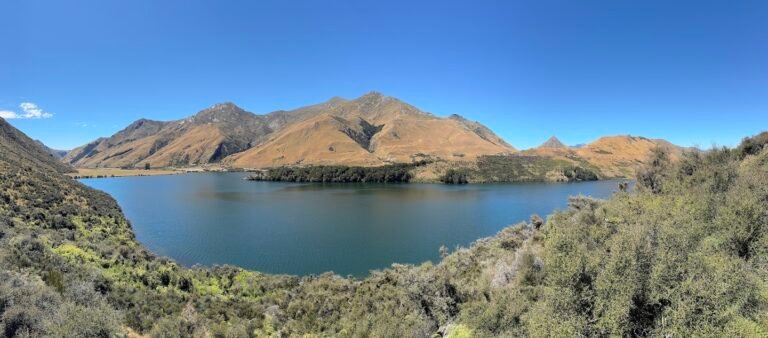
A lovely introductory hike near to Queenstown, the Moke Lake Reserve is home to an easy 4.3-mile loop hike. The track has beautiful views of the lake, mountains, and surrounding grasslands. Near the southern end of the lake the trail goes over a short boardwalk designed to protect the wetland below. Even though it was a gorgeous day, we saw hardly any other hikers over the course of the 1.5 hours it took us to make our way around the lake.
Need to Know
- Fees: No fee for trail use.
- Parking: There is ample free parking near the trailhead at the northern end of the lake. Access to the lake is on a paved road that turns into a crushed gravel road, easily accessible in any vehicle.
- Info & Current Status: New Zealand’s Department of Conservation has a webpage dedicated to nearly every hike. It’s a good idea to check for current conditions, closures, and other important information. Here is the link for the Moke Lake Track.
Day 3 | Queenstown: Ben Lomond Hike
Ben Lomond Hike
The hike to the summit of Ben Lomond will take most of the day and involve nearly 5,000 feet of vertical climbing, but trust us, the views are worth it.
We began our hike early in the morning to avoid the heat of the day, first tackling the Tiki Trail which climbs very steeply through the woods. This trail passes by the top of the Skyline Queenstown, the upper terminus of a gondola and home to a luge track.
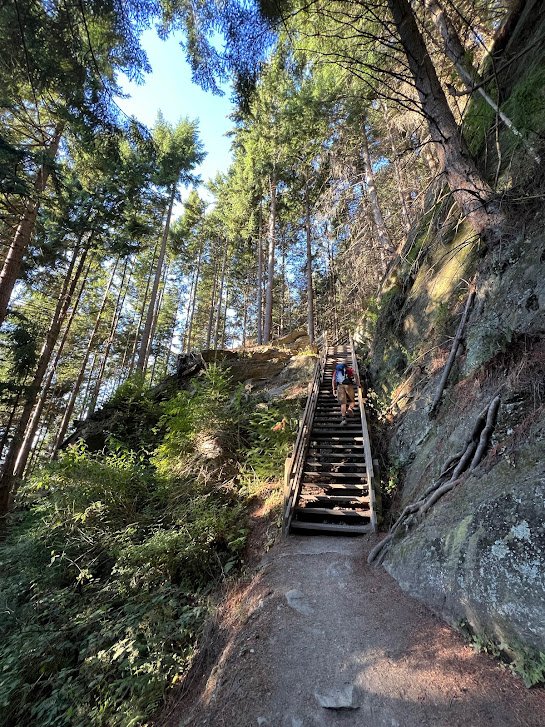
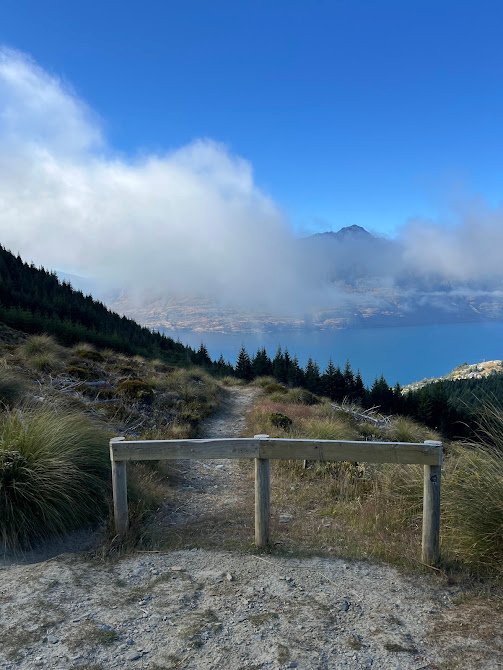
At this point, the entire trail is above the tree line and we already had fantastic views of Queenstown below. Although the trail got harder and harder, the views got better and better. Worthy of a hike by itself, the Ben Lomond Saddle had excellent panoramic views.
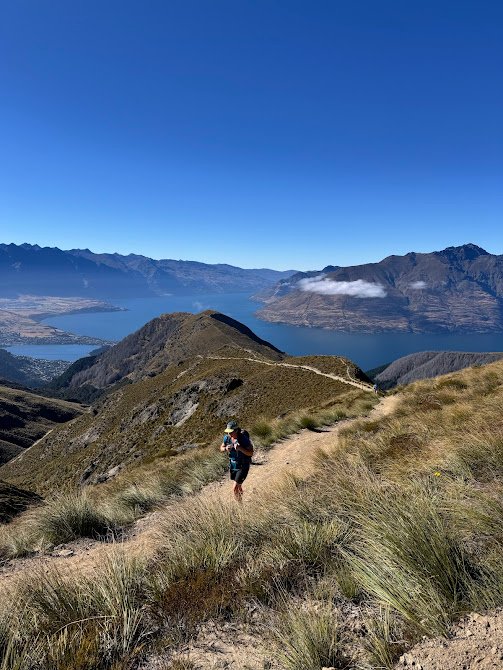

After the saddle, there is still 1,300 feet of elevation gain! We had to dig deep for the summit push as the terrain became even more rocky, uneven, and steep. The views at the top, standing at 5,700 feet in elevation, were mind-blowing. The town and lake were far below and we surrounded by incredible mountain ranges near and far.
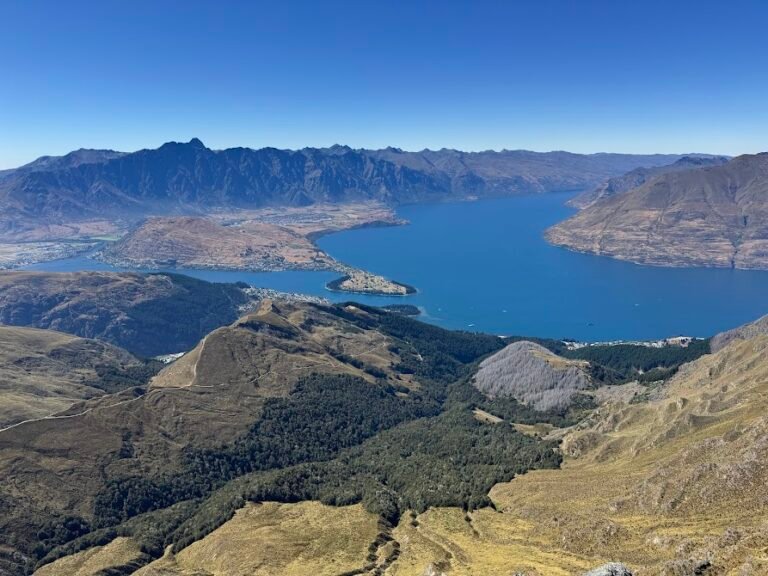
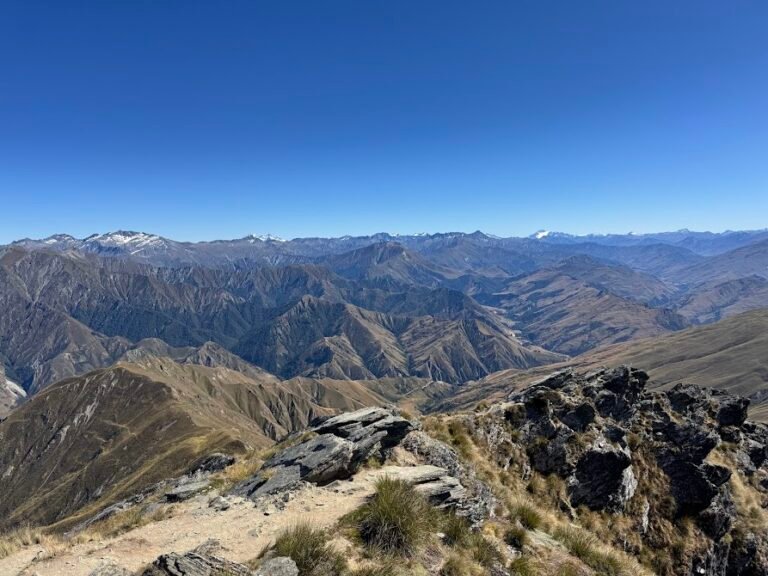
Enjoying a nice long rest at the summit, we made our way back down the path. Our stats for this hike came in at 10.7 miles total over 6.5 hours.
Need to Know
- Fees: No fee for trail use.
- Parking: There may be free street parking available near the trailhead. We could not find any, however, so we parked in a paid lot near the gondola. Note: We found the official Skyline Queenstown parking garage pricing to be very expensive (NZD 6/hr) so we avoided using it.
- Gondola: To shave off some of this trail’s ascent, you could make use of the Skyline Gondola. Just know that it is fairly expensive (NZD 66/adult roundtrip) and does not begin running until 9:30am, meaning you’ll be hiking uphill in the hottest part of the day.
- Info & Current Status: New Zealand’s Department of Conservation has a webpage dedicated to nearly every hike. It’s a good idea to check for current conditions, closures, and other important information. Here is the link for the Ben Lomond Track.
Explore Queenstown
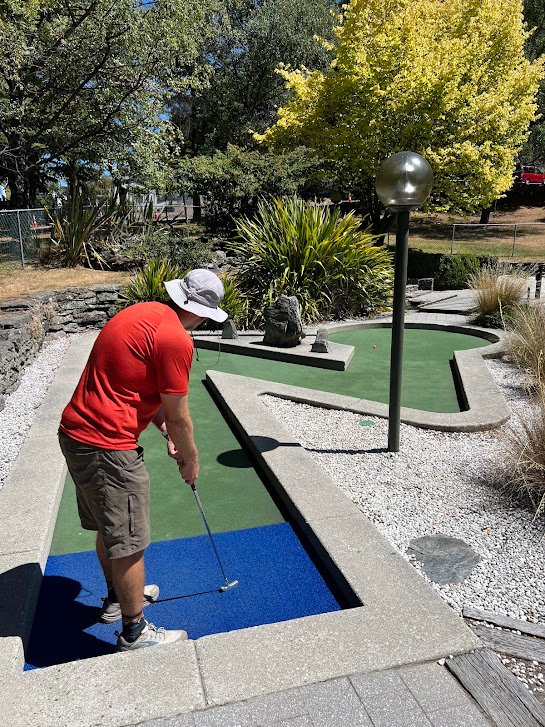
In the shadow of the Skyline Gondola lies the 18-hole Queenstown Mini Golf. The course was very well-manicured and maintained and fun. Since we headed there right from the trail, the incredibly kind clerk even offered to store our backpacks for us while we played!

Craving something cold and refreshing, just across the street we stumbled upon Anita Gelato. The flavors we had were outrageous: coconut, salted chocolate pretzel, tiramisu, and banana cookie. Yum!
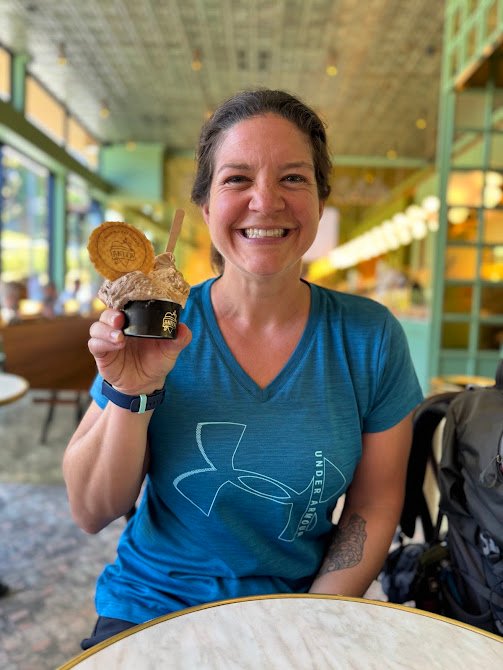
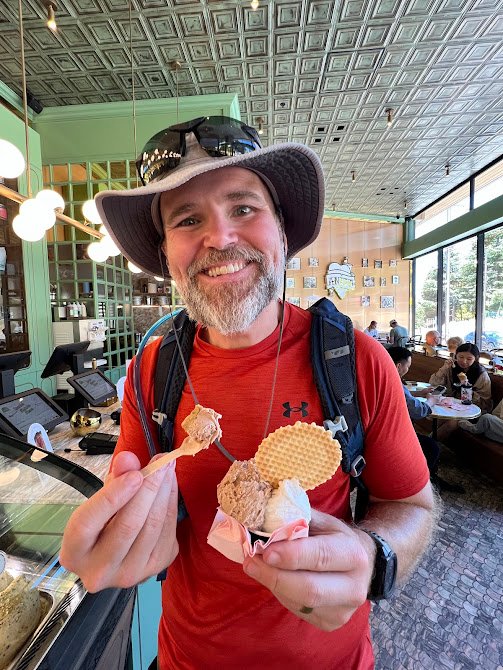
There is a lot more to explore in Queenstown whether it be foodie hot spots or quirky shops. We recommend exploring downtown on foot to wind down in the late afternoon.
Day 4 | Queenstown: Routeburn Track Hike
The Routeburn Track is a 20.5-mile point-to-point trek through stunning scenery within the Mount Aspiring and Fiordland National Parks. Most people take 2-4 days to complete the entire trek, stopping overnight in the managed mountain huts along the trail.
Not wanting to deal with the logistics of backpacking, we tackled most of the route in two separate day hikes. Our first planned day hike was a monster, clocking in at 18.1 miles and 4,900 feet of elevation gain over the course of 9.5 hours.
The hike can be completed in either direction, but for the shortest drive to the trailhead coming from Queenstown, parking at the Routeburn Shelter is easiest. The path began as a wide, level gravel trail along a gorge with crystal clear water coursing along. The trail then changed to more forest scenery and began to climb more steeply. We also crossed numerous swing bridges.
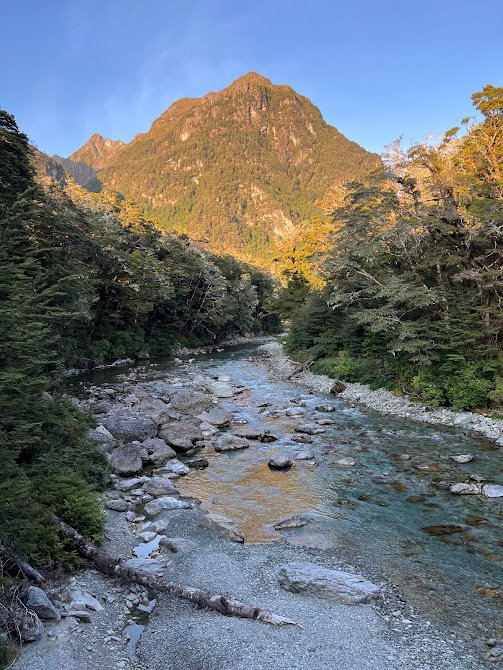
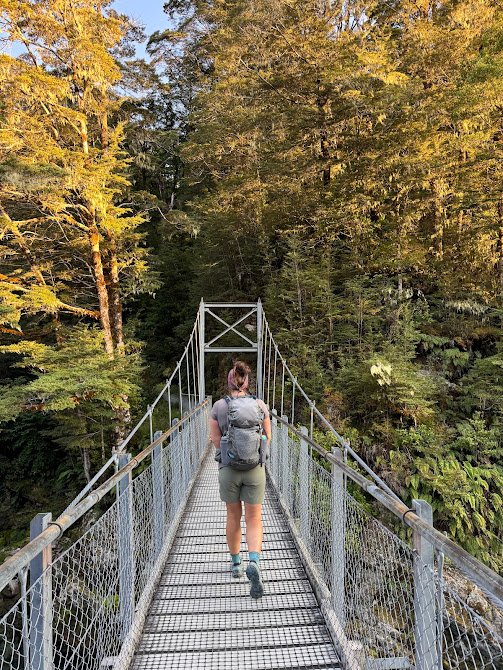
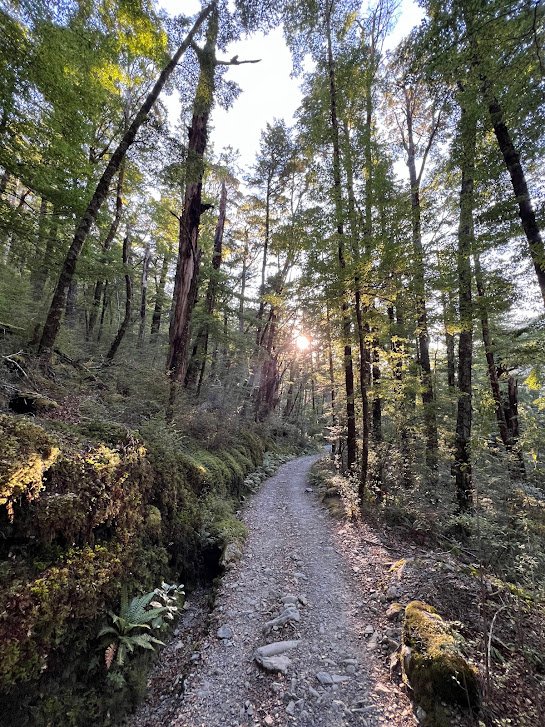
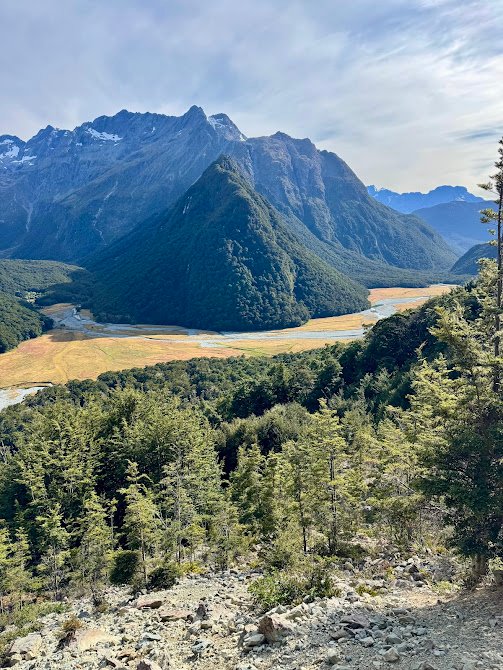
6 miles into the hike we hit the Routeburn Falls Hut. Here is a good spot to take a quick break and use the bathroom, if needed. Shortly after passing the hut, we passed the gorgeous cascades of Routeburn Falls.
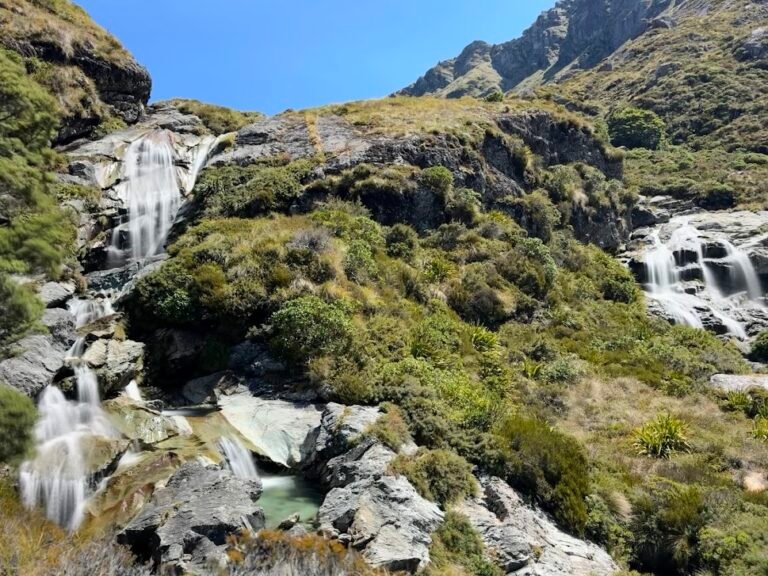
From this point, the vistas dramatically changed with wide open views as we hiked up and through the valley and across grasslands. Lake Harris was below and SO blue. If you are only completing this hike one way, be sure to periodically turn around to soak in the views behind you of the Routeburn Valley.
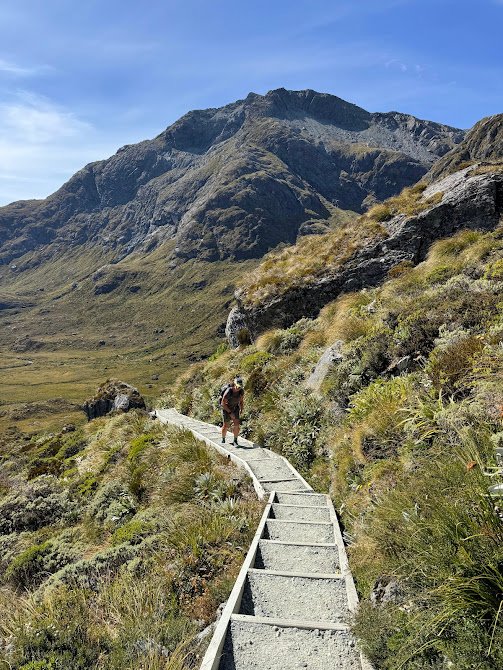
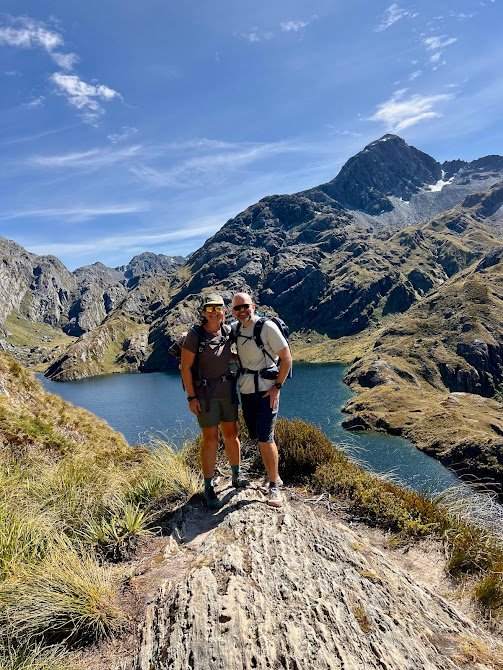
The climb continued to get harder and harder as we approached the Harris Saddle, the highest point along the entire Routeburn Track (4,117 feet). The views are fantastic from this point which straddles the two national parks. There is a small shelter here with a place to rest and bathrooms. It’s a good spot to gather your energy, or perhaps ditch your pack if you want to make the side trip and push further up the nearby Conical Hill.
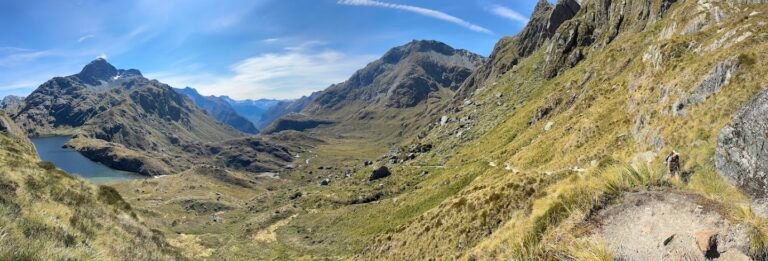
We decided to make the climb up Conical Hill, adding another 850 feet of straight up climbing! It was so hard at this point in the hike and we really had to dig deep, but we made it! The views were unparalleled and we saw massive snow and glacier-covered mountains that were magnificent. It was special because you could not see these below, at the saddle.
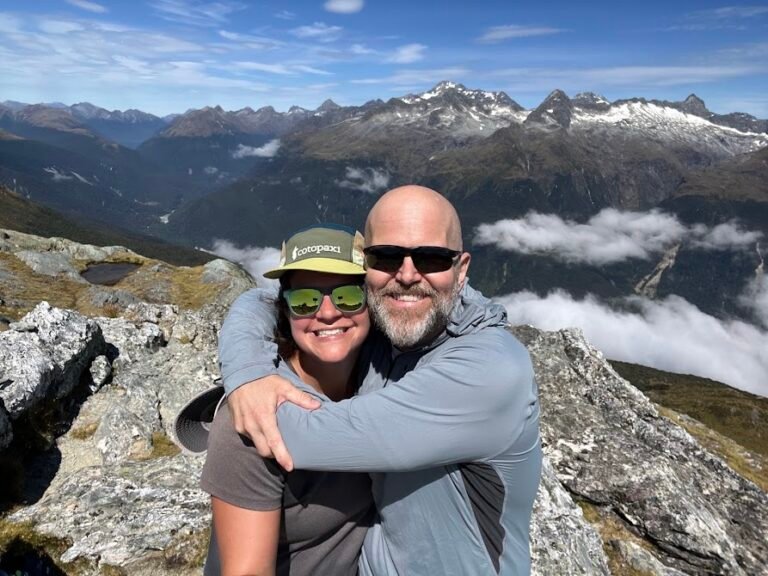
As this was our turnaround point for the day, we slowly and carefully made our way down from Conical Hill and retraced our steps back through the valley enjoying a lot of snacks. This hike made for a very long day, but was 100% worth it and we can’t recommend it enough!
Need to Know
- Fees: No fee for trail use.
- Parking: There is a large, free parking lot at the Routeburn Shelter. If starting the hike from the opposite end of the route, there is also a car park at the Divide Shelter.
- Info & Current Status: New Zealand’s Department of Conservation has a webpage dedicated to nearly every hike. It’s a good idea to check for current conditions, closures, and other important information. Here is the link for the Routeburn Track.
Day 5 | Te Anau: Bungy Jump & Glowworms
Kawarau Bridge Bungy Jump
Bungy jumping was an activity we didn’t get to during our first trip to New Zealand, so it was one we were keen to do this time. The father of commercial bungy was a New Zealand native, AJ Hackett, and the very first location was on Kawarau Bridge. Of course we had to do our first jump here!
We had an absolutely amazing experience with AJ Hackett and would recommend them to anyone. Everyone we interacted was very friendly and professional, and it was obvious safety was the number one priority. While we had the nervous jitters ahead of time, the staff put us at ease.
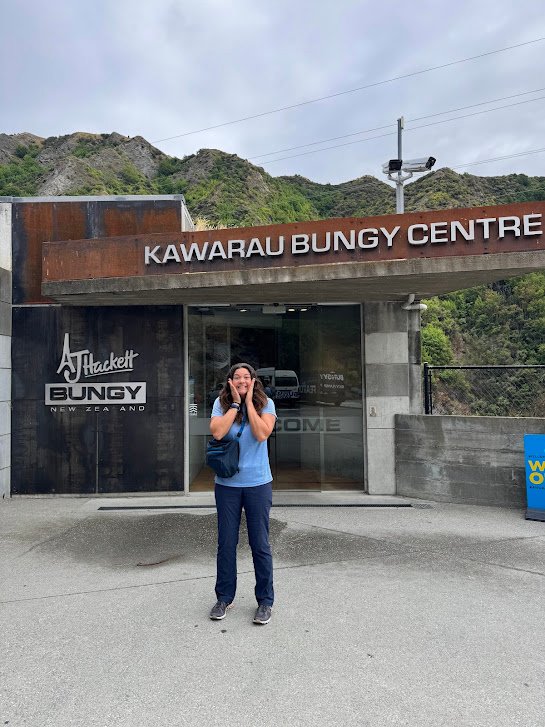
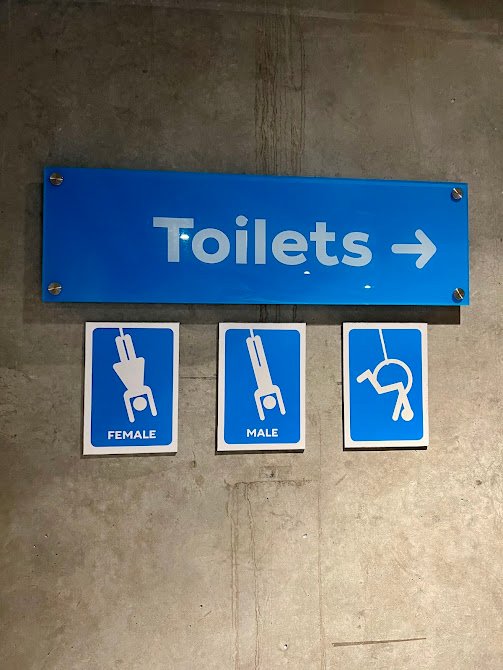
Inside, the bungy center reminded us of a super cool, modern rock climbing gym. There were fun signs everywhere, a Liquid Courage bar, and a live feed of the bridge. There is a really nice outdoor viewing platform at the bungy center which anyone can visit. Even if you’re not up for a bungy, it would be a cool spot to check out and have some fun watching others.
After checking in, we were weighed and our weight was written on our hands in permanent makers. After getting out one last nervous pee, it was time to head to the bridge!
Once at the bridge we were fitted with something similar to a rock climbing harness, then shown out to the jump spot where we were weighed a second time. Our legs were wrapped in what looked like a bath towel (here is where I started to get really nervous) and then we were clipped into all the other safety gear. There were multiple checks of the gear by multiple staff members, and the weight on our hands was checked what felt like a dozen times.
Before I knew it I was being shuffled to the edge and asked if I was ready. Eek!! I took a deep breath to take in the moment (and the scenery) and after a VERY quick 5-4-3-2-1…I jumped into the abyss…
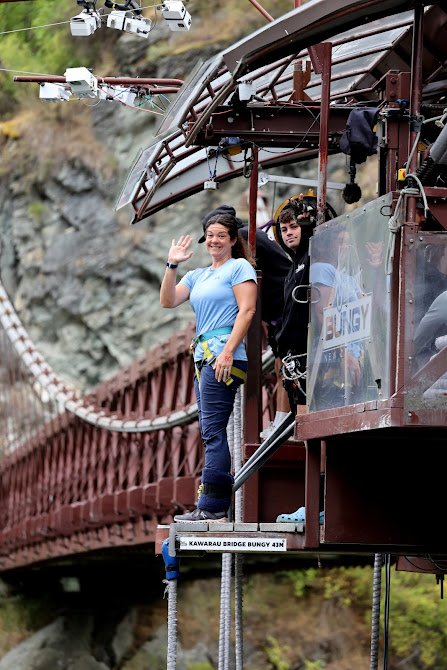
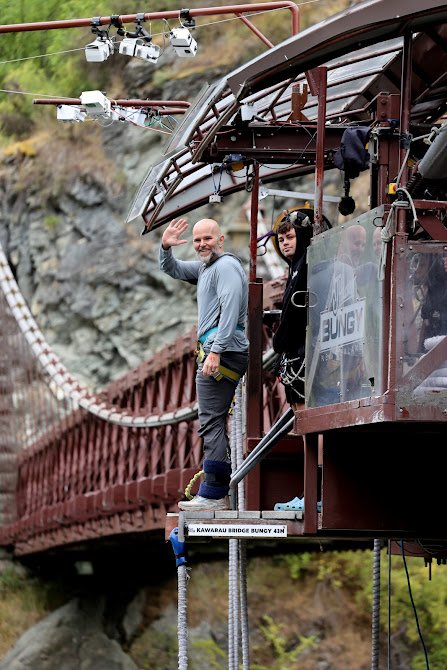
…and absolutely screamed my lungs out much to the delight of all the onlookers.
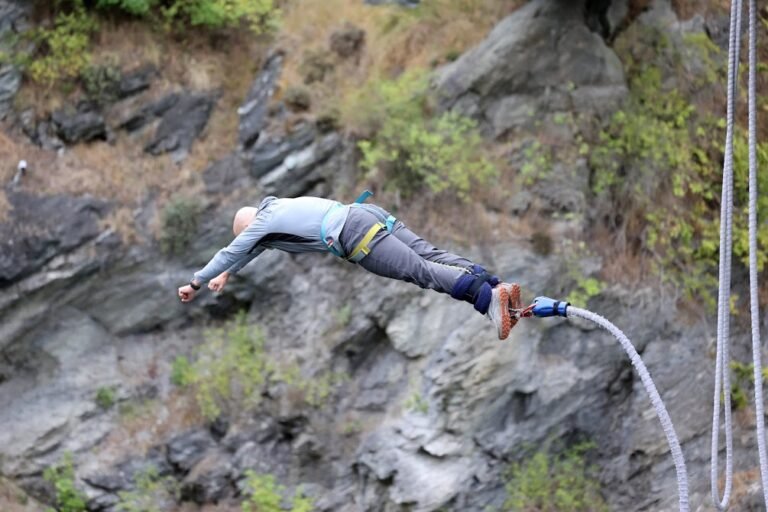
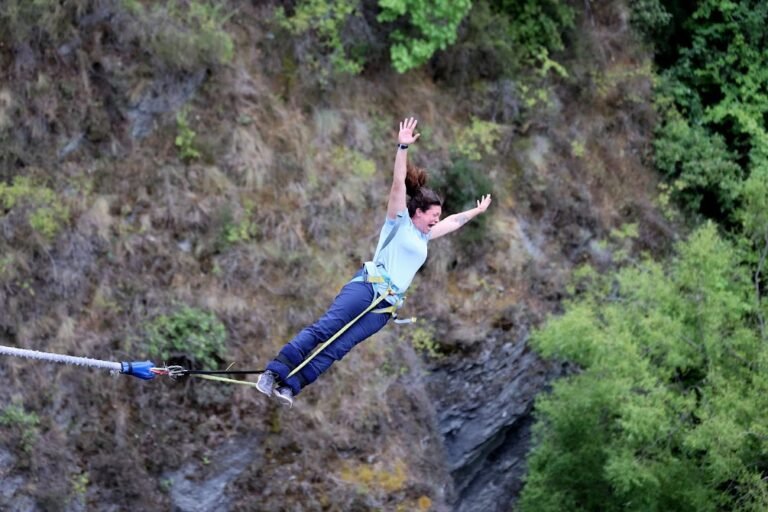
One of the most incredible rushes of my life! Neither of us touched the water, but did come close, and had some major swings before being lowered to the raft waiting in the water below. Once safely in the raft we had our safety gear undone and were put ashore to then climb up the path to the bridge area. I got to watch Mike do his jump and afterward we had a HUGE hug!
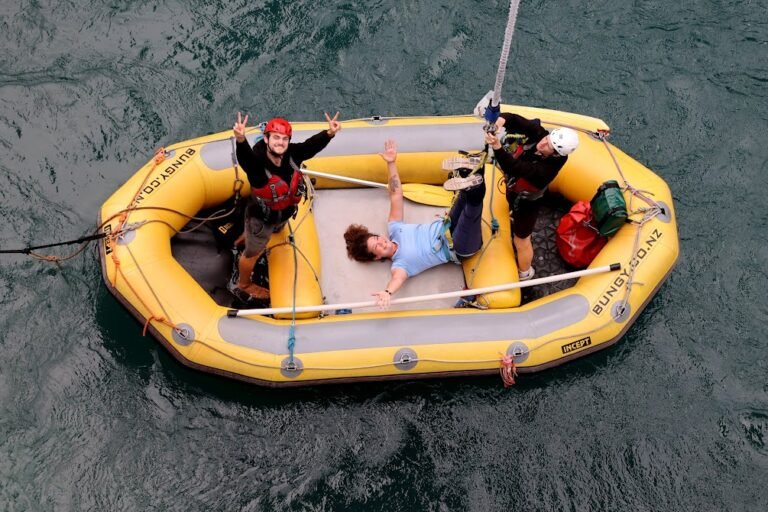
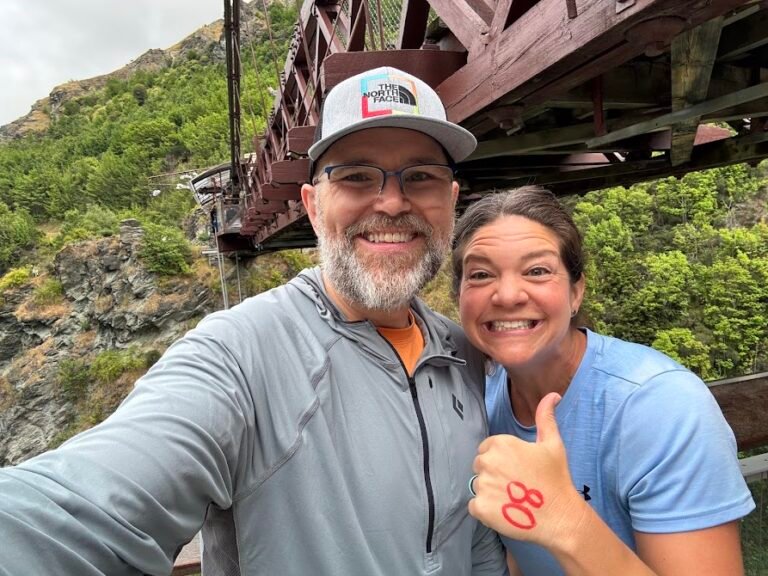
We really appreciated the fact that all media was included in our jump price and that it was super high-quality. There were photographers and automatic cameras positioned throughout the jump site to catch the bungy in photos and video from all angles. Everything was available for viewing and downloading immediately! Check out the videos below.
Need to Know
- Bookings: Bookings are available daily in 15-minute increments on the AJ Hackett website. While we had made advance reservations, when we visited there were plenty of open spots and you could have just walked up.
- Directions: The Bungy Center is located a 25-minute away from downtown Queenstown. There is free parking onsite, but if you need a ride there is a complimentary shuttle you can book during the online ticketing process.
- Inclusions: The bungy package includes a free t-shirt and media pack which is of a professional quality.
Visit Arrowtown
Just 10 minutes from the bungy center (or 20 minutes from Queenstown), lies Arrowtown, a historic gold mining town along the Arrow River. This historic town is worthy of a stroll through to admire its quaint shops and restaurants.
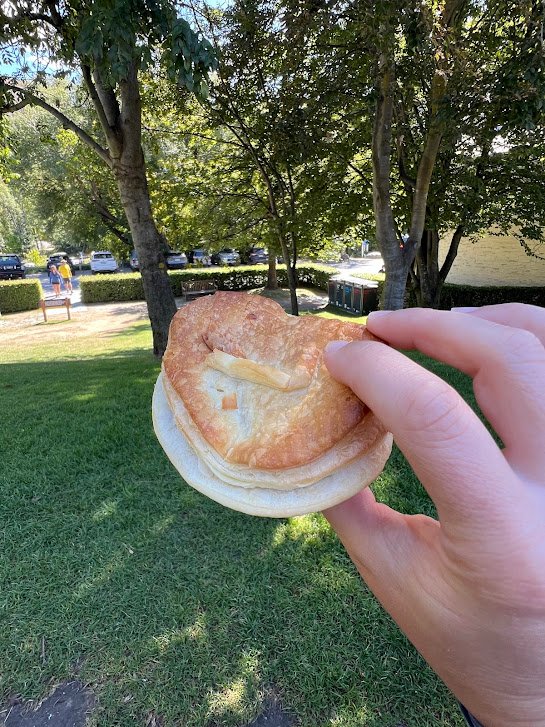
We adore Arrowtown Bakery’s pies and the lamb and mint was just as good as we remembered 15 years later.
We also stopped at Wolf Coffee Roasters, the perfect place to debrief on our bungy jumps over refreshing iced lattes.

Drive to Te Anau
We drove about 2.5 hours to Te Anau, known as the gateway to Fiordland National Park and Milford Sound. This would be our base for the next three nights.
Where We Stayed
We stayed at an Airbnb just a short, 5-minute drive from downtown. Most of our activities departed from the town center where parking was plentiful and free.
Te Anau Glowworm Caves
Glowworms. The name is a bit of a misnomer because they actually aren’t worms at all but rather larvae of fungus gnats, a type of insect. It may sound kind of gross, but the incredible fact is that they are bioluminescent, emitting a green-blue glow from their tails! While this attracts prey so they can have a meal, for us it means they are one of the coolest natural phenomenon to observe.
Glowworms often live in caves and there are several places to visit throughout New Zealand. On our last trip we loved our excursion to the Waitomo Caves on the North Island, so we decided to do an afternoon outing to the Te Anau caves this time.
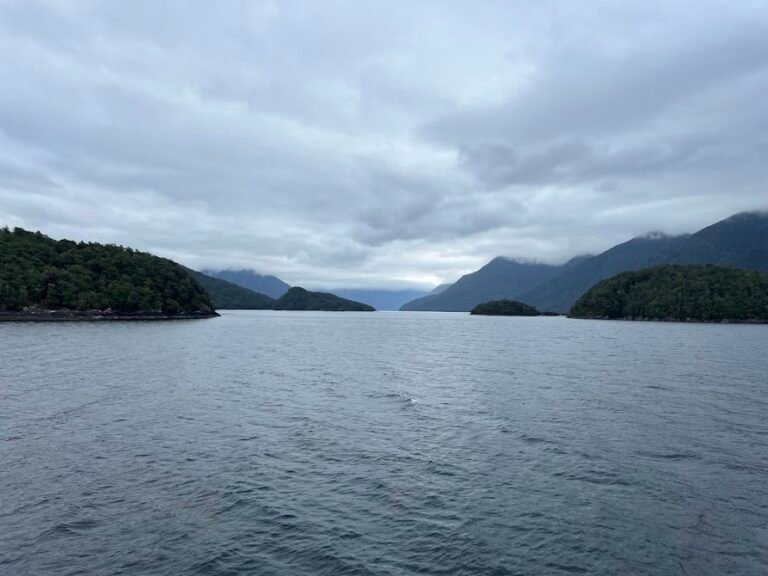
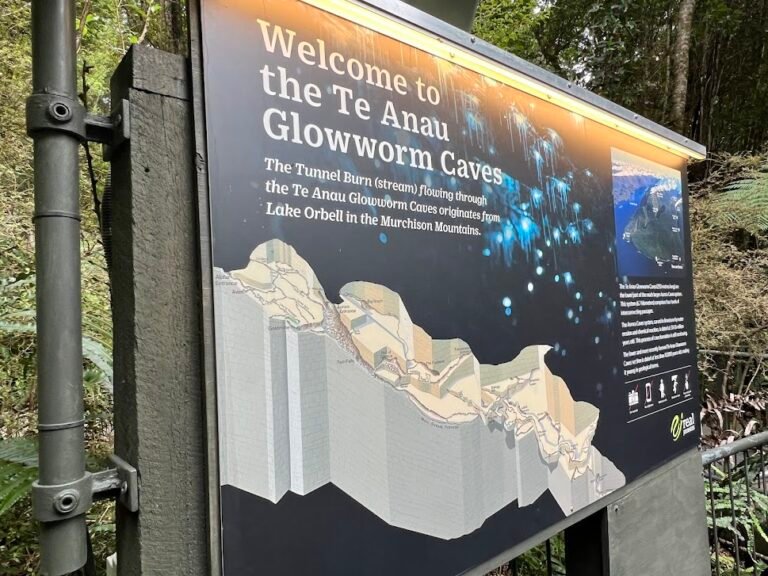
The outing began with a scenic catamaran ride across Lake Te Anau. Once there, participants were broken out into smaller groups and then we ventured into the cave system on a foot path. We could hear the rushing water underground and saw many rock formations carved out of the limestone.
The true highlight was when we boarded a very small hand-rowed boat. We were all asked to be completely silent as we glided through the pitch black in a grotto. As our eyes adjusted, a sparkling canopy of what look like thousands of stars came into focus. The walls and ceiling of the cave were positively teeming with glowworms.
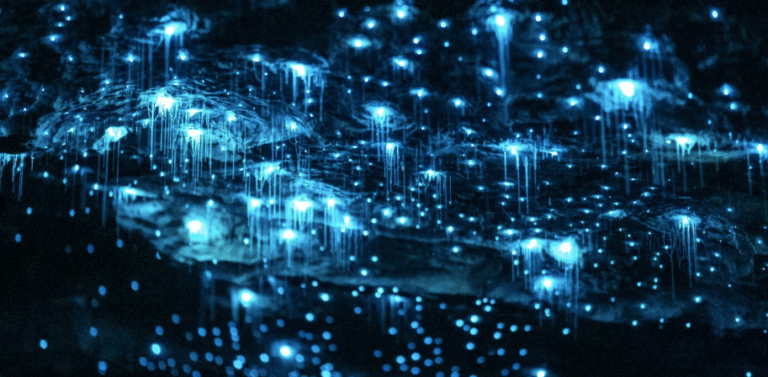
Photo credit: Te Anau Glowworm Caves, RealNZ
We really would describe the experience as magical and wondrous. The entire tour was enhanced by the fact that no photos, videos, phones out, etc. were allowed anywhere in the cave, forcing everyone to just be present. At the end of our cave tour we were invited into the Cavern House where hot drinks were served and we were given a short, informative lecture about glowworms and the cave system. Then we boarded the boat and headed back to town.
Need to Know
- Bookings: Bookings are available daily from morning through evening and can be made on the RealNZ website. We had made advance reservations and were glad we did because many tour times were sold out.
- Tours: The entire tour lasts about 2.5 hours, including the boat ride and time in the caves.
- Directions: Tours depart from the RealNZ Visitor Centre located at 85 Lakefront Drive inTe Anau. We were able to easily find free parking just a short walk away from the Visitor Center along Lakefront Drive.
Day 6 | Te Anau: Milford Sound & Key Summit Hike
Milford Sound Cruise
Milford Sound is one of the crown jewels of New Zealand. A stunning fjord unspoiled by development, it is a place best explored by boat.
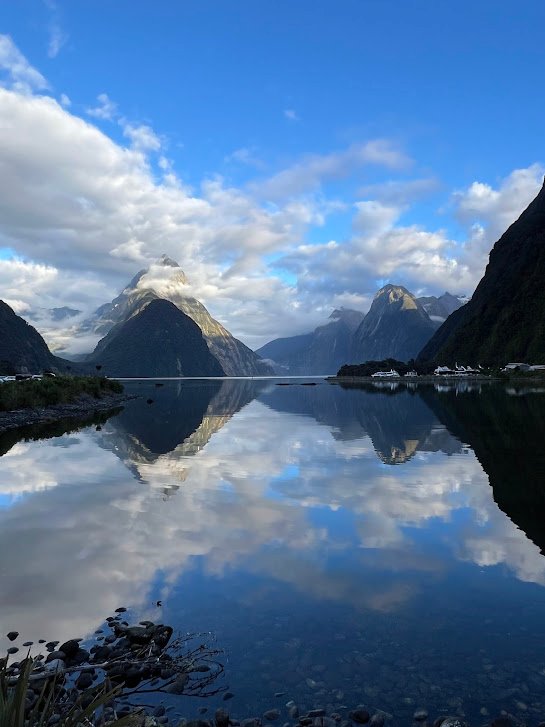
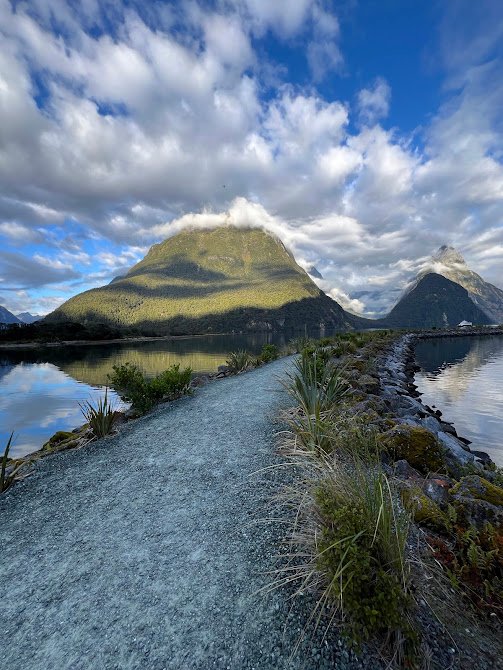
We booked a morning boat trip that departed the dock at 8:45am. It was a 2-hour drive from Te Anau, but a gorgeous one at that along winding roads through Fiordland National Park. We booked a boutique small boat cruise with Cruise Milford and 100% recommend this company and the experience. When it was time to board the boats, we felt like VIPs when only 30 of us got on the boat. Others had literally hundreds of people clamoring to get on. Once on the boat we settled into seats on the top deck and enjoyed the complimentary hot coffee and biscuits on offer.
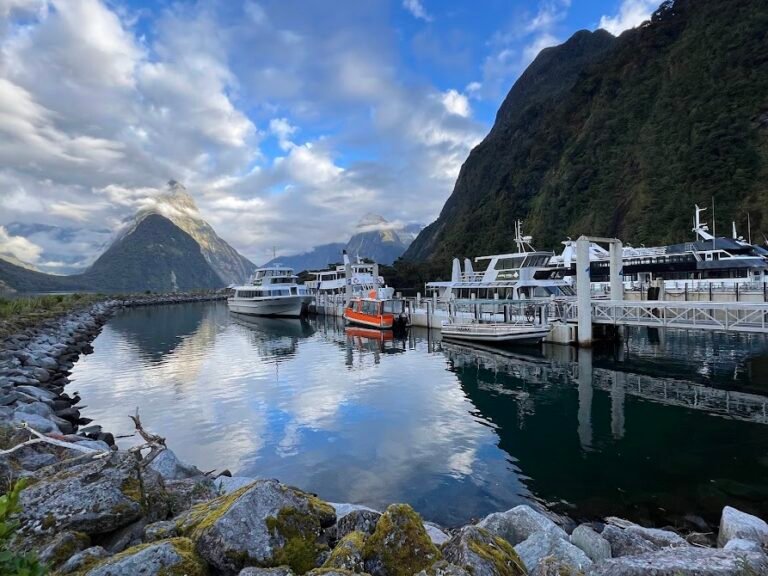
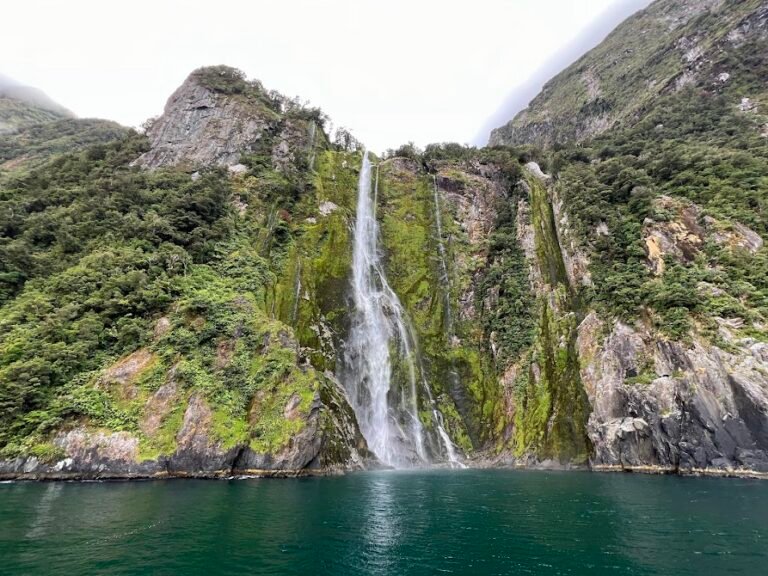
Our boat slowly cruised the length of the sound as our jaw hung open at the surrounding beauty. We saw towering waterfalls, only two of which are permanent (there are many more when it rains), along with wildlife including seals. We felt the scenery rivaled that of the fjord cruise we did in Norway due to just how close we got to the fjord walls.
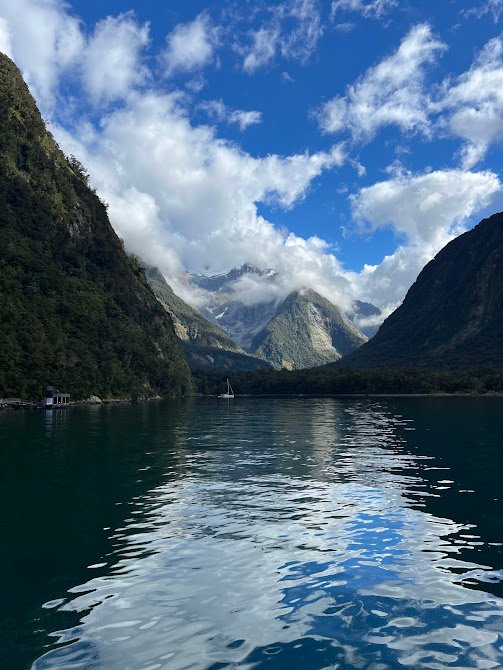
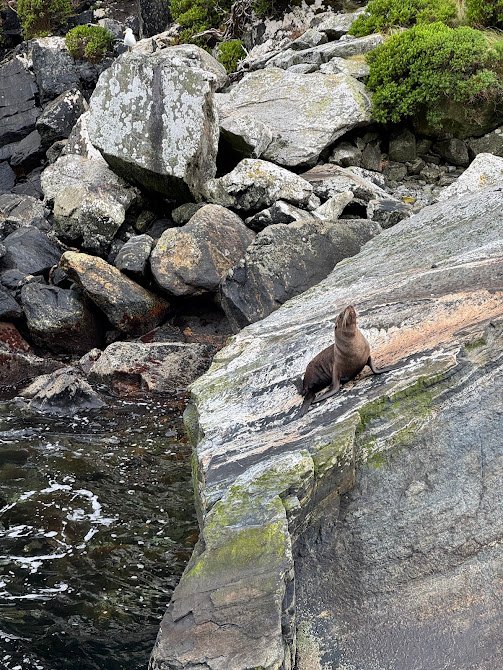
It only took about 40 minutes to reach the mouth of the sound where it met the Tasman Sea. We enjoyed the return trip with the entire excursion clocking in at just under 2 hours.
Need to Know
- Bookings: Bookings are available daily from morning through the afternoon and can be made directly on the Cruise Milford website.
- Tours: The cruise lasted 1 hour and 45 minutes. Dress warmly as it is cold and windy on the water and Milford Sound is one of the wettest places on earth, so it may rain on your trip!
- Directions: Tours depart from the Milford Sound Visitor Terminal. This is a full 2-hour+ drive from Te Anau along a scenic highway. There are many twists and turns in the highway, along with a one-way tunnel near the end. Traffic is managed via a stoplight and on our way to the docks, we had to wait nearly 10 minutes for it to change.
- Parking: There is a large lot a short walk away from the docks. Payment is made at the automated kiosks, in advance, and costs NZD 10/hour.
- Pro tip:Leave plenty of extra time for the drive and to find parking. It can be slow-going if you get stuck at the light or behind a slow-moving vehicle. From the parking area, it is a 10-minute walk to the docks.
Key Summit Hike
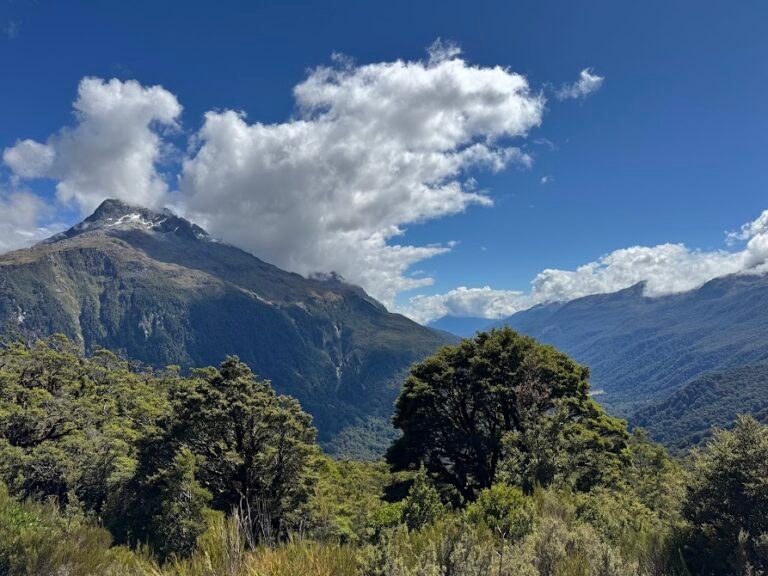
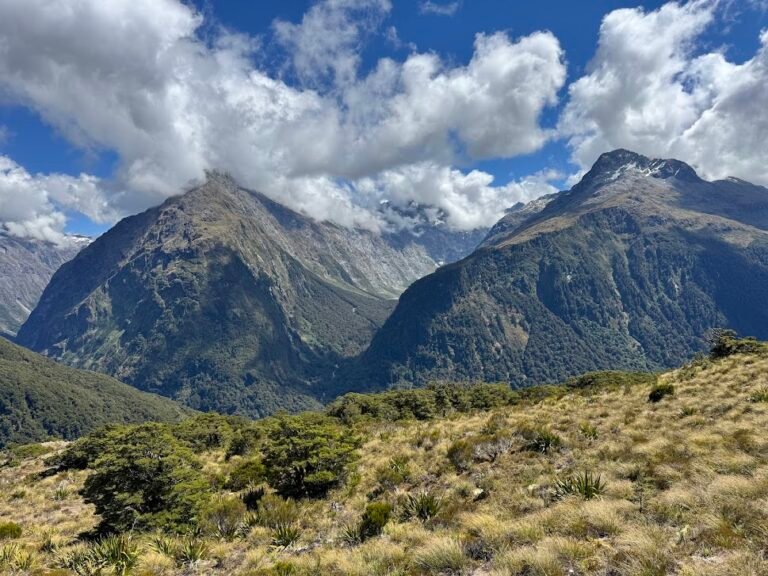
Along the drive back to Te Anau from Milford Sound via Milford Road (SH94) lies the trailhead for the other end of the Routeburn Track. Here we hiked another portion of the trail to the Key Summit for outstanding views of the Darran Mountains and the Hollyford Valley.
The trail climbed steadily the entire time, but was very manageable. We began in a shaded forest as switchbacks wound past waterfalls and gnarly trees.
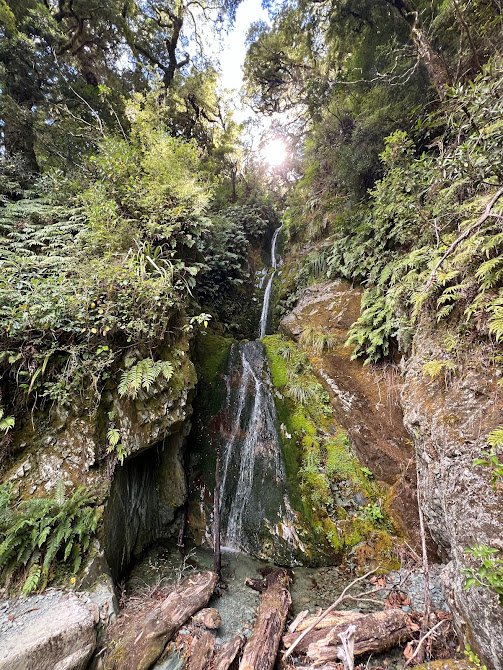
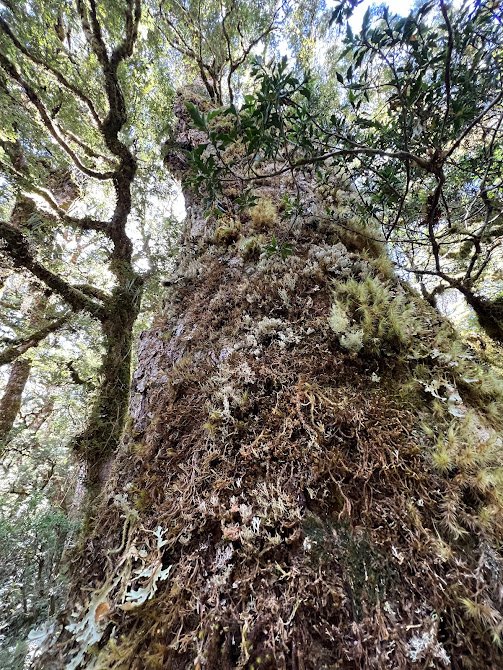
Leaving the tree line behind, the trail turned toward the summit. Once at the top we could see Lake Marian way in the distance. We had lunch at a viewpoint with a truly stunning vista. This 5-mile hike with 1,400 feet of elevation gain felt easy compared to the past few hikes we completed and we spent 2.5 hours total. It is definitely worth checking out on a clear day and is a great way to round out a day after a Milford Sound cruise.
Need to Know
- Fees: No fee for trail use.
- Parking: There is a large, free parking lot at the Divide Shelter.
- Info & Current Status: New Zealand’s Department of Conservation has a webpage dedicated to nearly every hike. It’s a good idea to check for current conditions, closures, and other important information. Here is the link for the Routeburn Track.
Day 7 | Te Anau: Doubtful Sound
Te Anau Bird Sanctuary
Finding our selves with some free time in the morning, we did a little exploring in Te Anau. We had delicious cappuccinos at the tiny Milford Road Merchant. Worthy of a stop to fuel your road trip!
We also swung by the free Te Anau Bird Sanctuary. Home to bird species that may otherwise be difficult to spot in the wild, the highlight here is the chance to see takahē. We were lucky enough to catch a glimpse of a takahē and her chick! The birds are very uniquely colored and look almost prehistoric. There were also plenty of other birds onsite including parakeets and pateke (ducks).
Doubtful Sound Cruise
Nearly ten times larger than Milford Sound, Doubtful Sound is located in a rugged and remote section of Fiordland National Park. If visiting on a day trip like we did, it requires a hefty time commitment and logistical dance. The reward, however, is seeing almost no one else the entire day. Visiting Doubtful Sound feels like you’ve been let in on a secret almost no one else knows about or cares to visit.
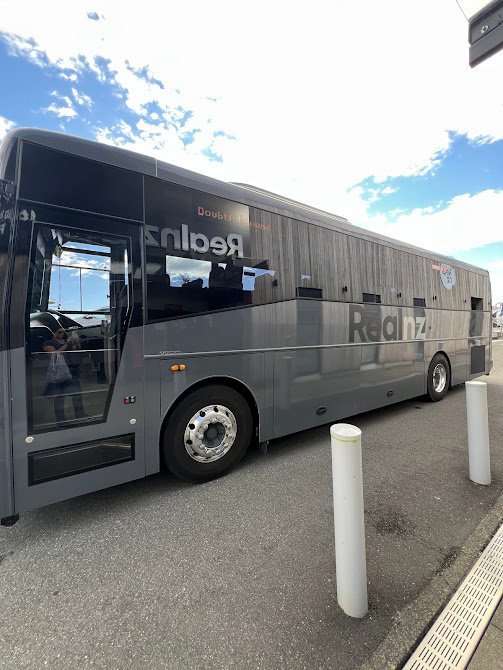
We departed from Te Anau using RealNZ and had a fantastic experience. A rough outline of the day:
- 30-minute coach bus ride from Te Anau to the Manapouri Visitor Centre.
- 45-minute scenic cruise across Lake Manapouri where we passed many tiny islands.
- 45-minute coach bus ride over Wilmot Pass. During the drive we gained 2,200 feet of elevation and at times the road had a 20% grade! The bus stopped briefly at a vista overlooking Doubtful Sound far below.
- 3-hour cruise along the tranquil waters of Doubtful Sound.
- Retrace all your steps and complete your 9-hour journey!
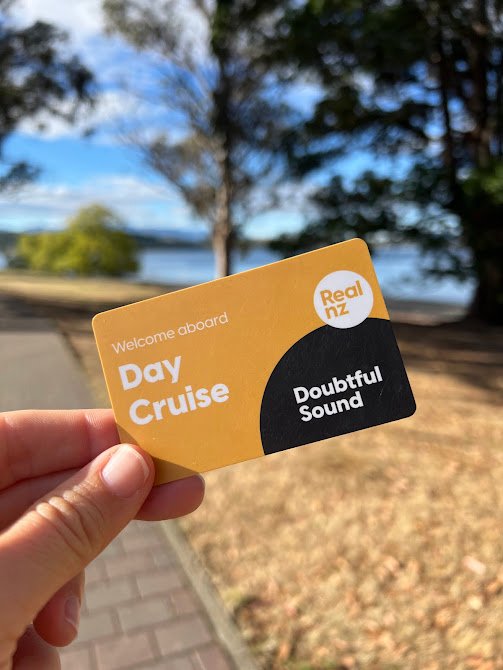
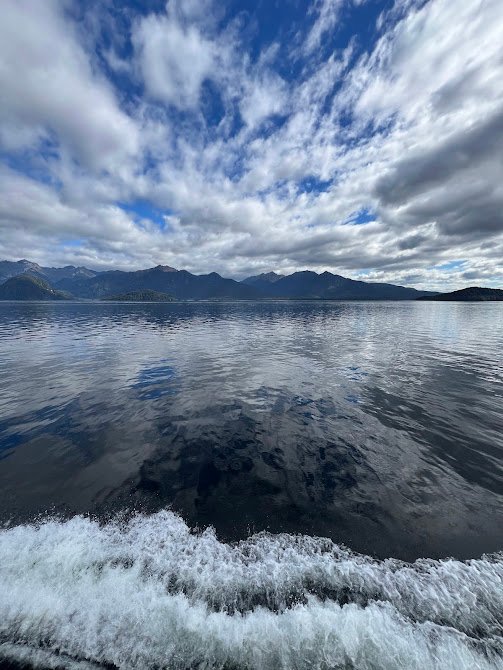
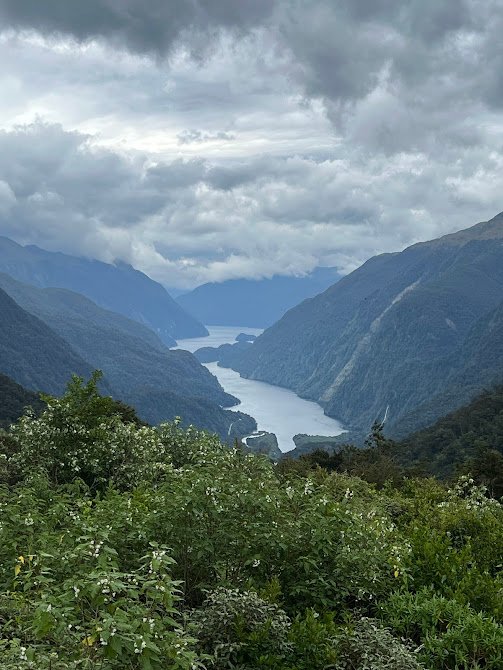
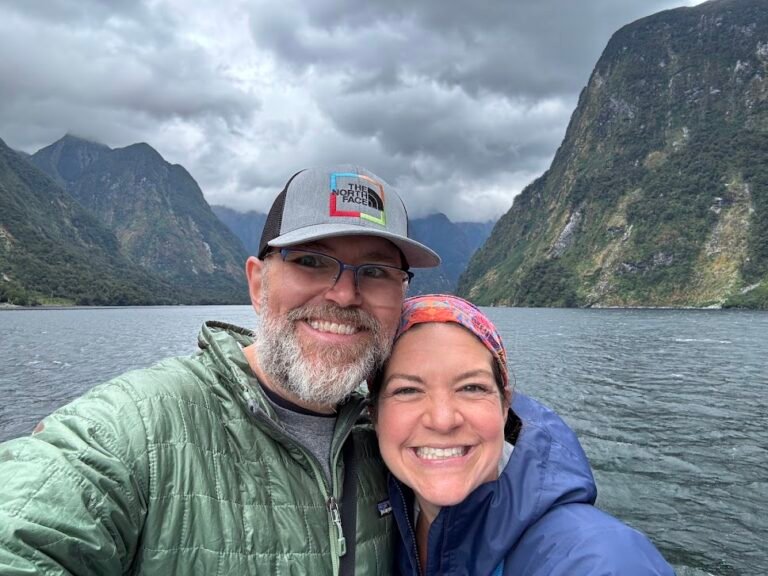
We can’t overstate how remote and wild Doubtful Sound was. We felt like we had reached the end of the world when we reached the Tasman Sea at the mouth of the sound. We saw many birds, seals, and other wildlife.
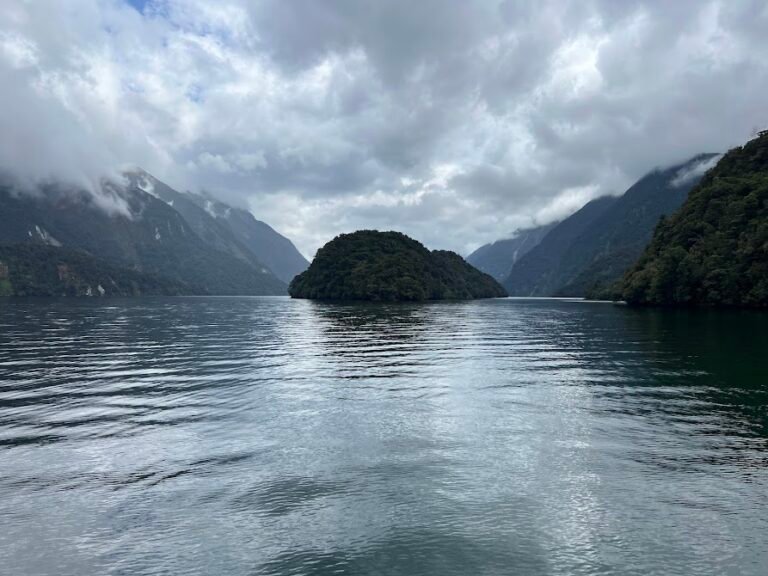
On the way back, we went down several of the fjords arms which were extremely narrow with towering cliffs on either side. Our favorite part of the day was when the captain shut off the engines at the end of one of the arms. We were invited to relax into several minutes of silence which resulted in a mystical and powerful moment.
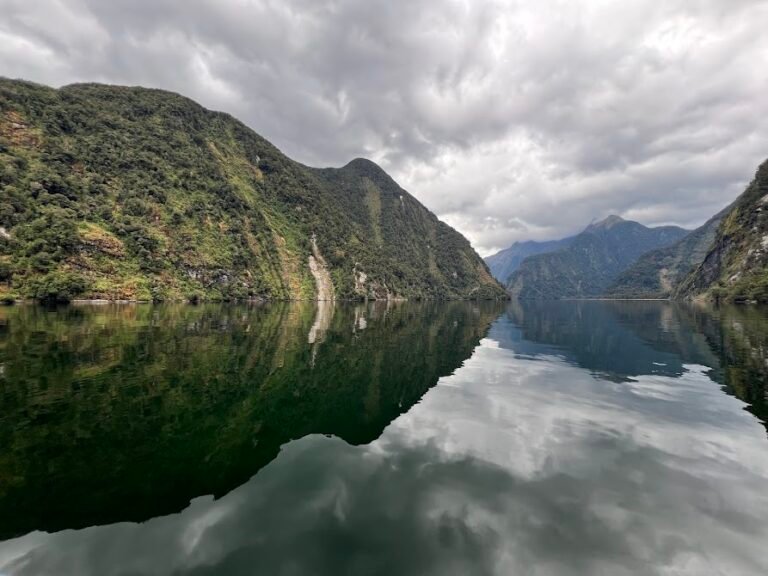
While it wasn’t perfectly sunny on the day we visited, it never rained and we were able to stand at the railing on the bow of the boat during the entire cruise. We highly recommend bundling up and staying outside as much as possible for the incredible views.
Need to Know
- Bookings: Bookings are available daily with two morning departures and can be made directly on the RealNZ website.
- Tours: The entire day lasted nearly 9 hours door to door. Dress warmly as it is cold and windy on the water and it may rain on your trip!
- Directions: We opted to depart from Te Anau at the RealNZ Visitor Centre located at 85 Lakefront Drive. Alternatively, you can self-drive to the Manapouri Visitor Centre at 64 Waiau Street (free parking).
- Food & Drink: There are snacks and drinks for sale on the boat once on the Doubtful Sound. Alternatively, you can pack your own food (this is what we did) or pre-order a picnic lunch from the cafe at Manapouri.
Milford Sound vs. Doubtful Sound
This is a tough one and depends on the type of experience you are looking for and how much time you have to devote to a day trip.
If you want to get a flavor for being on the water in a fjord and have more limited time, Milford Sound is a great option and we think you’ll be very happy with your choice.
If you have more time, however, and want a true off-the-grid adventure, we’d suggest Doubtful Sound. It sees far fewer visitors and the tranquility is unmatched.
Check out this article for more helpful information when making your decison.
Day 8 | Wānaka: Isthmus Peak Hike
Drive to Wānaka
We drove about 3 hours to Wānaka, a resort town set on the shores of the lake and gateway to Mount Aspiring National Park. This would be our base for the next four nights.
Where We Stayed
We stayed at an Airbnb in the Northlake community, just a short, 10-minute drive from downtown. Most of our activities were within an easy 30-minute drive of our rental.
Isthmus Peak Hike
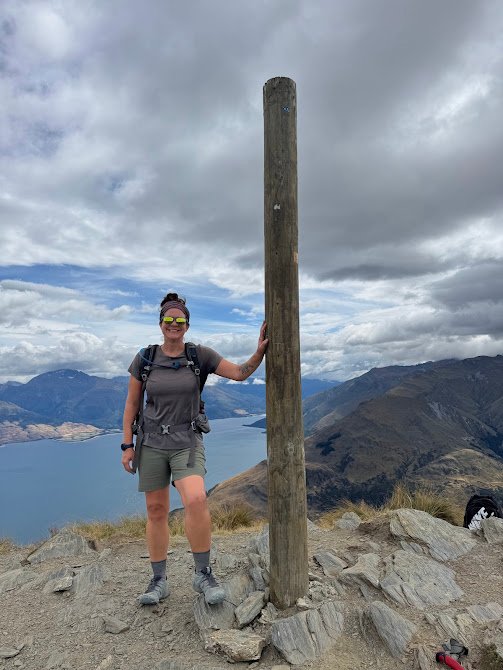
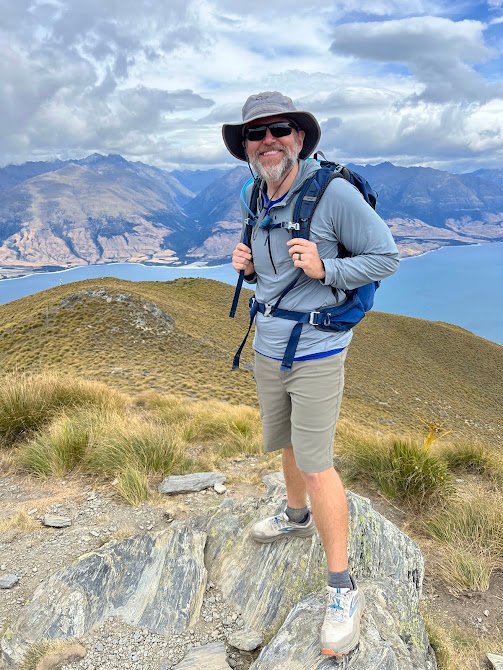
We chose to hike Isthmus Peak as an alternative to the wildly popular nearby Roys Peak. When we drove by the Roys Peak trailhead, cars were spilling out of the car park and down the road in a long line. But when we arrived at the car park for Isthmus mid-morning on a Sunday, it was only half full. In fact, we saw only a handful of other hikers the entire day. We’re not sure why this trail is so much less crowded but can enthusiastically recommend it for stunning views.
The trail began through the forest and traversed private farmland, with lots of cattle gates to open and close. Then, it joined a wide, gravel track and went up and up and UP! Here it was all exposed and we were grateful for the high clouds on the day we hiked.
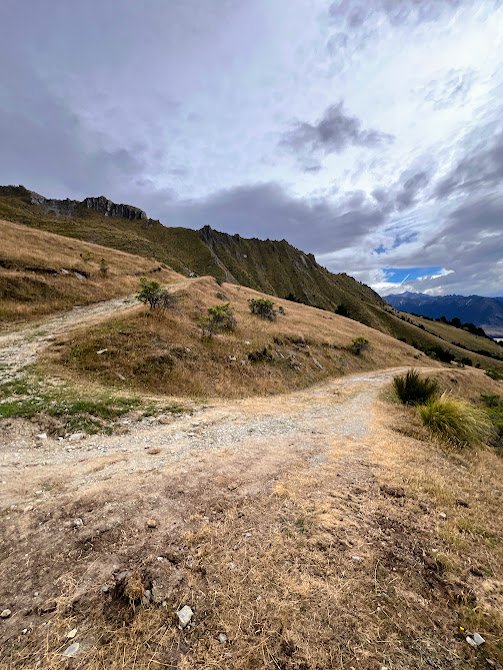
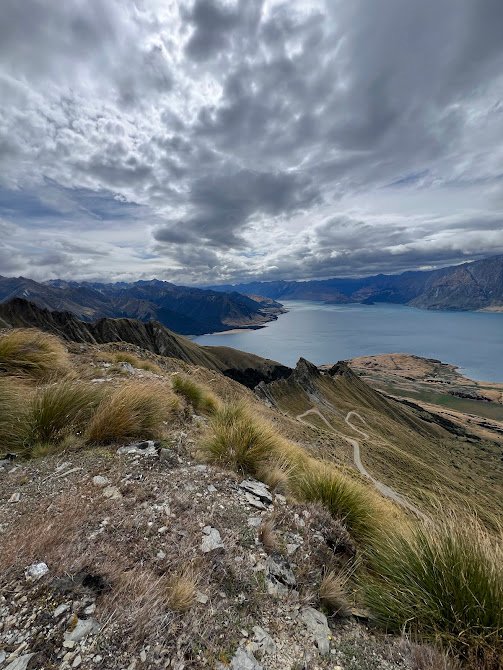
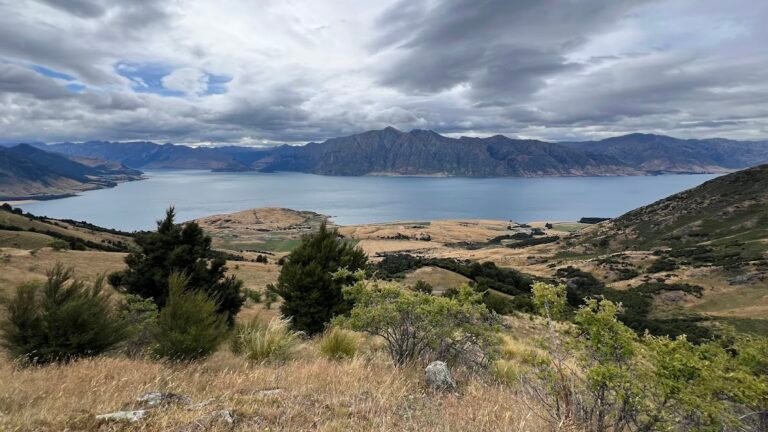
The climb was absolutely relentless and just when we thought we were close-ish to the summit, we turned a corner and saw a sign that we still had a bit to go to reach the peak!

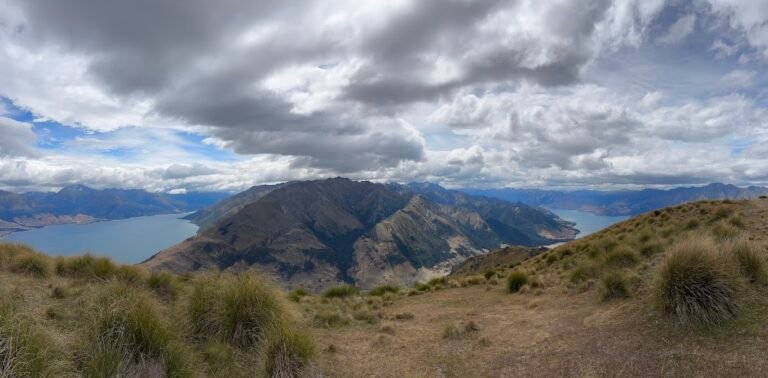
After 2.5 hours of hiking straight up, our efforts were rewarded by majestic views of Lake Wānaka on one side and Lake Hāwea on the other. The icing on the cake was the view of the Southern Alps in the distance. We savored the views, then slowly made our way back down to the car park. Our final hiking stats were 10 miles and 3,700 ft of elevation gain over 5 hours.
Need to Know
- Fees: No fee for trail use.
- Parking: There is a medium-sized, free parking lot off SH6. To get to the trailhead, you need to cross this busy road, so use caution. The trailhead is about a 30-minute drive outside Wānaka.
- Info & Current Status: New Zealand’s Department of Conservation has a webpage dedicated to nearly every hike. It’s a good idea to check for current conditions, closures, and other important information. Here is the link for the Isthmus Peak Track.
Day 9 | Wānaka: Diamond Lake & Rocky Peak Hike
Diamond Lake & Rocky Peak Hike
On a cloudy and overcast morning, we set our sights on hiking up to the summit of Rocky Peak. This hike is actually quite close to Isthmus Peak, but offers different views and terrain.
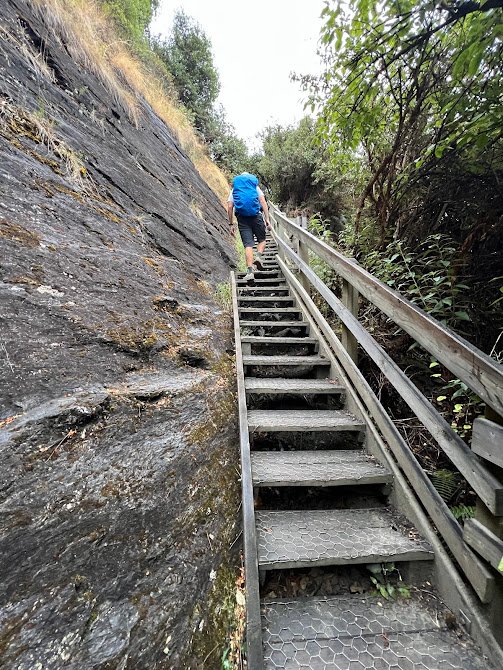
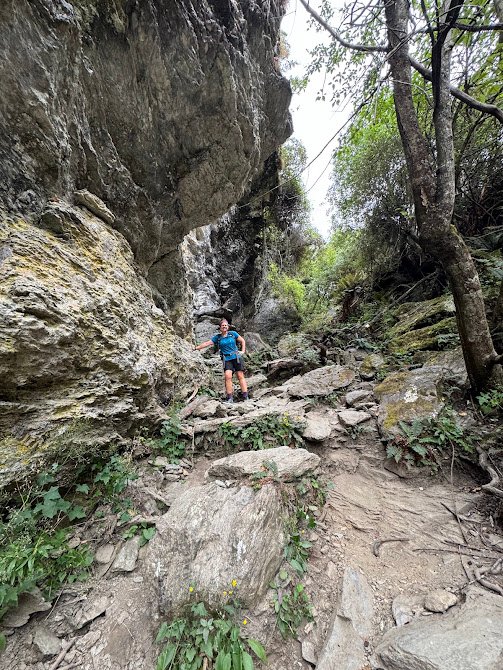
We saw no one else on our hike until the very end. Just lots of sheep for company! The trail was deceivingly steep, even making good use of long sets of stairs hugging the rock walls. A viewing platform overlooking the picturesque Diamond Lake offered a nice place to take a break.
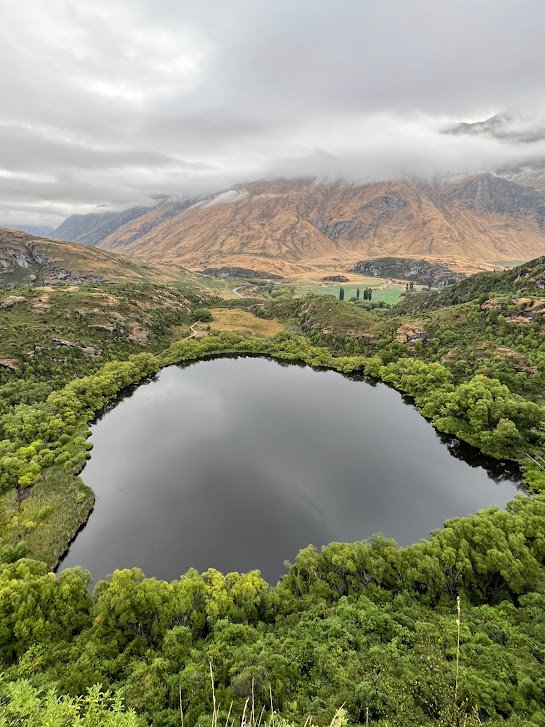
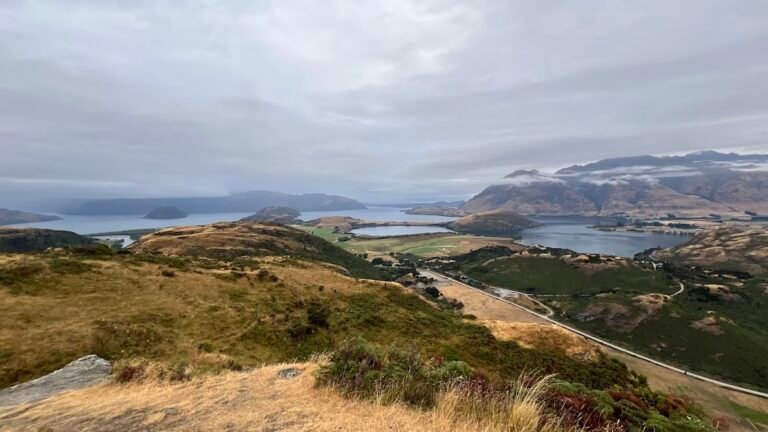
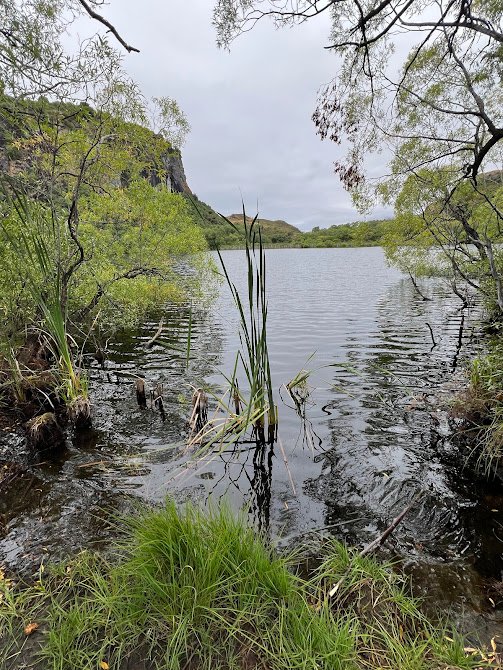
The summit, standing at 2,500 feet, was large and flat with plenty of room to take in views of Lake Wānaka and the surrounding mountains. We appreciated the fact that this hike was a loop so we made our way down a different trail system, stopping briefly at Diamond Lake and then back to our car. We traveled 4.75 miles and gained 1,600 feet of elevation over the course of our 2.5-mile hike.
Need to Know
- Fees: No fee for trail use.
- Parking: There is a large, free parking lot at the Diamond Lake Conservation Area where the trail begins. The trailhead is about a 30-minute drive outside Wānaka.
- Info & Current Status: New Zealand’s Department of Conservation has a webpage dedicated to nearly every hike. It’s a good idea to check for current conditions, closures, and other important information. Here is the link for the Rocky Mountain Track.
Free Afternoon in Wānaka
Wānaka is a great town to explore on foot with many nearby attractions that don’t involve hiking. For example, you can visit a lavender farm or put your skills to the test at an outdoor maze.
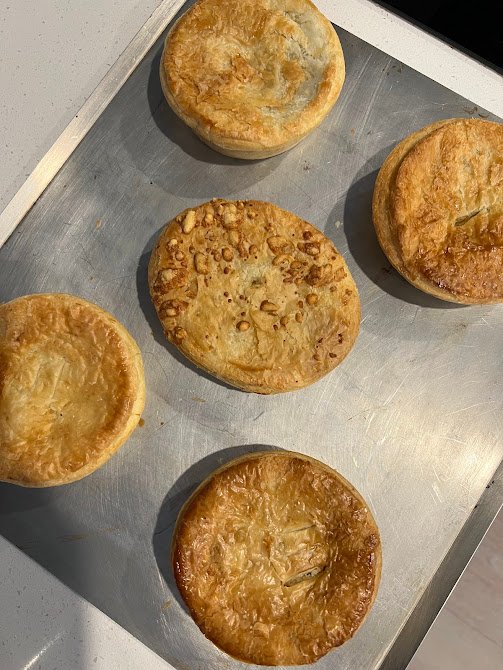
We really enjoyed treating ourselves to a feast of pies from The Doughbin Bakery. We had everything from lamb & mint to pork belly & plum. We capped off our meal with a caramel brownie. You can tell we were hungry from all our hiking!
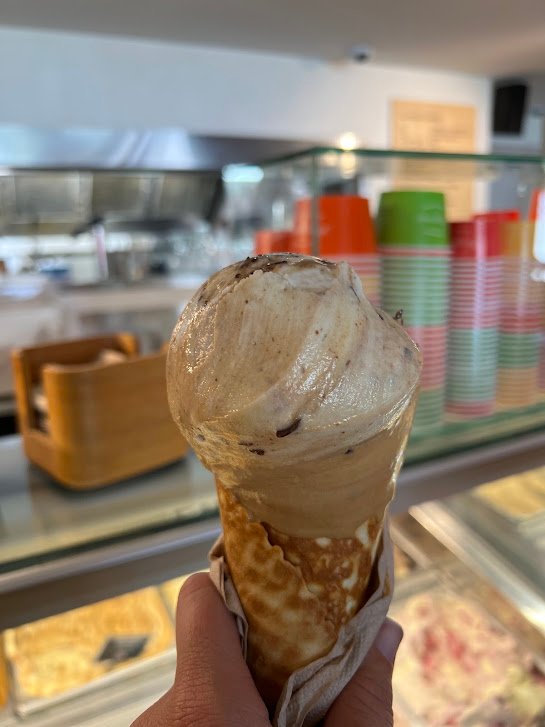
Another great spot to satisfy your sweet tooth is Patagonia Chocolates. Their ice cream flavors are unique and we tried dulce de leche, banana split, coconut stracciatella, and vanilla honey. Yum!!
Day 10 | Wānaka: Wildwire Waterfall Via Ferrata
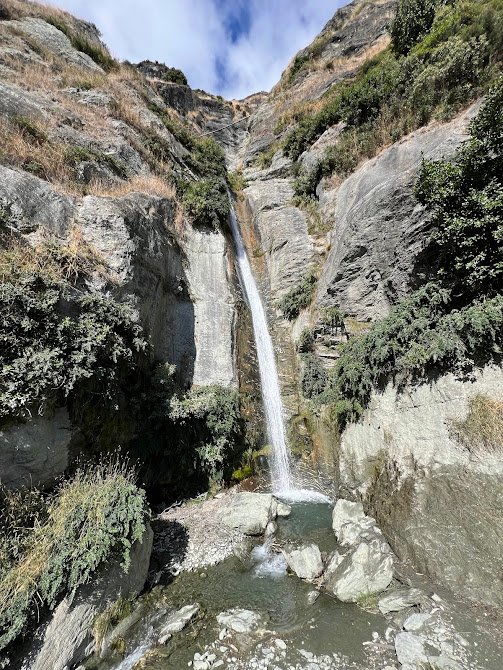
At this point in our explorations, we’ve been on nearly a dozen via ferrata climbs across the world. What makes Wildwire so unique is that it climbs along a waterfall, an absolute first for us. This remains one of our favorite activities across all our trips. We were riding high off the fun and adrenaline for days afterward!
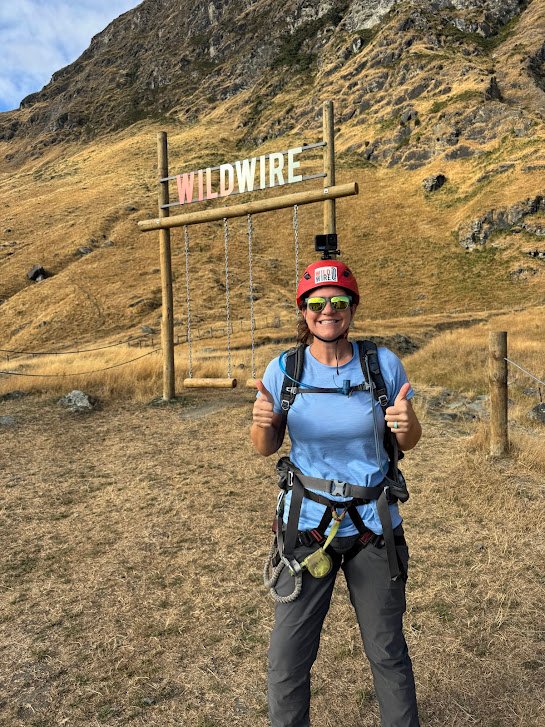
We opted for the Lord of the Rungs 🙂 Level 2 excursion. Rated at a medium level of difficulty, this option climbs 1,050 vertical feet and crosses 6 suspension bridges. After signing a waiver and getting fitted into our climbing harnesses, we set off on trail to get to the mini-via ferrata training area for a safety briefing, instructions and some practice.
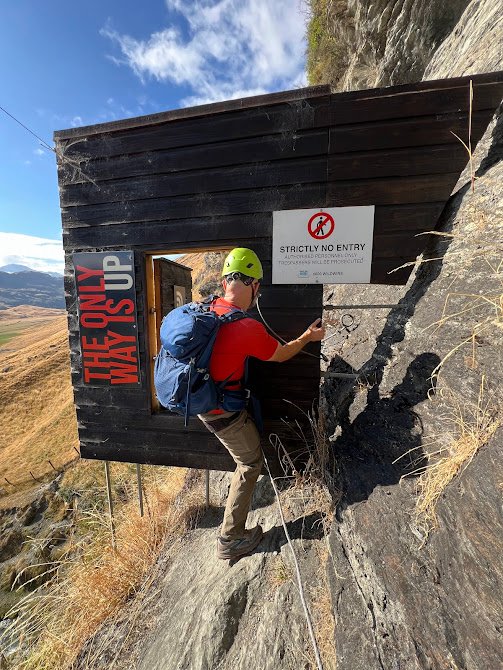
From there we were divided into smaller groups with a dedicated guide. We loved how small the groups were (just one other couple (with via ferrata experience) was paired with us) and our guide was incredibly friendly and enthusiastic. We easily got our footing due to the fact that the entire route had iron rungs on which to place your feet and hands. Shortly after beginning we got our first view of one of the waterfall cascades we’d be climbing alongside, with a bridge high above it.
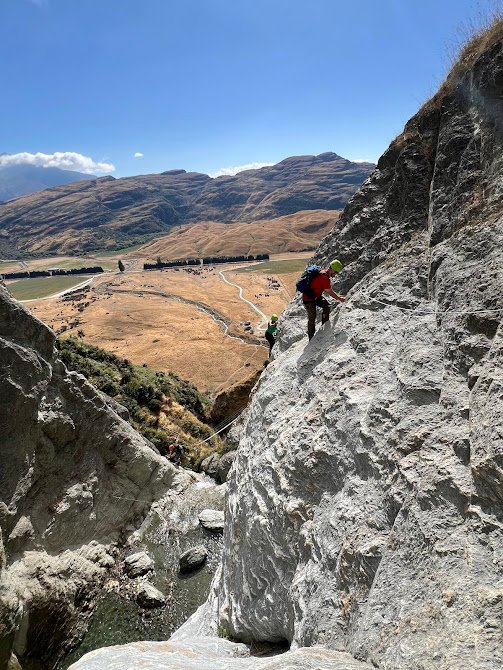
The great thing about this via ferrata were the views, no matter which direction you looked. You could stare at the wall in front of you with the waterfall spilling gently down, or across the valley at your back.
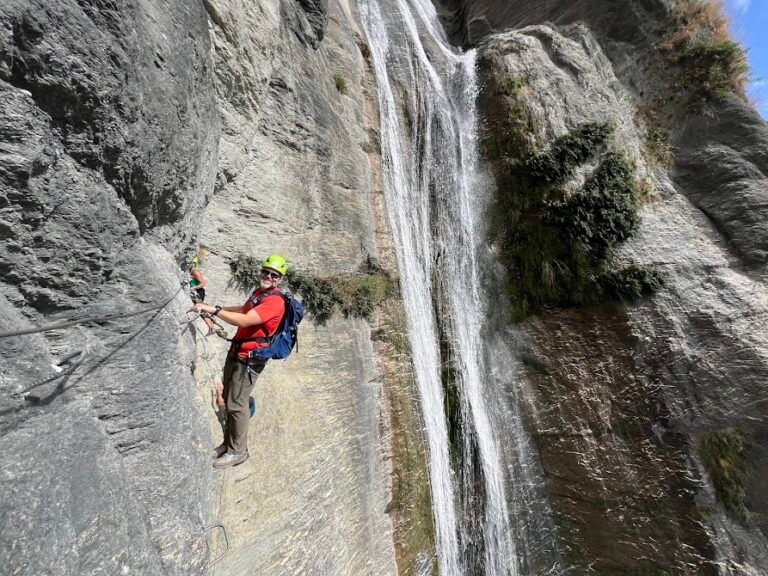
Now high above the valley, our group settled into a comfortable rhythm, undaunted by the heights or the suspension bridges. Some had wooden planks to walk across, but others were more of a tightrope walk!
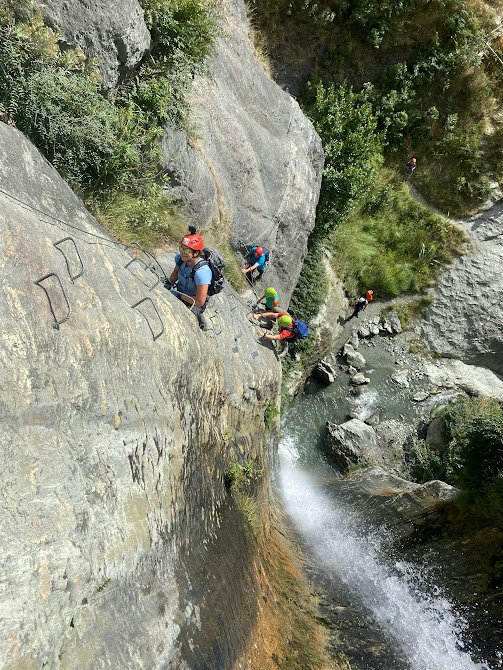
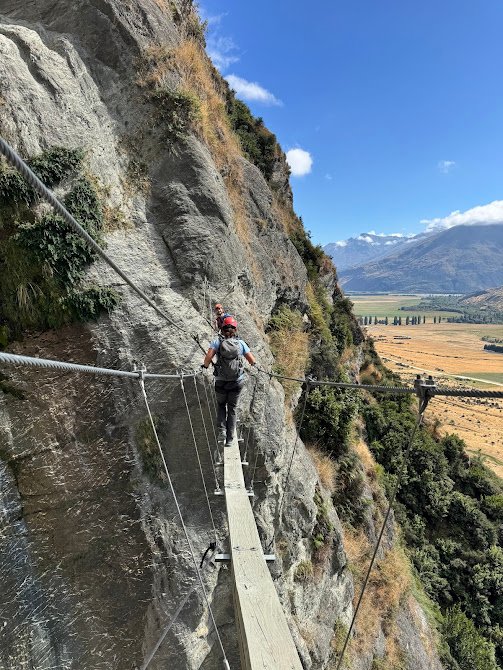
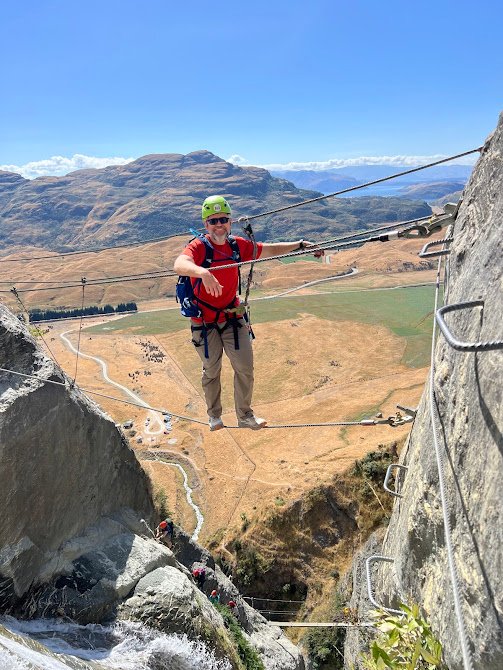
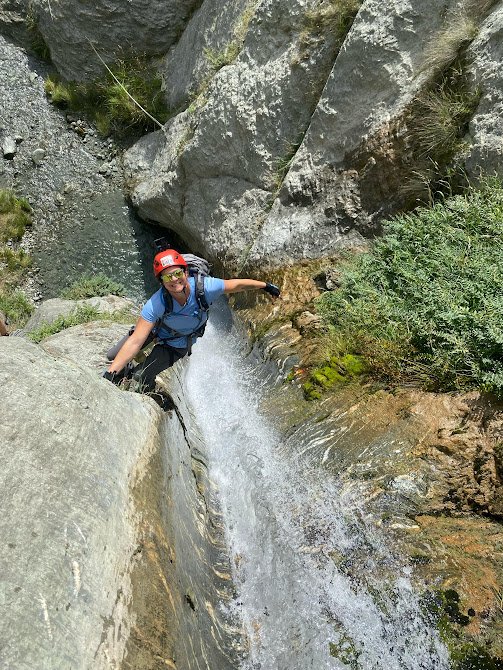
The route topped off after crossing our final bridge. Our group was all brave enough to dangle off the sides! At this point we were invited to enjoy the provided packed lunch, surprisingly delicious sandwiches and a brownie. We had a nice long rest in the shade and could take a dip at the base of the waterfall, if desired.
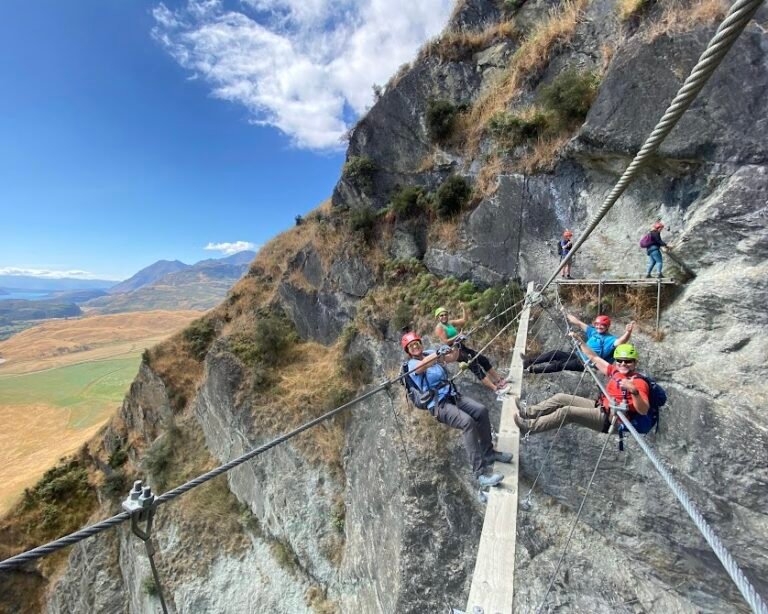
Given all the elevation we had gained on the climb up, I was a bit apprehensive about the way down. My fears were unfounded, however. There was some amount of down climbing the route while clipped in to our gear, then just lots of stairs and I can do stairs! For a more in-depth look at our Wildwire experience, check out the video below.
Need to Know
- Bookings: Bookings are available daily and generally depart at 9am. Spots are limited and frequently sell out, so booking in advance is recommended and can be made done on the Wildwire website.
- Tours: We did the Lords of the Rungs Level 2 excursion which lasted approximately 4 hours. There is a shorter option which we think would leave most people wanting more. There is also a longer option that climbs the entire waterfall to the very top and then takes a helicopter down! This sounded really cool but was out of our budget.
- Directions: The meeting point was a 20-minute drive from Wānaka. The gate to the property was closed when we arrived, but shortly thereafter a staff member came out to greet all participants and let us in to park.
- What to Bring: We wore comfortable clothes, including pants, similar to what we’d wear hiking. We also brought day packs filled with 2 liters of water and small snacks. We also brought our GoPro and mounted it to my helmet to capture footage of the climb. Lunch was included in the booking and carried by the guides.
Day 11 | Wānaka: Lake Dunstan Cycling Trail
The Lake Dunstan Cycling Trail located in the Central Otago region is one of 23 trails scattered across the country designated as Ngā Haerenga Great Rides. The trail is practically brand new and links the heritage towns of Cromwell and Clyde. Along the way, the 26 miles of path pass by gorgeous lakes, wineries, over bridges, and along cantilevered boardwalks skirting the bluffs.
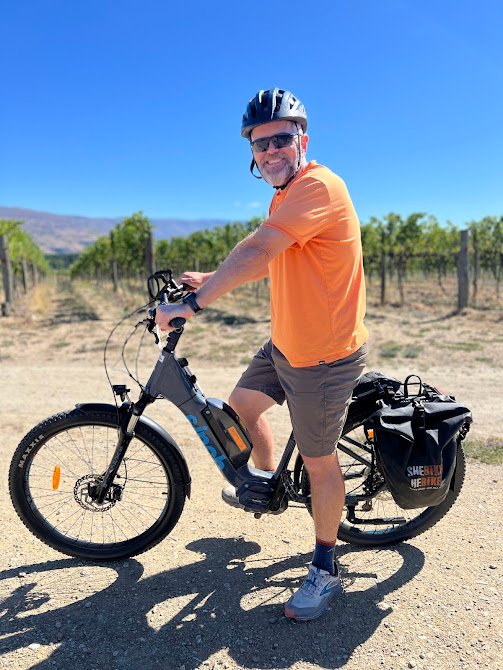
As there are several thousand feet of elevation gain along the trail, we opted to rent e-bikes from Shebikeshebikes and cannot recommend this company highly enough. We had an amazingly positive experience from our first to last interaction. After our bike fitting and a brief lesson on how to operate the e-bikes, we were shuttled from the pickup depot in Clyde to the start of the trail in Cromwell.
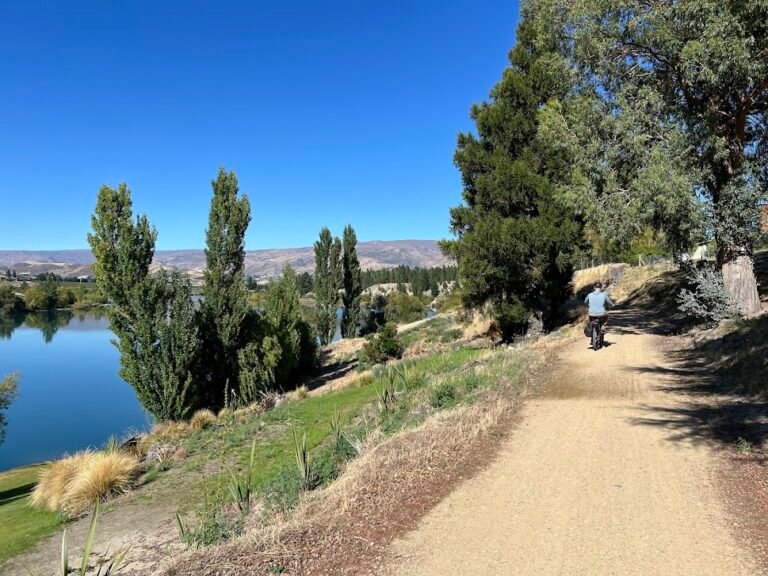
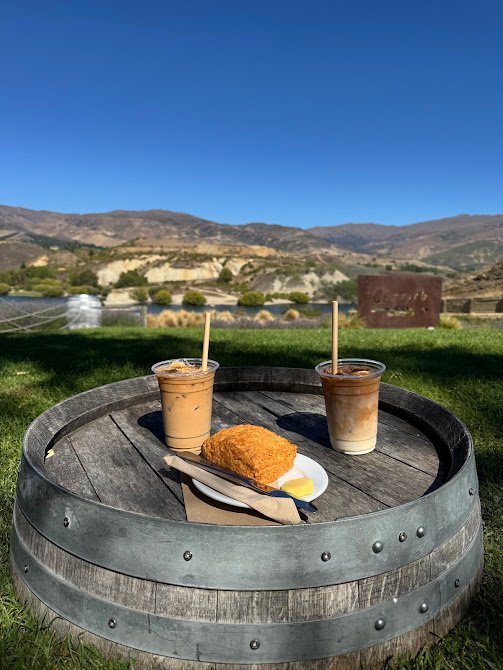
The first portion of the trail had an easy grade and took us along the Kawarau arm of Lake Dunstan. We soon reached the first of many bridges and on the other side got our first glimpse of the Bannockburn vineyards. Although it was still early in our journey, we couldn’t resist stopping at the inviting lawn of Carrick Winery for refreshments. No wine, but rather we had delicious iced lattes and a cheese scone fresh out of the oven. Heavenly!
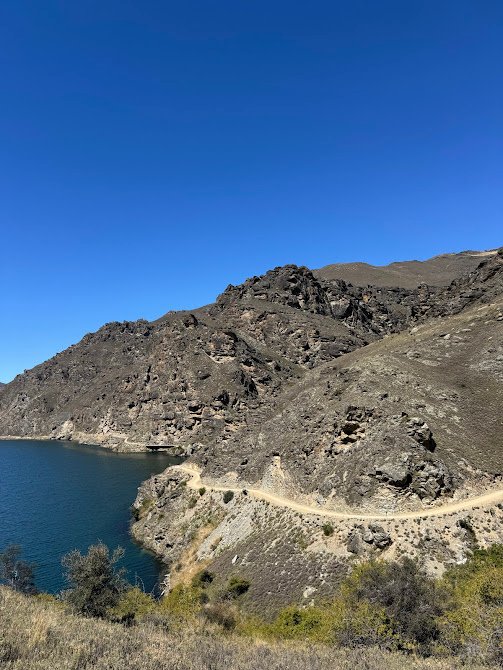
After passing the beautiful vineyards and reaching Cornish Point, the landscape changed pretty dramatically into rocky cliffs. Here we entered Cromwell Gorge and had our first portion of the ride on cantilevered boardwalks. SO COOL!

We reached Cairnmuir Gully and then had the craziest climb up a section known as the Cairnmuir Ladder. We had to climb 425 feet up a never ending, but very well-graded, set of switchbacks. Thank goodness for e-bikes! Once at the top, we celebrated at the trig point marking the highest point along the entire trail. We rested and ate our lunch, then had a pretty hair raising downhill section. We passed over several more bridges, including the Hugo suspension bridge standing 93 feet tall!
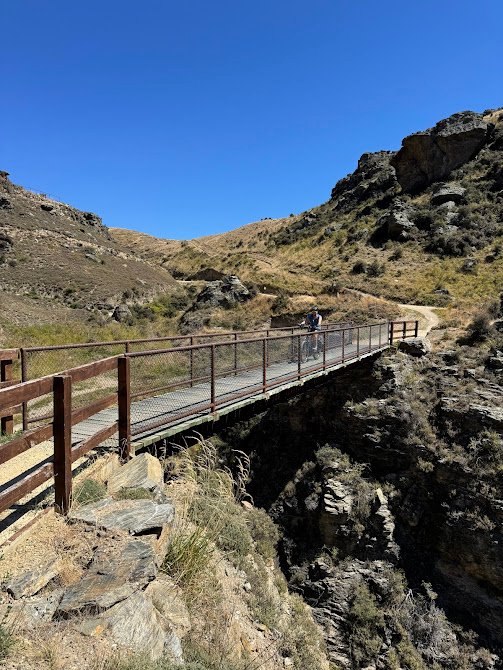
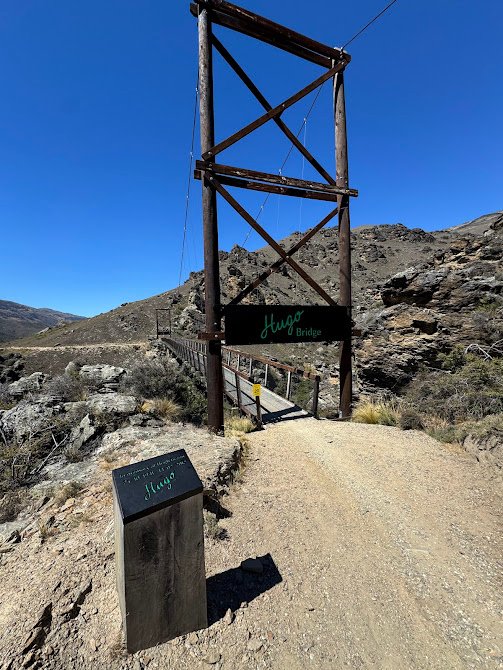
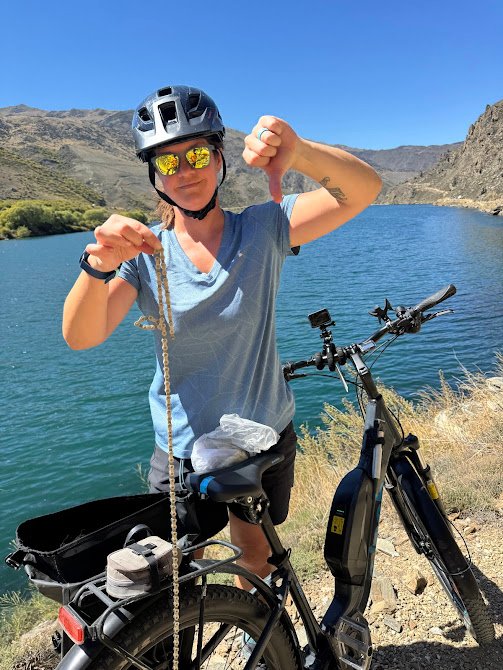
As we happily glided along along narrow sections of the trail and more boardwalks, I heard a sound no bicyclist wants to hear. My chain snapped. 🙁 Our e-bikes came fully kitted out with panniers that included a tire and chain repair kit. I had even prepared for the worst by watching the chain repair videos that were sent ahead of time.
Unfortunately, after almost an hour of trying to repair the chain on our own, we gave in and called the bike shop. We spoke with a mechanic who confirmed we were doing everything right. While I was fully prepared to push my bike all the way back, Shebikeshebikes went above and beyond, sending out a staff member to us on trail who got us going again in no time. How amazing is that??
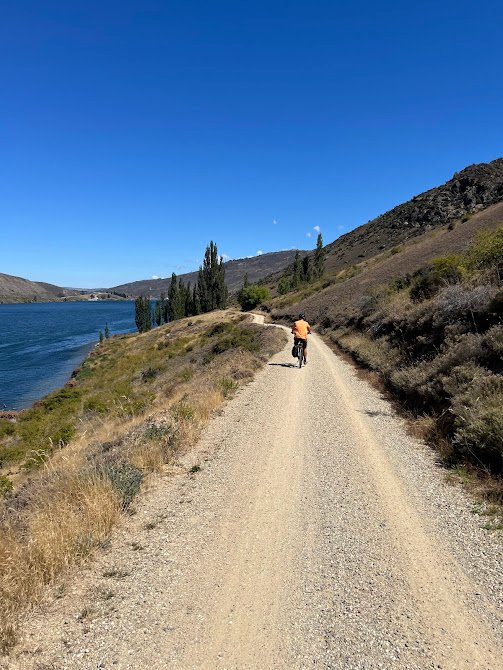
Thankfully the rest of the trail was smooth sailing along the gorgeous lake, past the Clyde Dam, and over the Clyde Bridge back into town. Including breaks and time to fix the chain, we were on the trail for a total of 5.5 hours.
Even with the chain mishap, this was one of the best outings we’ve ever had on a trip. A true adventure by bike! Check out our video below to see what it’s like on the Lake Dunstan Trail.
Need to Know
- Logistics: We used Shebikeshebikes for e-bike rental and a shuttle from Clyde to Cromwell. Bookings can be made on their website. We cannot recommend this company enough due to the quality of the service they provide. Our e-bikes were like brand new and included a helmet and panniers.
- Directions: We met in Clyde at the Shebikeshebikes depot. There was a large free parking lot just outside the depot. The shuttle ride to Cromwell took about 30 minutes and we had until 5pm to bike back along the trail.
- What to Bring: Bring plenty of water and at least some snacks, or even lunch. While there were some places to refuel along the way, they were either at wineries in the beginning of the trail or at floating cafes on the water, which were not operating when we rode.
Day 12 | Mount Cook: Hooker Valley & Tasman Lake Hikes
Drive to Mount Cook
We drove about 2.5 hours to Mount Cook National Park. This park is home to Mount Cook, New Zealand’s highest mountain. The landscape is also dramatically different than anywhere else on this itinerary, filled with menacing rocky peaks covered in snow and ice. Mount Cook would be our base for the next two nights.
Where We Stayed
We stayed in a room at the Mount Cook Lodge. All activities within the national park were a 5-minute drive away. Our room was clean and comfortable, had air conditioning, and we loved the onsite restaurant, Chamois Bar & Grill.
Hooker Valley Hike
In our opinion, hiking the Hooker Valley Track is THE quintessential day hike in the Mount Cook area. The hike is relatively flat and has glacier views, swinging bridges over gorgeous blue water, and ends at Hooker Lake.
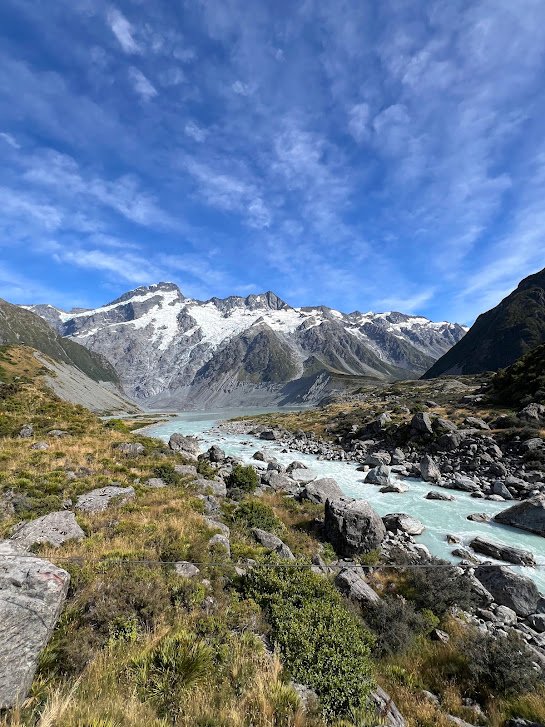
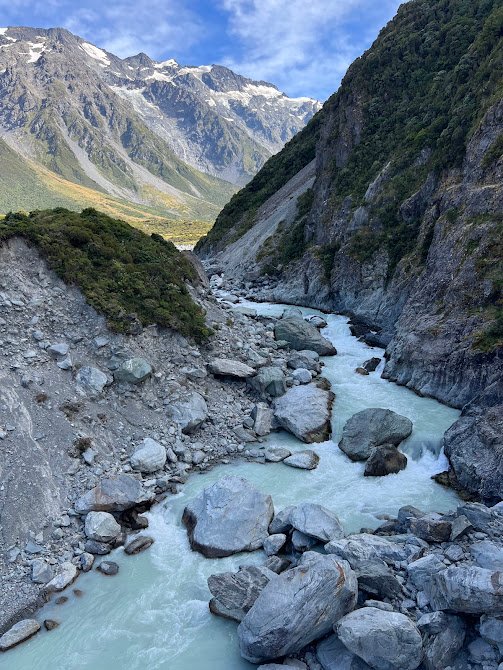
Hiking in just under a mile will take you to the first swing bridge and the Mueller Lake lookout point with amazing views. In our experience, while the trail was very crowded to this point, it thinned out after.
The trail then skirted around Mueller Lake to the Mount Sefton lookout point where there was a second, longer swing bridge to cross.

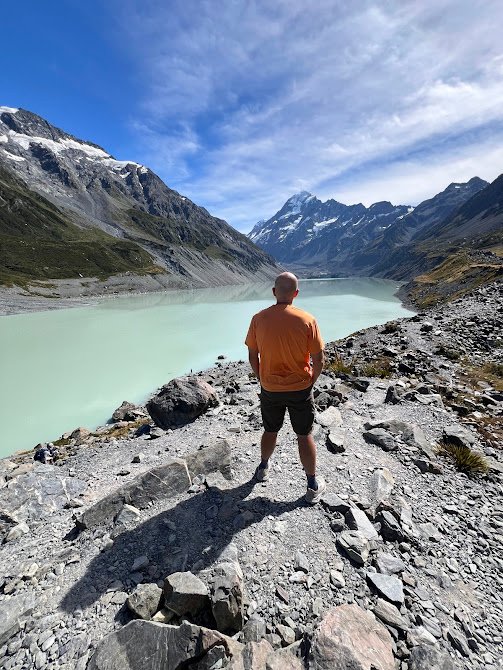
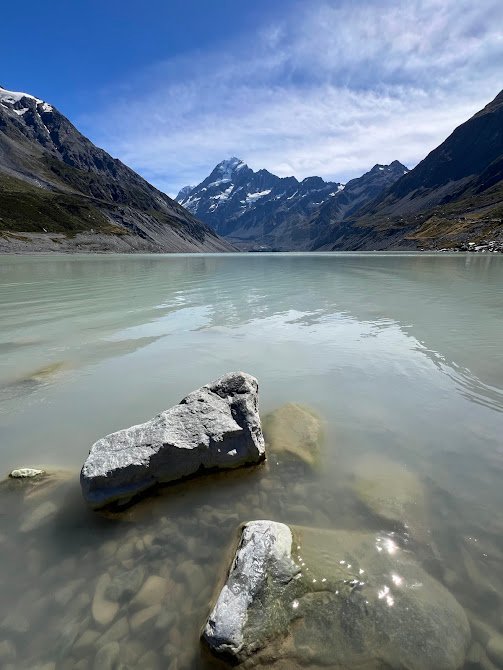
Following the Hooker River we eventually ended at Hooker Lake. This was a really nice spot to find a rock, rest, and eat lunch before heading back and retracing our steps. We could even hear and see a few avalanches off in the distance. This hike was 6.8 miles with 700 feet of elevation gain. We spent 2 hours and 45 minutes on trail.
Need to Know
- Fees: No fee for trail use.
- Parking: There is a large, free parking lot at the White Horse Hill Campground located at the end of Hooker Valley Road. We arrived at 10am and the area was very busy, so we had to park along Hooker Valley Road. The trailhead is just a 5-minute drive from the Mount Cook Lodge or The Hermitage Hotel.
- Info & Current Status: New Zealand’s Department of Conservation has a webpage dedicated to nearly every hike. It’s a good idea to check for current conditions, closures, and other important information. Here is the link for the Hooker Valley Track.
- Caution: Currently the Hooker Valley Track is only open to the Mount Sefton viewpoint as a new, second swing bridge is being constructed. The full trail is expected to open in the Fall of 2026.
Tasman Lake Hike
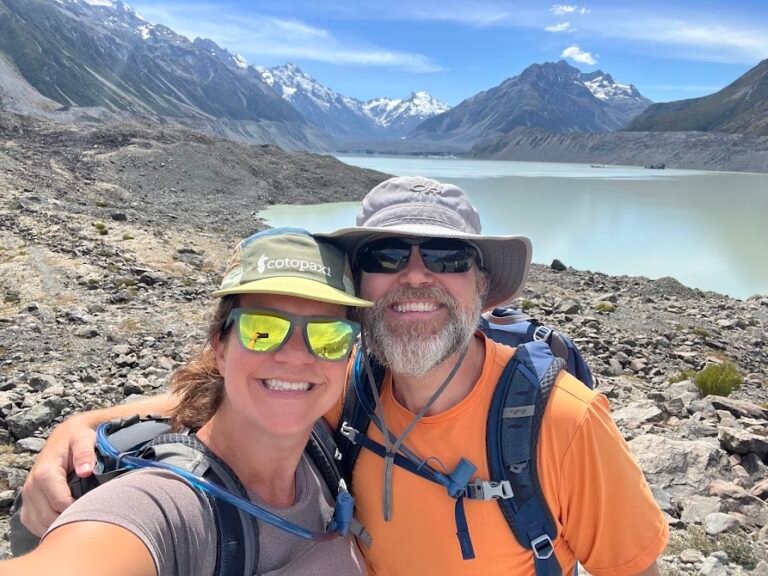
If you are not doing a boat tour of Tasman Lake, making the easy out-and-back hike to see views of the lake dotted with icebergs and the glacier at the far end is worthy of your time. Along the way you’ll hike through the old terminal moraines of the glacier. This hike is 2 miles roundtrip with only 160 feet of elevation gain. It took us just under one hour to complete.
Need to Know
- Fees: No fee for trail use.
- Parking: There is a fairly small, free parking lot at the end of Tasman Valley Road. The trailhead is a 15-minute drive from the Mount Cook Lodge or The Hermitage Hotel.
- Info & Current Status: New Zealand’s Department of Conservation has a webpage dedicated to nearly every hike. It’s a good idea to check for current conditions, closures, and other important information. Here is the link for the Tasman Lake Track.
- Note: If you do the Glacier Explorers boat trip you will hike this same route to get to the boats.
Explore the Lodges
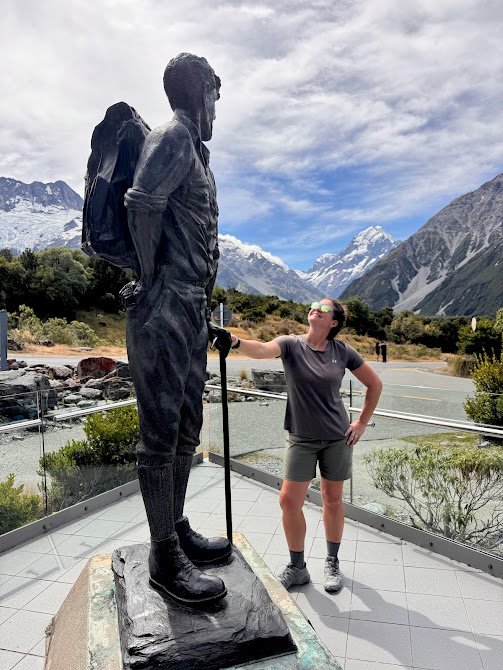
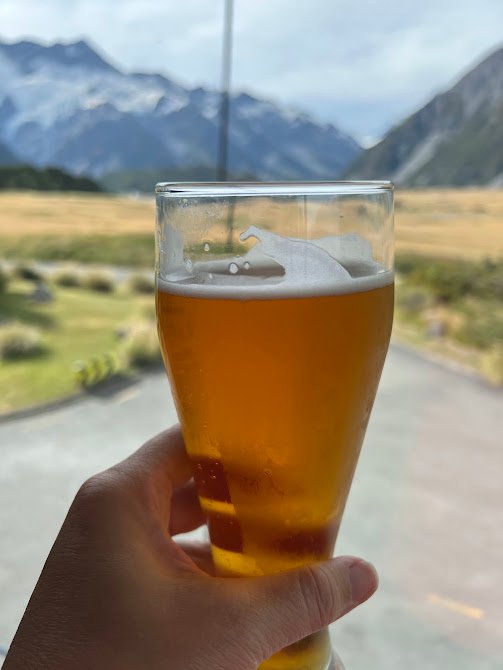
To finish our day, we went into The Hermitage Hotel where they have a gift shop, cafe, and a small museum. We wandered around, I took a picture with Sir Edmund Hillary, and we enjoyed a well-deserved beer with a view!
Day 13 | Mount Cook: Sealy Tarns & Mueller Hut Hike + Glacier Boat Tour
Sealy Tarns and Mueller Hut Hike
For our last hike in Mount Cook we picked a real doozy. After spending the day prior in the valley, on this day we hiked far above it for some of the best views in the park that don’t require mountaineering in the summer.
We got an early start, hiking along the Kea Point Track, then turning up the Sealy Tarns Track. And when we say up, we mean up a LOT of stairs. 2,200 stairs to be exact. Phew!
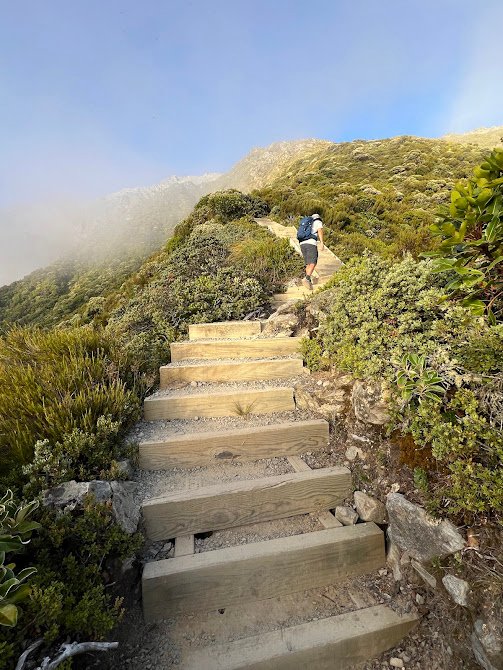

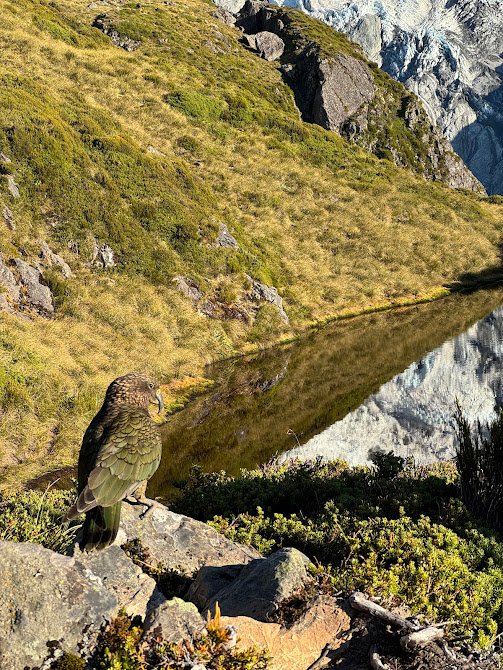
When we arrived at the freshwater lakes of Sealy Tarns we were absolutely blown away. The reflections of the mountains in the water plus distant views of other peaks were amazing. We even saw a gorgeous kea, a bird endemic to the area which looks like a mishmash of a parrot, hawk, and owl. To get to Sealy Tarns is “only” a 1.5-mile hike but you gain 1,700 feet of elevation! We think this is a destination worthy of itself and no judgement if you don’t continue because after this point the trail is pretty heinous as a day hike.
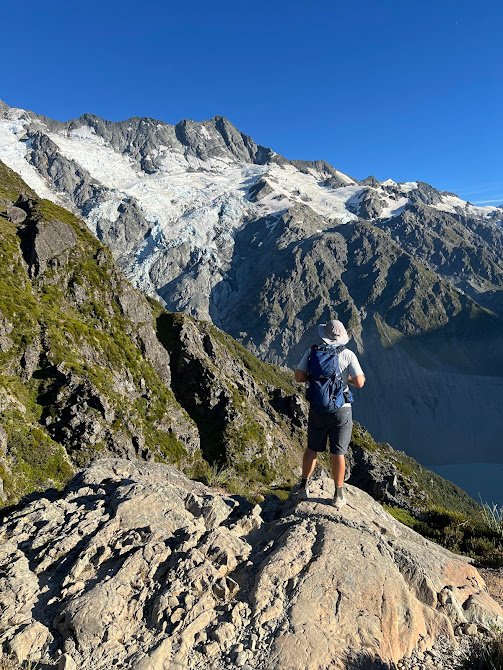
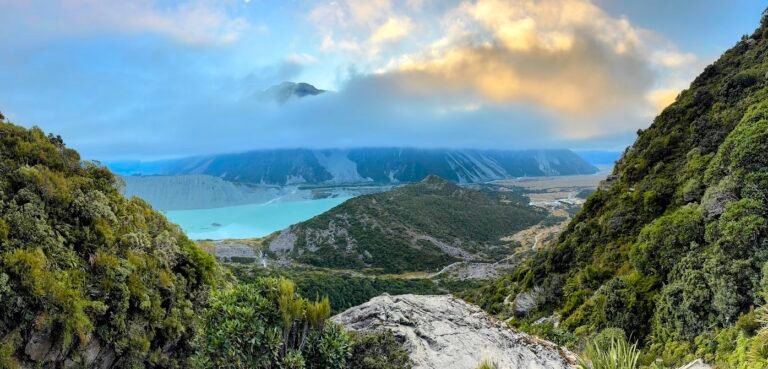
As we hiked the clouds continued to burn off and the views got better and better when we turned around to look into the valley below.
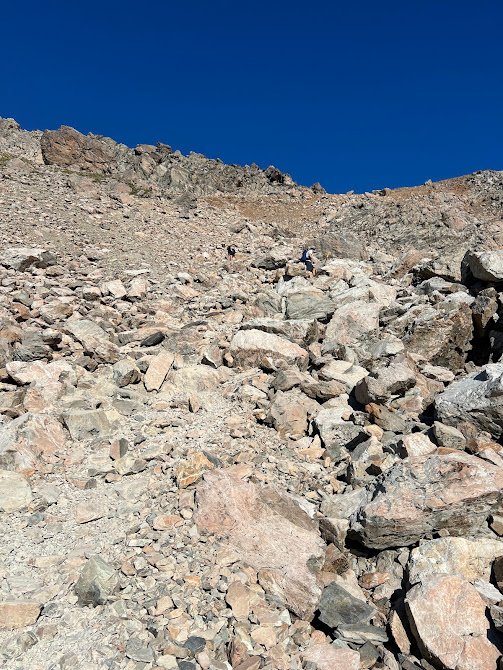
But then we reached the hardest part of the hike which is described not as a “maintained route” but rather an alpine route. In this case alpine route = straight up a large rock field and loose gravel slope. At times it was difficult to find our footing. I found it very challenging and draining. Here the trail gained 1,500 feet of elevation in just one mile. Reaching the skyline ridge was worthy of a celebration and a rest.
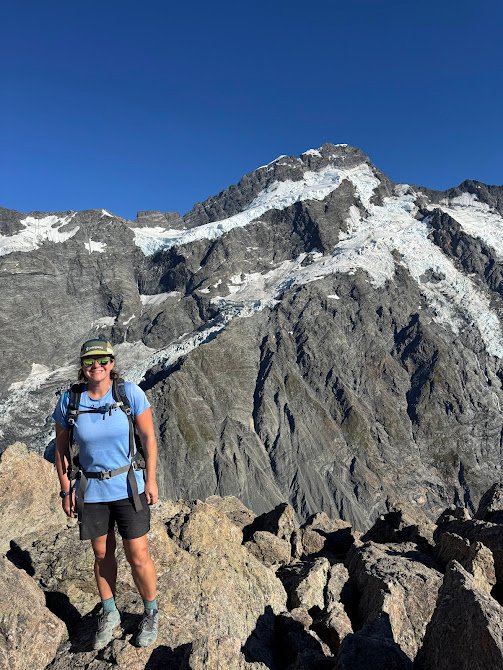
The sweeping views here of Mueller Glacier, the ice shelf on Mount Sefton, and other peaks were 10/10. While we continued on the trail to Mueller Hut, we personally don’t think the views get better than here and our recommendation would be to turn around here as a day hike.
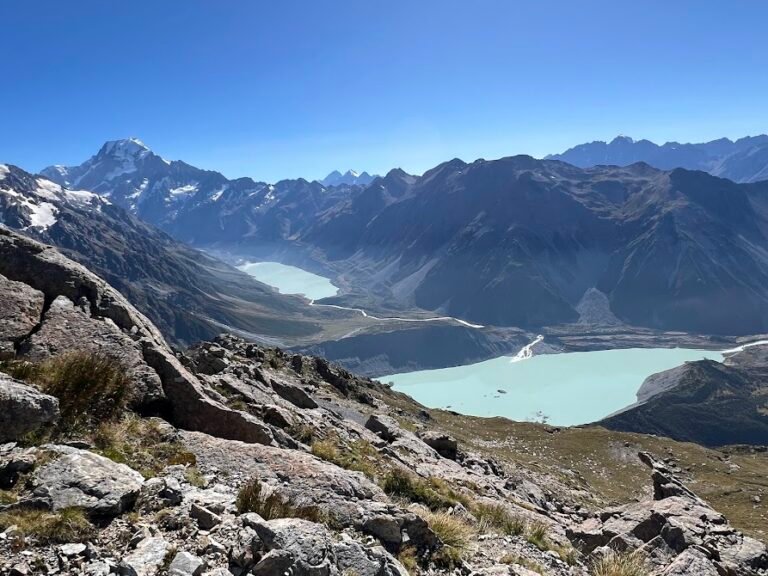
We both continued on towards Mueller Hut where many hikers opt to stay the night. Exhausted, I turned around to rest and wait at the skyline ridge. Mike went on a bit further towards the summit of Mount Ollivier, then came back to meet up and head back down.
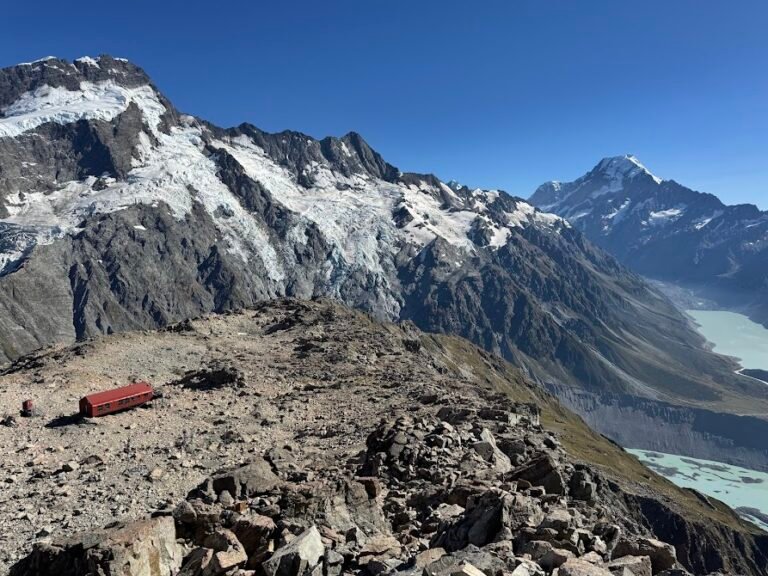
We carefully picked our way down the alpine route and never thought we would be so grateful to see stairs. Those made the descent fairly fast but this was still a long morning out given the relatively low mileage. We hiked 6.7 miles and gained 3,700 feet of elevation, spending 6 hours out on trail.
Need to Know
- Fees: No fee for trail use.
- Parking: There is a large, free parking lot at the White Horse Hill Campground located at the end of Hooker Valley Road. The trailhead is just a 5-minute drive from the Mount Cook Lodge or The Hermitage Hotel.
- Info & Current Status: New Zealand’s Department of Conservation has a webpage dedicated to nearly every hike. It’s a good idea to check for current conditions, closures, and other important information. Here is the link for the Mueller Hut Route.
Glacier Explorers Boat Tour
Another must-do activity in the Mount Cook area is a boat tour on Tasman Lake. These are run by Glacier Explorers out of The Hermitage Hotel.
We booked a late afternoon trip and after checking in at the activity desk in the hotel, boarded a coach bus for transfer to the Tasman Lake Track. We made the mile or so walk and then were divided intro groups and boarded our bright yellow boat to take to the lake.
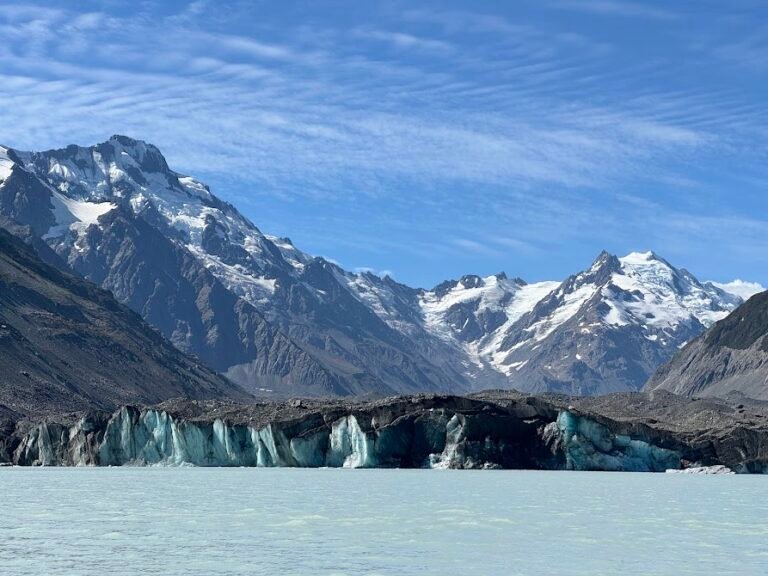
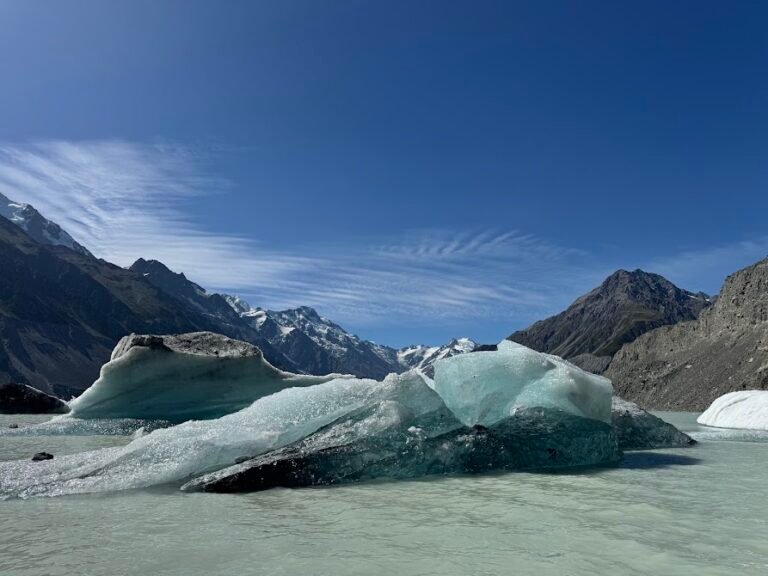
Tasman Glacier is currently New Zealand’s largest, but it is melting and calving at an alarming rate. The difference was notable from when we visited 15 years ago. It is a beautiful and serene experience to be out on the water, gracefully weaving through icebergs of all different shapes and sizes.
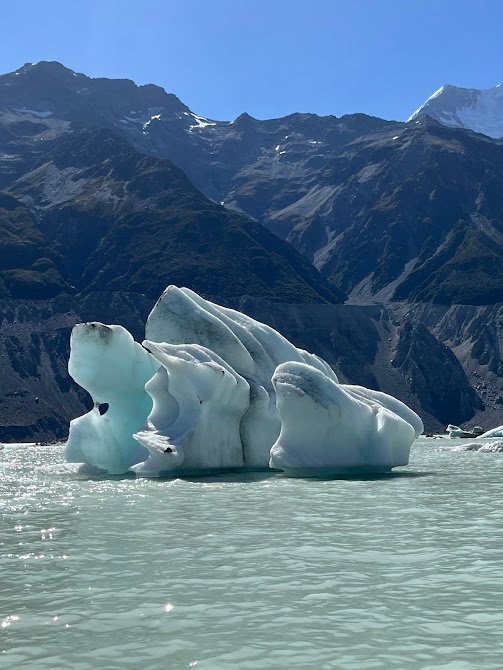
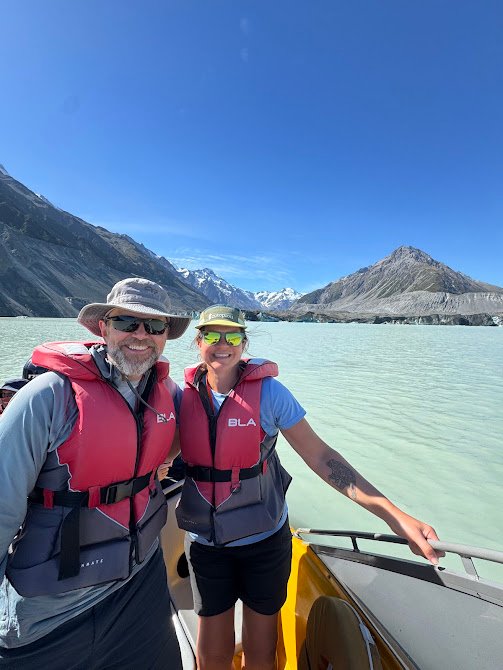
During the tour we did plenty of whizzing around the lake on our fast boats, but also took time to admire the icebergs at a close distance. There was even a photo stop in front of the glacier face. After about an hour on the water, it was time to head back with beautiful memories.
Need to Know
- Bookings: Bookings are available daily and depart throughout the day. Spots are limited and frequently sell out, so booking in advance is recommended and can be made on the Hermitage website.
- Tours: We did the tour departing at 3pm. The entire excursion lasted three hours with one hour on the water.
- Directions: The meeting point was at the activity desk in The Hermitage Hotel. There is free parking onsite, but it can be challenging to find a space during busy times, so make sure to leave enough time.
- What to Bring: We suggest checking the weather and dressing appropriately. An extra layer is never a bad idea as it can be chilly on the water. We also recommend wearing hiking boots/sturdy walking shoes for the 1-mile hike to the boat landing.
Day 14 | Christchurch: Godley Head Loop Hike
Drive to Christchurch
We drove about 4 hours from Mount Cook to Christchurch. Along the way, we stopped at the Greedy Cow Cafe and had the most amazing breakfast. Cappuccinos, a croissant breakfast sandwich, and white chocolate & passion fruit muffin. Yum!
Where We Stayed
We stayed in a room at the Tuscana Motor Lodge. This checked all the boxes. It was clean, comfortable, had free parking, and was within walking distance to several eateries.
Speaking of, we really enjoyed the beer at Two Thumbs Brewing and Irish cuisine at The Bog.
Godley Head Loop Hike
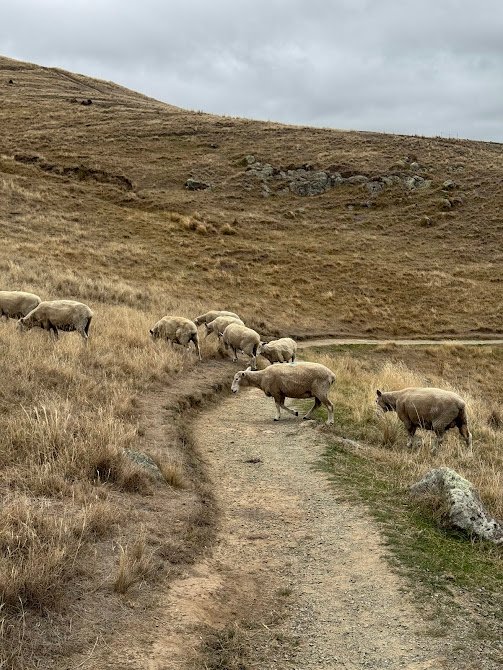
The hike around this gorgeous headland was the perfect way to end our trip. Feeling the sea breeze and seeing the waves crash below was so refreshing. While there were many people at Taylors Mistake Beach at the start, we saw hardly anyone else on trail. Just sheep!
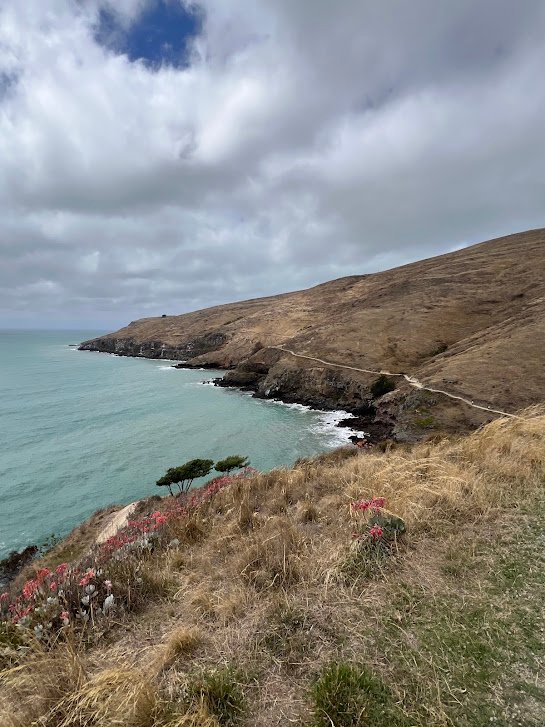
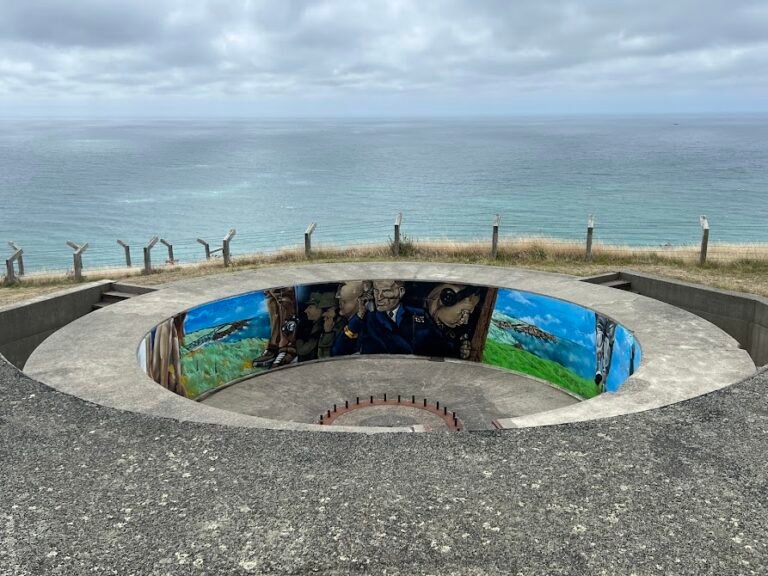
Along the trail we also passed by the Godley Head coastal defense battery. We explored the informational placards and gun emplacements, some of which are covered in beautiful interpretative graffi.
After this point we continued to be treated to coastline views and Lyttelton Harbour and Banks Peninsula. This loop hike totaled 5.7 miles with 1,100 feet of very manageable elevation gain. We took 2 hours 15 minutes to complete the circuit.

Need to Know
- Fees: No fee for trail use.
- Parking: There is a large, free parking lot at the beach Taylors Mistake. The trailhead is about a 30-minute drive from Christchurch.
- Info & Current Status: New Zealand’s Department of Conservation has a webpage dedicated to nearly every hike. It’s a good idea to check for current conditions, closures, and other important information. Here is the link for the Godley Head Loop Track.
Although this two-week itinerary is jam-packed with adventure, it just barely scratches the surface! There are so many other places worthy of a visit, particularly on the upper South Island. Think glaciers on the West Coast, mountains in the interior, and the coastal beauty of Nelson Tasman. That’s why we’re already planning a THIRD trip back to New Zealand next year. Stay tuned for even more ideas and information to fuel your wanderlust!

